Let’s get you started:
STEP 1. Log in to your Tumblr blog, go to Account and choose 'Edit Appearance' from the drop-down list.
STEP 2. Click 'Edit Theme' in the Website Theme section.
STEP 3. In the new window, choose 'Edit html' under the 'Custom theme'.
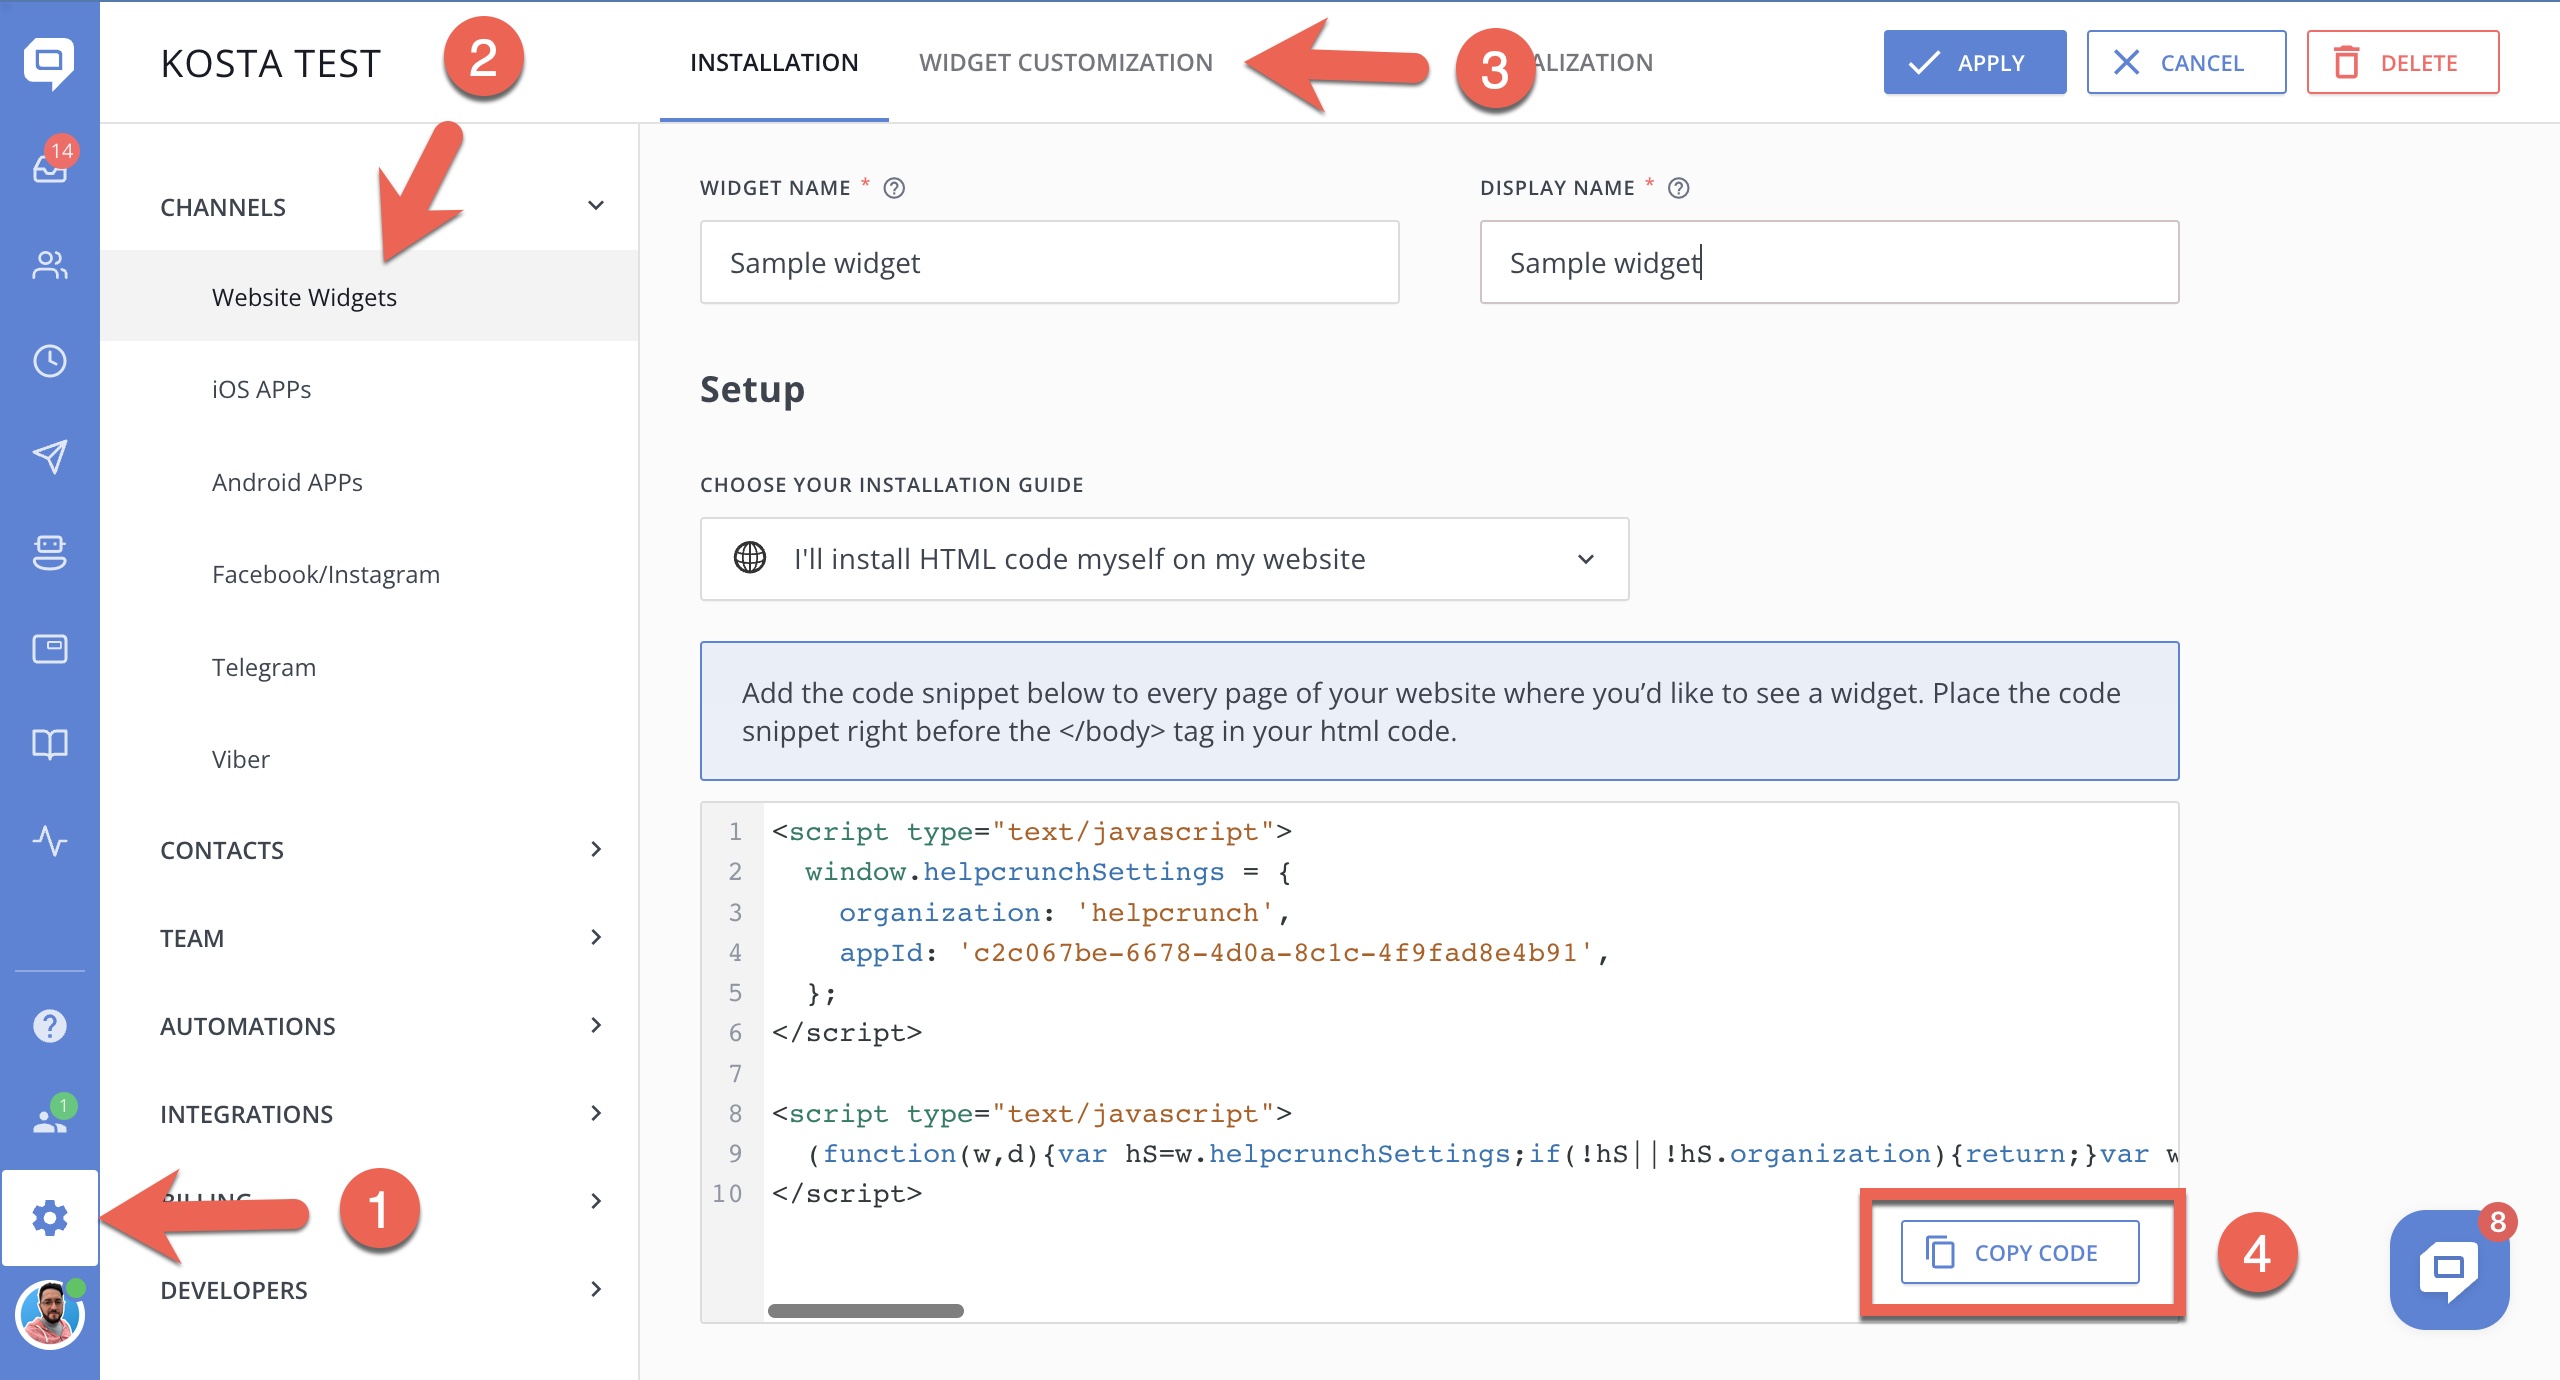
STEP 4. At this point, you're going to need your HelpCrunch installation code. So, log in to your HelpCrunch account, go to Settings → Website Widgets → Your Website and copy a JavaScript code snippet.
STEP 5. Go back to Tumblr and paste your HelpCrunch code snippet before the closing </body> tag.
NOTE
Insert the code by using hot keys (Cmd + V for Mac and Ctrl +V for PC) as pasting with mouse click won’t be active.
STEP 6. Click the green 'Update Preview' button and then 'Save' to complete installation.
Go to your blog page and you’ll see the HelpCrunch chat at the bottom right corner.