Chatbots are essential for gathering lead information, qualification, chat tagging, and assignment to specific departments and team members.
To create a chatbot flow, simply go to the Chatbot section in the sidebar and hit the "Add new flow" button.
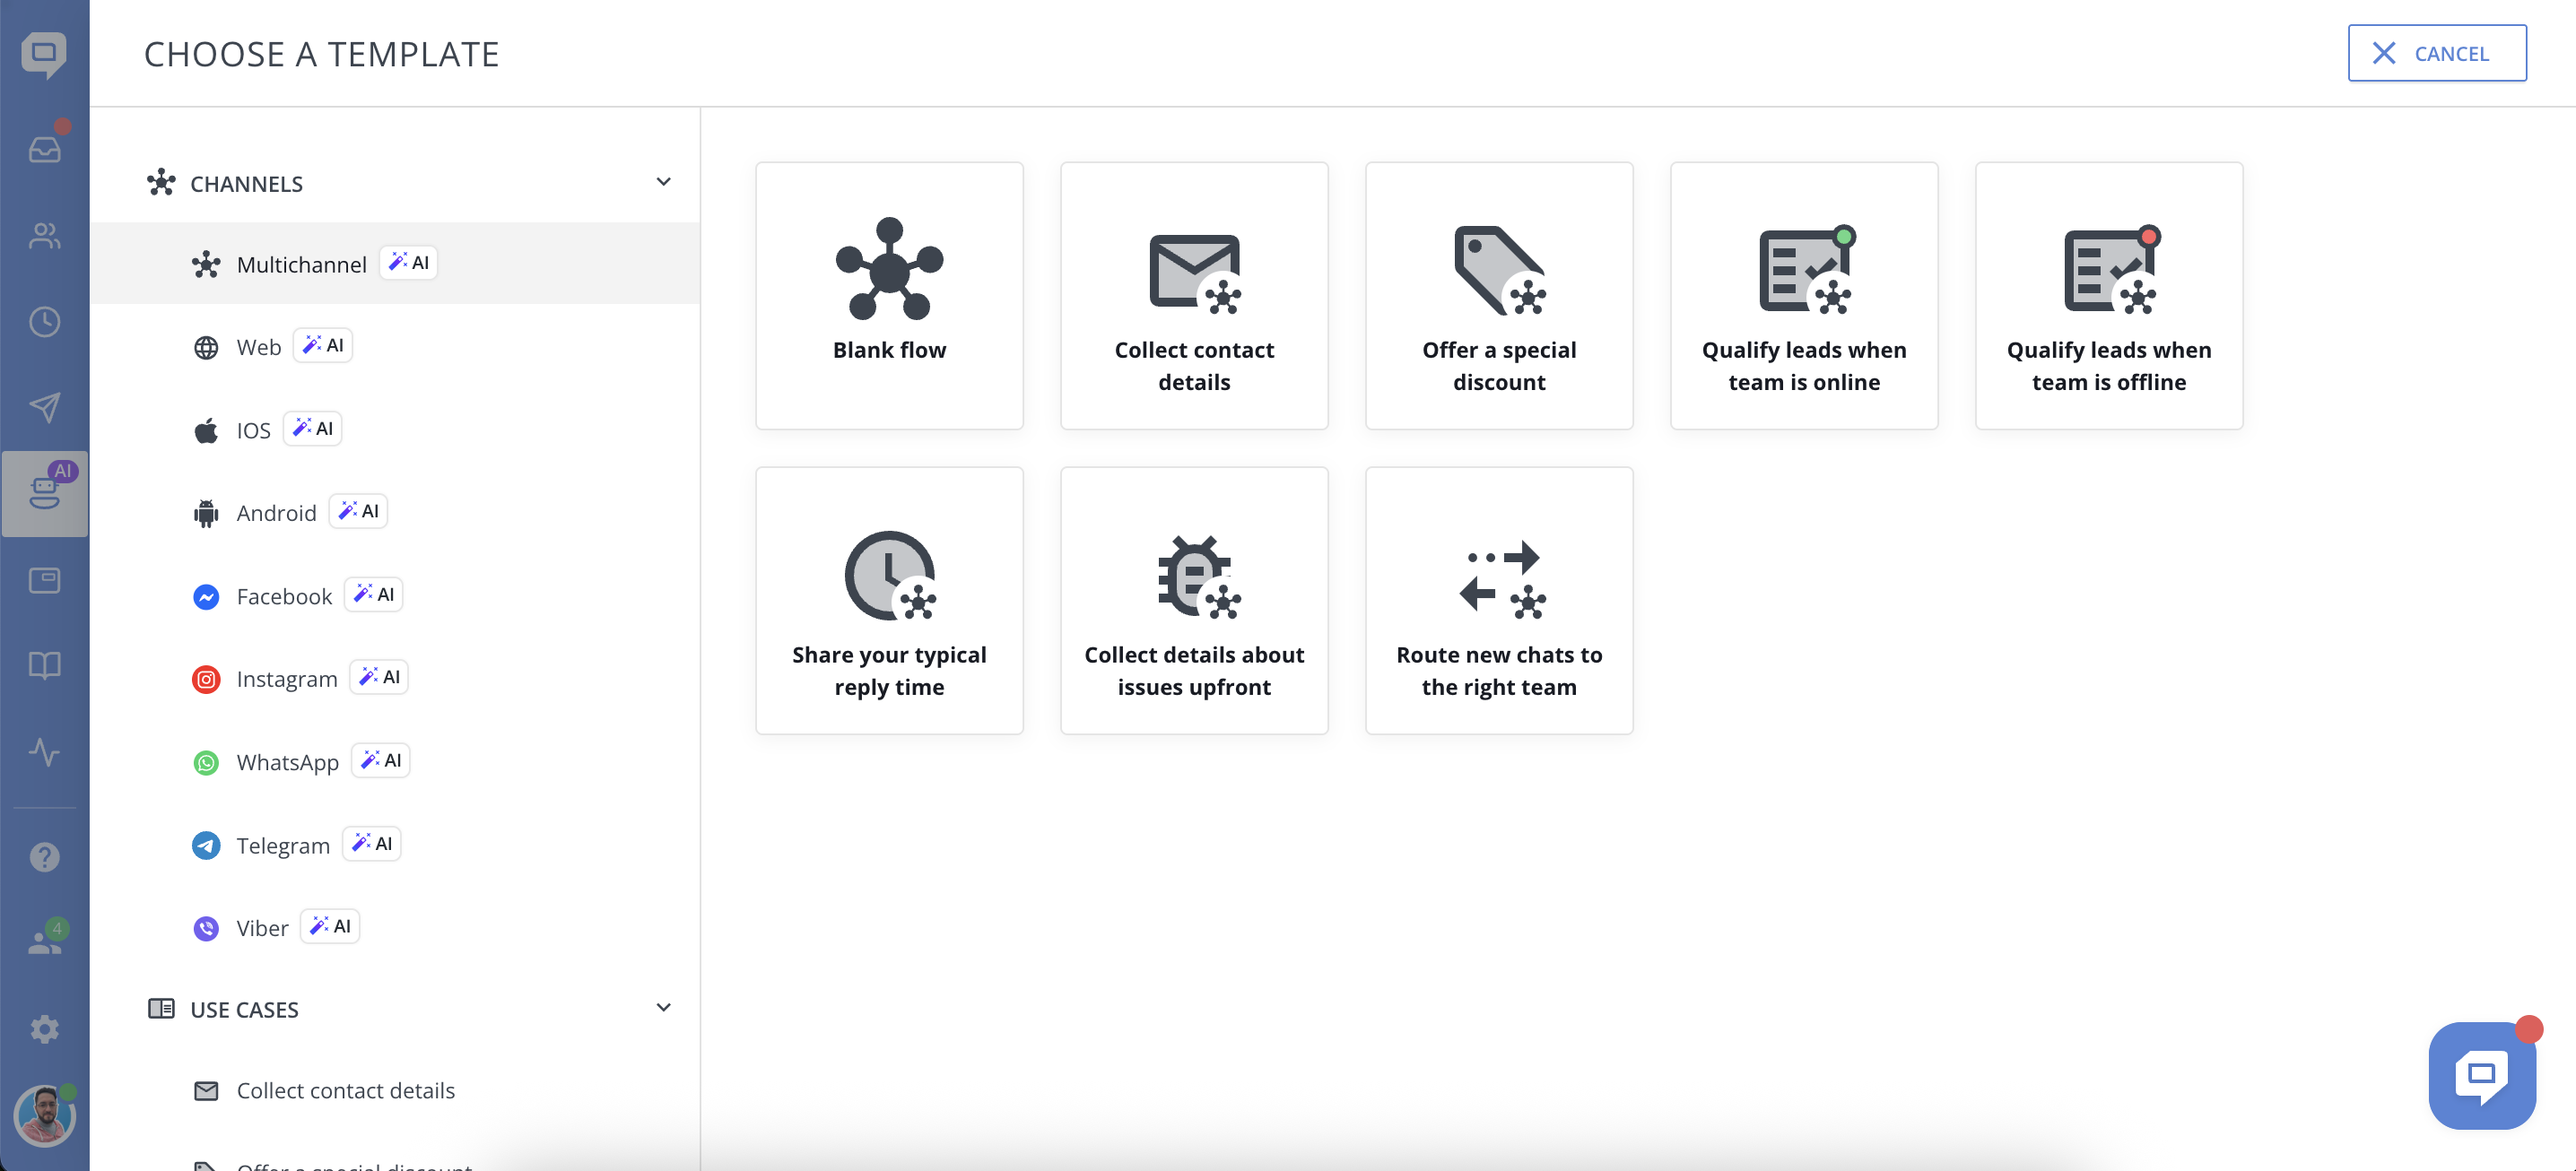
Here you'll be offered to create a multichannel bot or select a specific channel (Facebook, Instagram, mobile SDK, etc...). Once you decide on the channel, there are two main roads to choose from: creating a blank flow from scratch, or selecting one of the available templates.
iOS SDK to version 4.5.1 or higher
Android SDK to version 3.4.7 or higher
For new users, it's always a good idea to start by selecting one of the available templates and editing them, to see how everything works. After that, you're good to create blank flows from scratch.
Let's select one of the channels and choose "Collect contact details" for example, to modify it slightly.
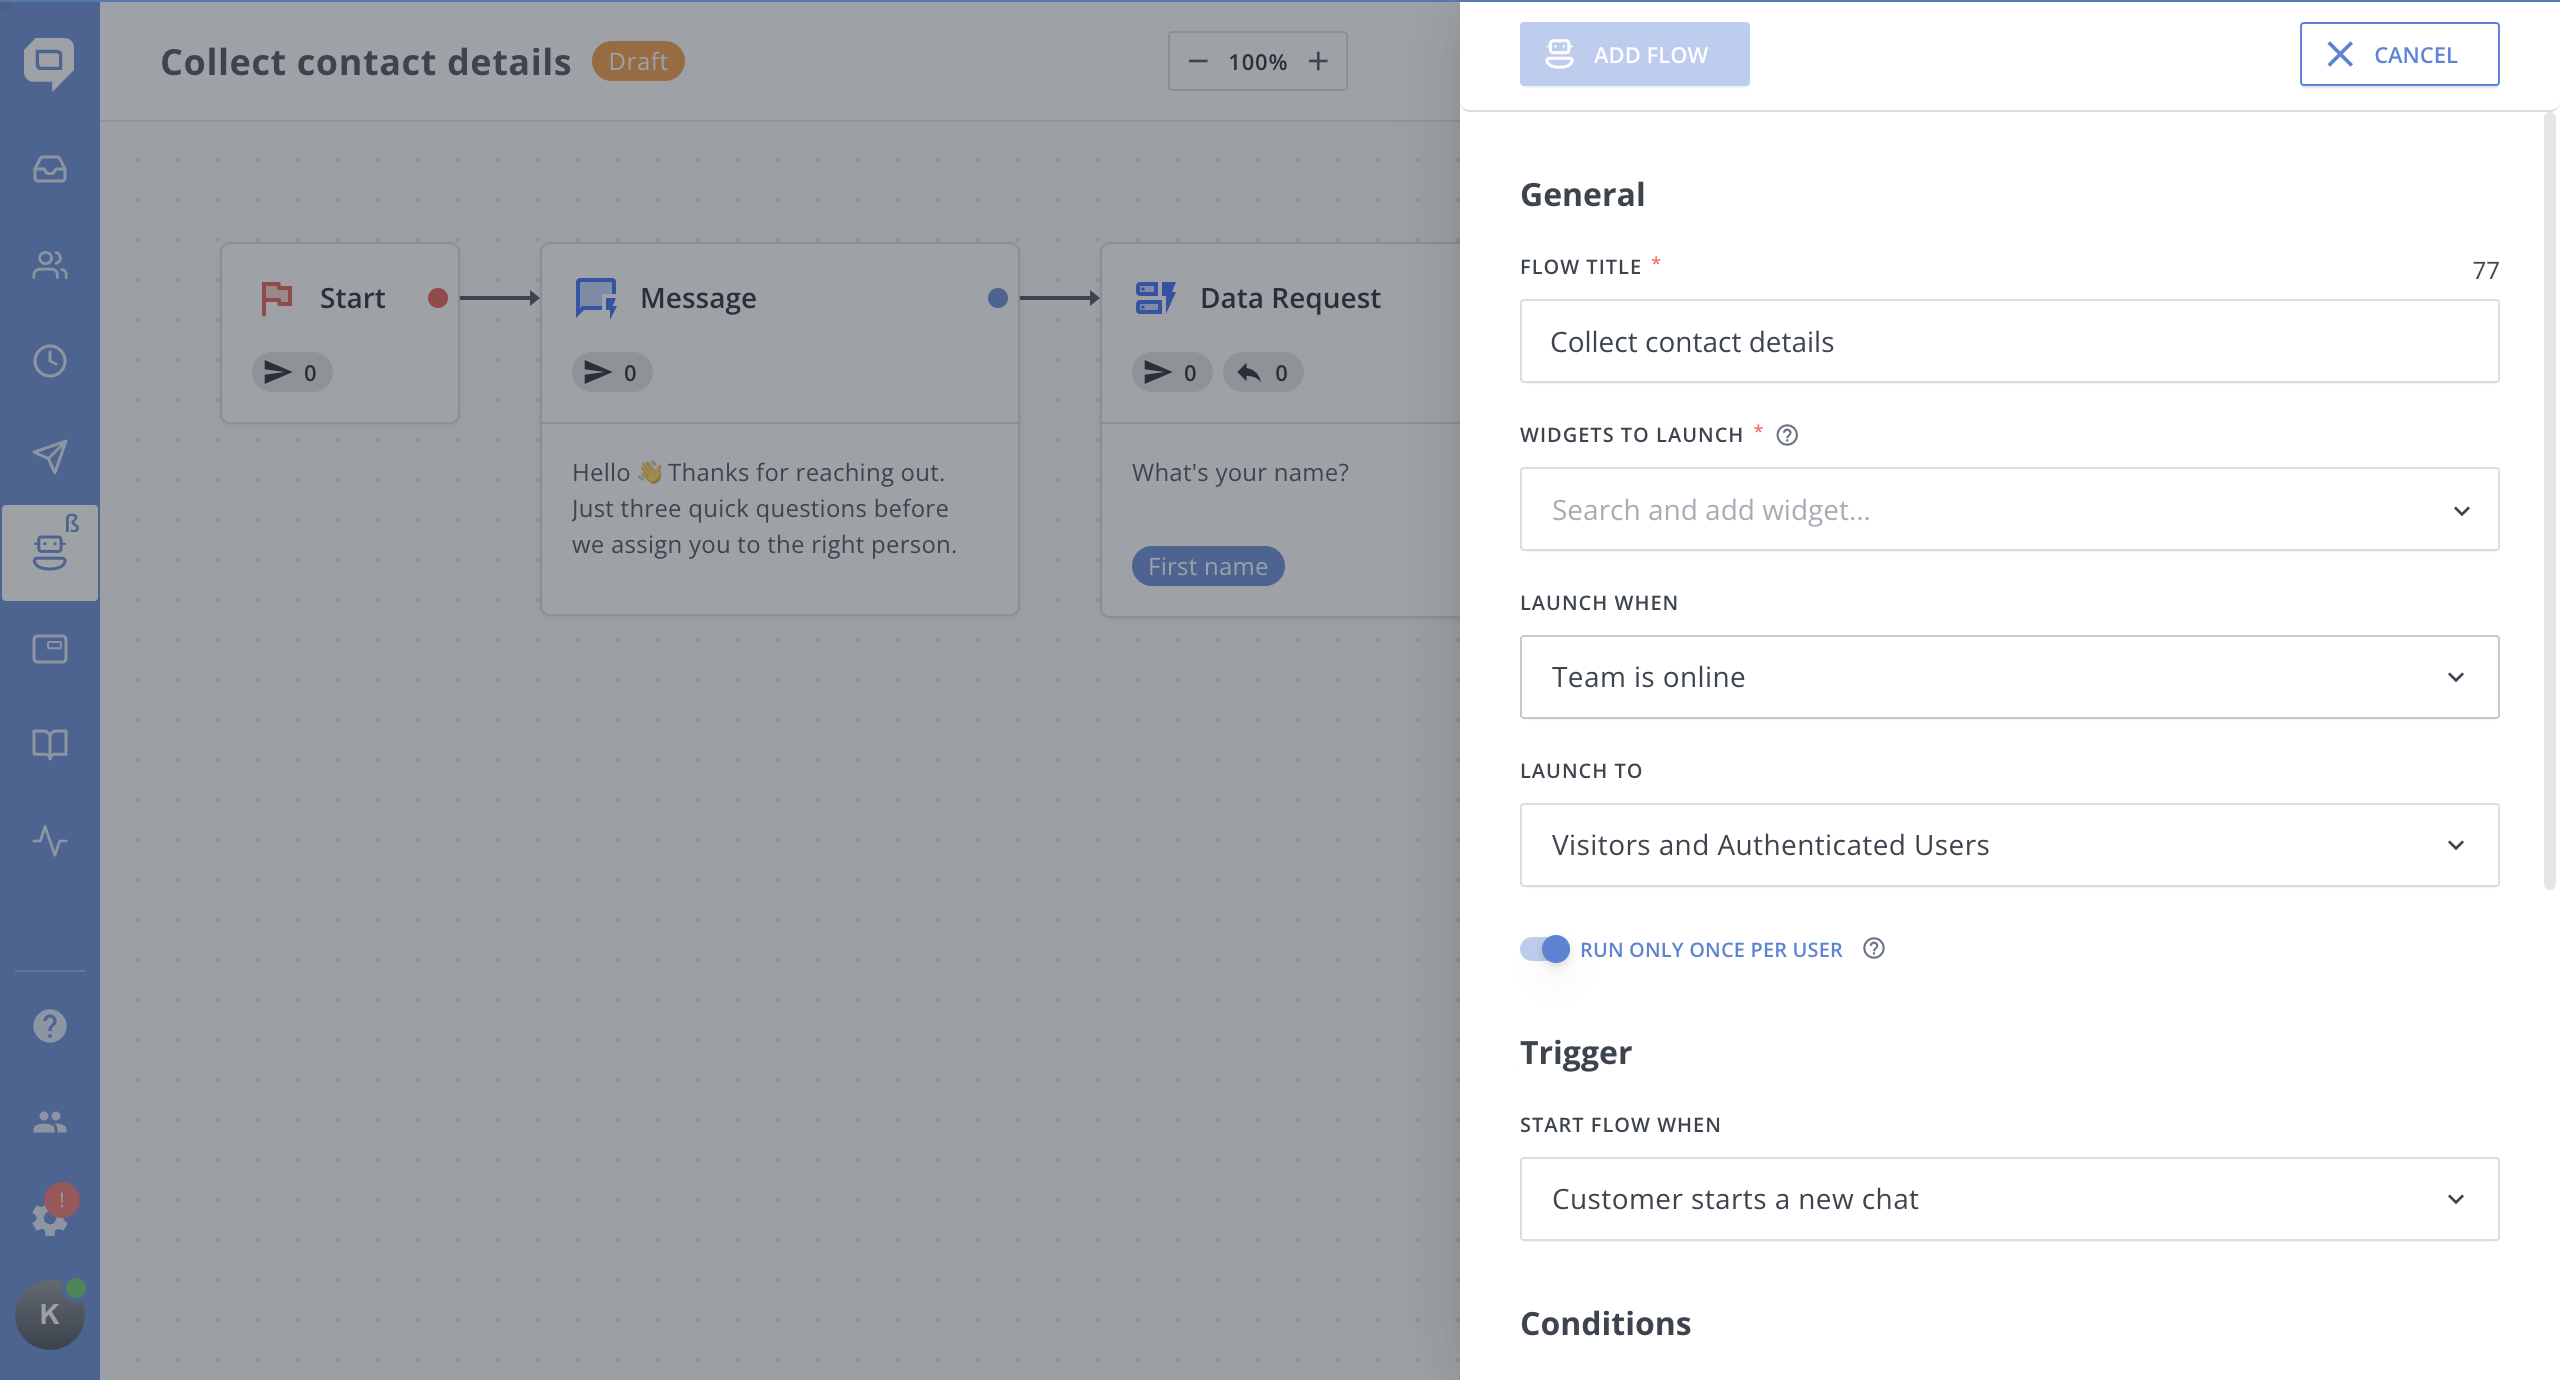
Flow settings dialogue will appear. It's divided into 3 categories: General, Trigger, and Conditions.
General
- Flow title - make sure to enter an informative title to easily navigate through the list of created flows, without the need to open each.
- Widgets to launch - choose one or multiple widgets you want to apply this flow to. (You can select multiple only if you're creating a multichannel flow)
- Launch when - flow will work only team is online, offline, or always.
- Launch to - visitors, authenticated users, visitors, and authenticated users. (user auth mode)
- Run only once per user - If unchecked, the bot flow will be launched each time any unique user meets the criteria defined for the flow.
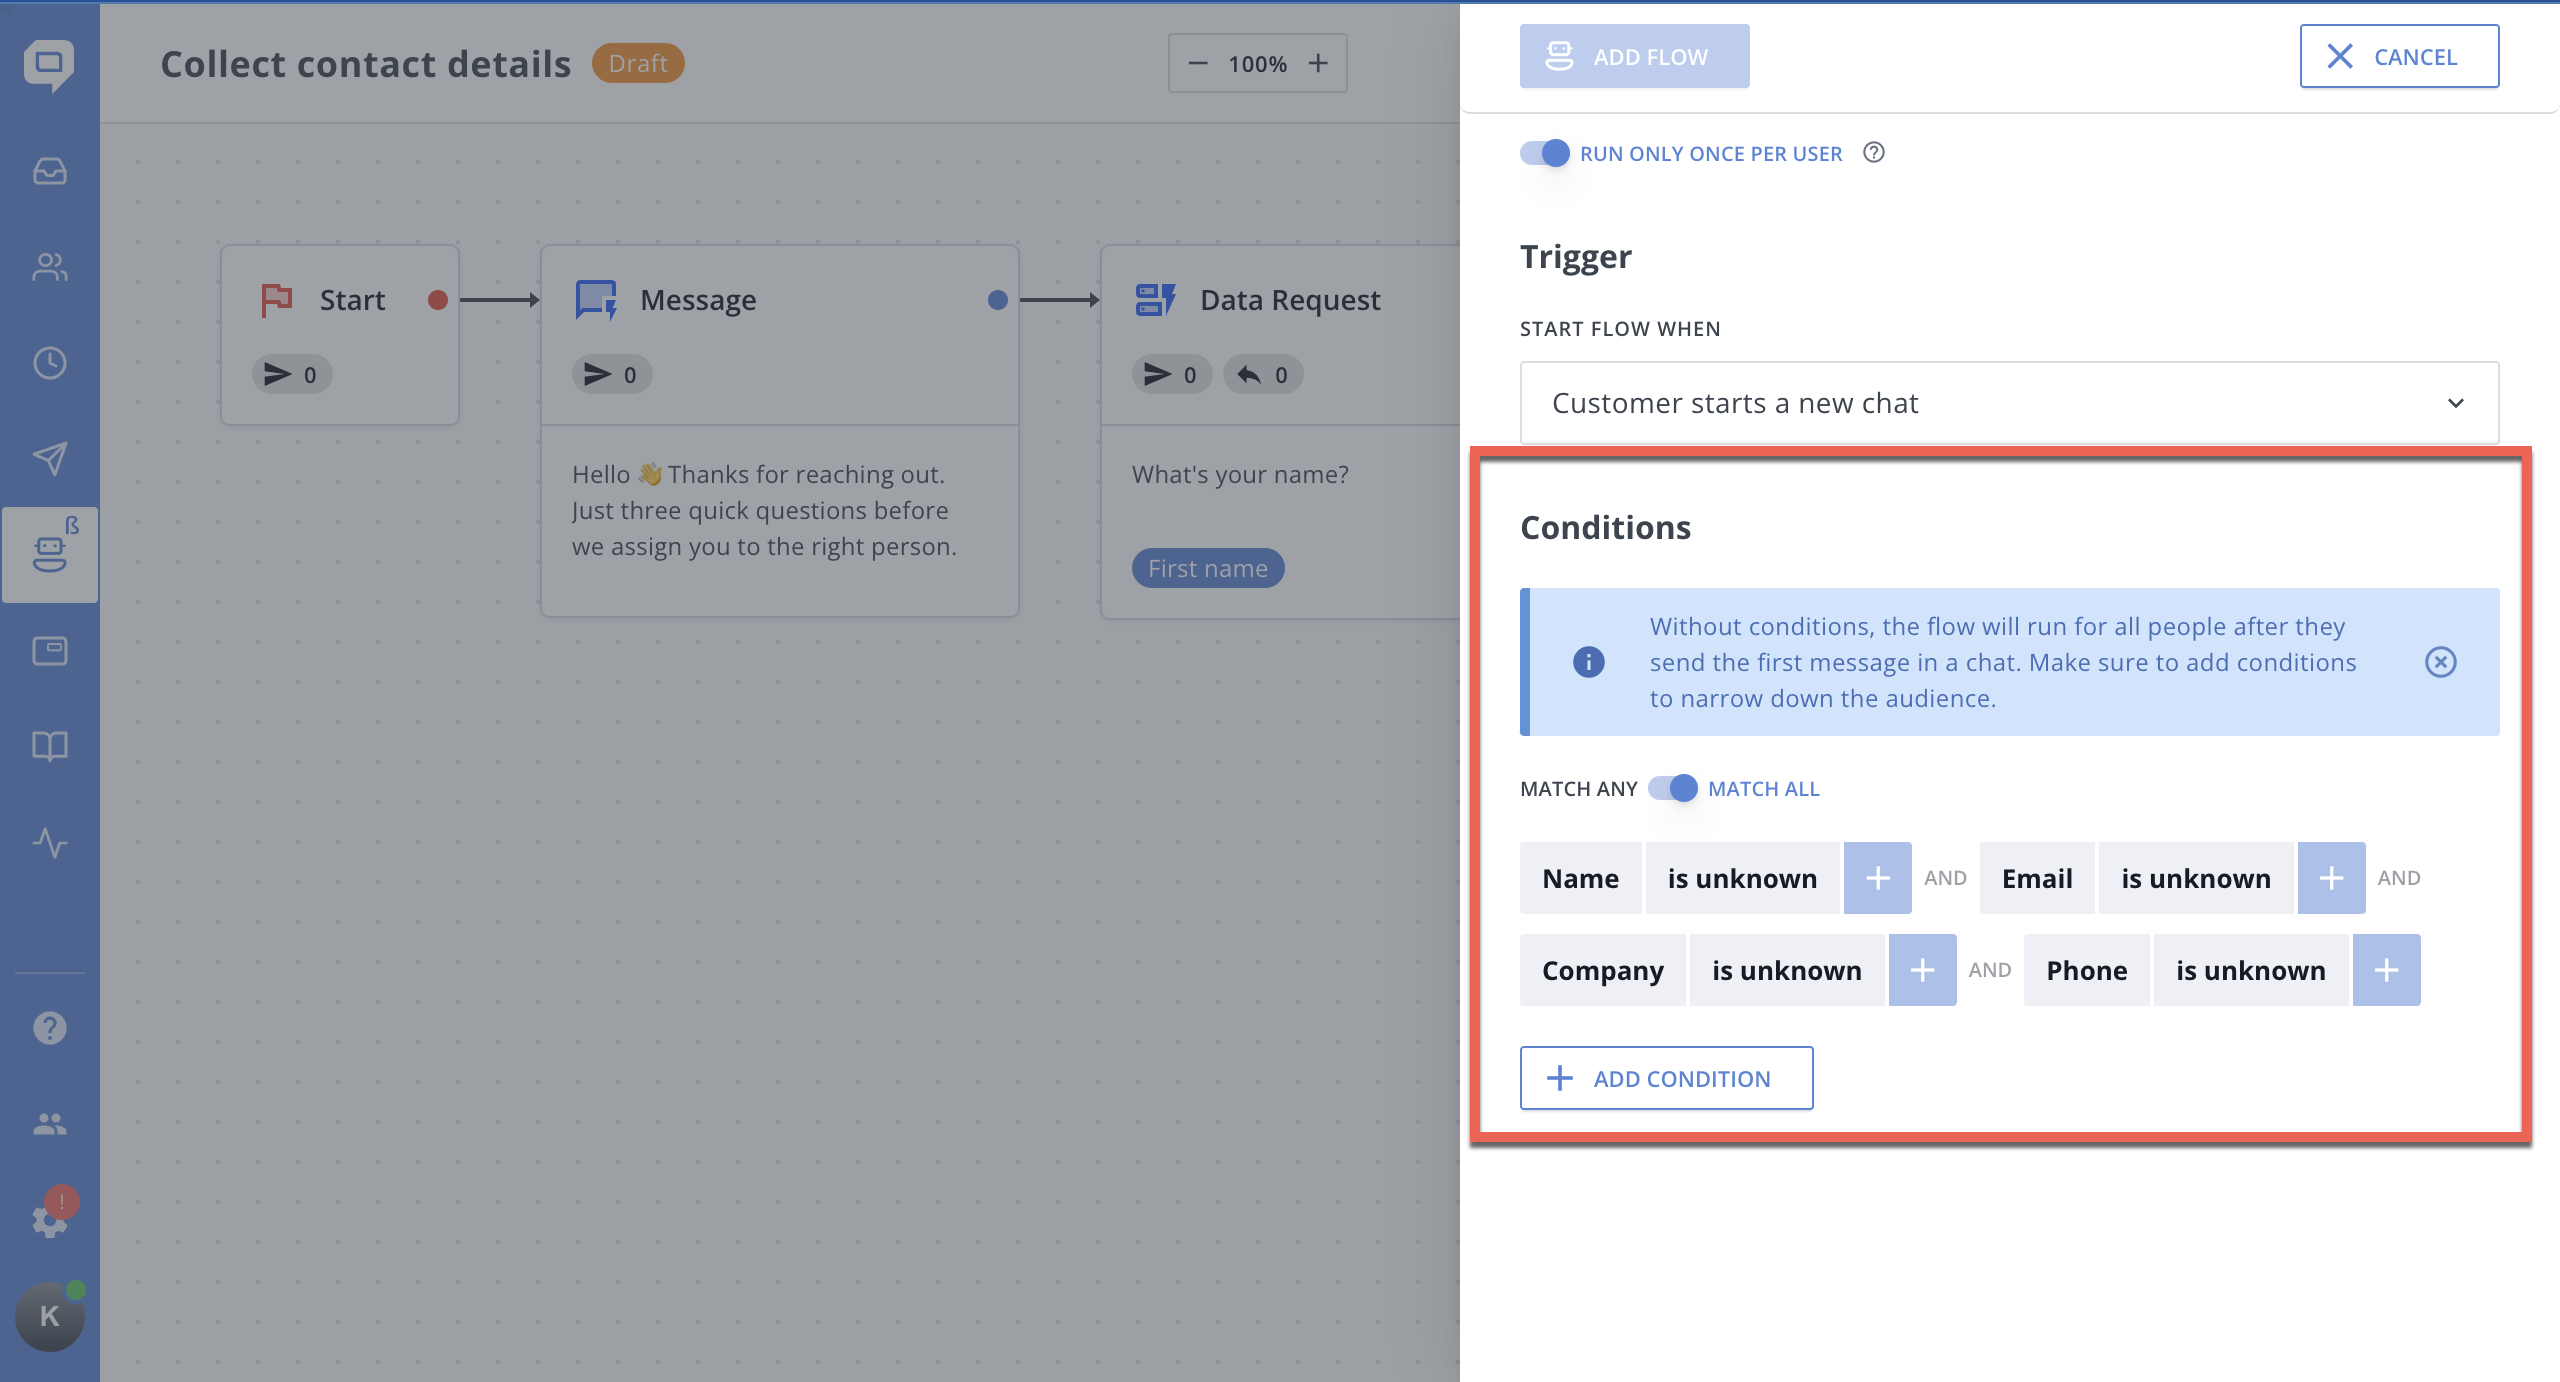
Trigger
Start flow when:
- Customer starts a new chat
- Customer replies to chat Auto/Manual Message (auto messages)
- Customer creates a chat or replies to chat Auto/Manual Message
Conditions
Without conditions, the flow will run for all people after they send the first message in a chat. Make sure to add conditions to narrow down the audience.
You can specify multiple rules and use an option to match any or all rules specified there.
After specifying the rules, Click "Add Flow" at the top.
Now you can preview available blocks in the flow, edit text, modify blocks, etc...
This simple flow asks users to provide their name, email, or phone, and after that tags chat and assigns them to a specific department. You can change the tag, or assign chats to a different department on an agent by modifying these blocks.
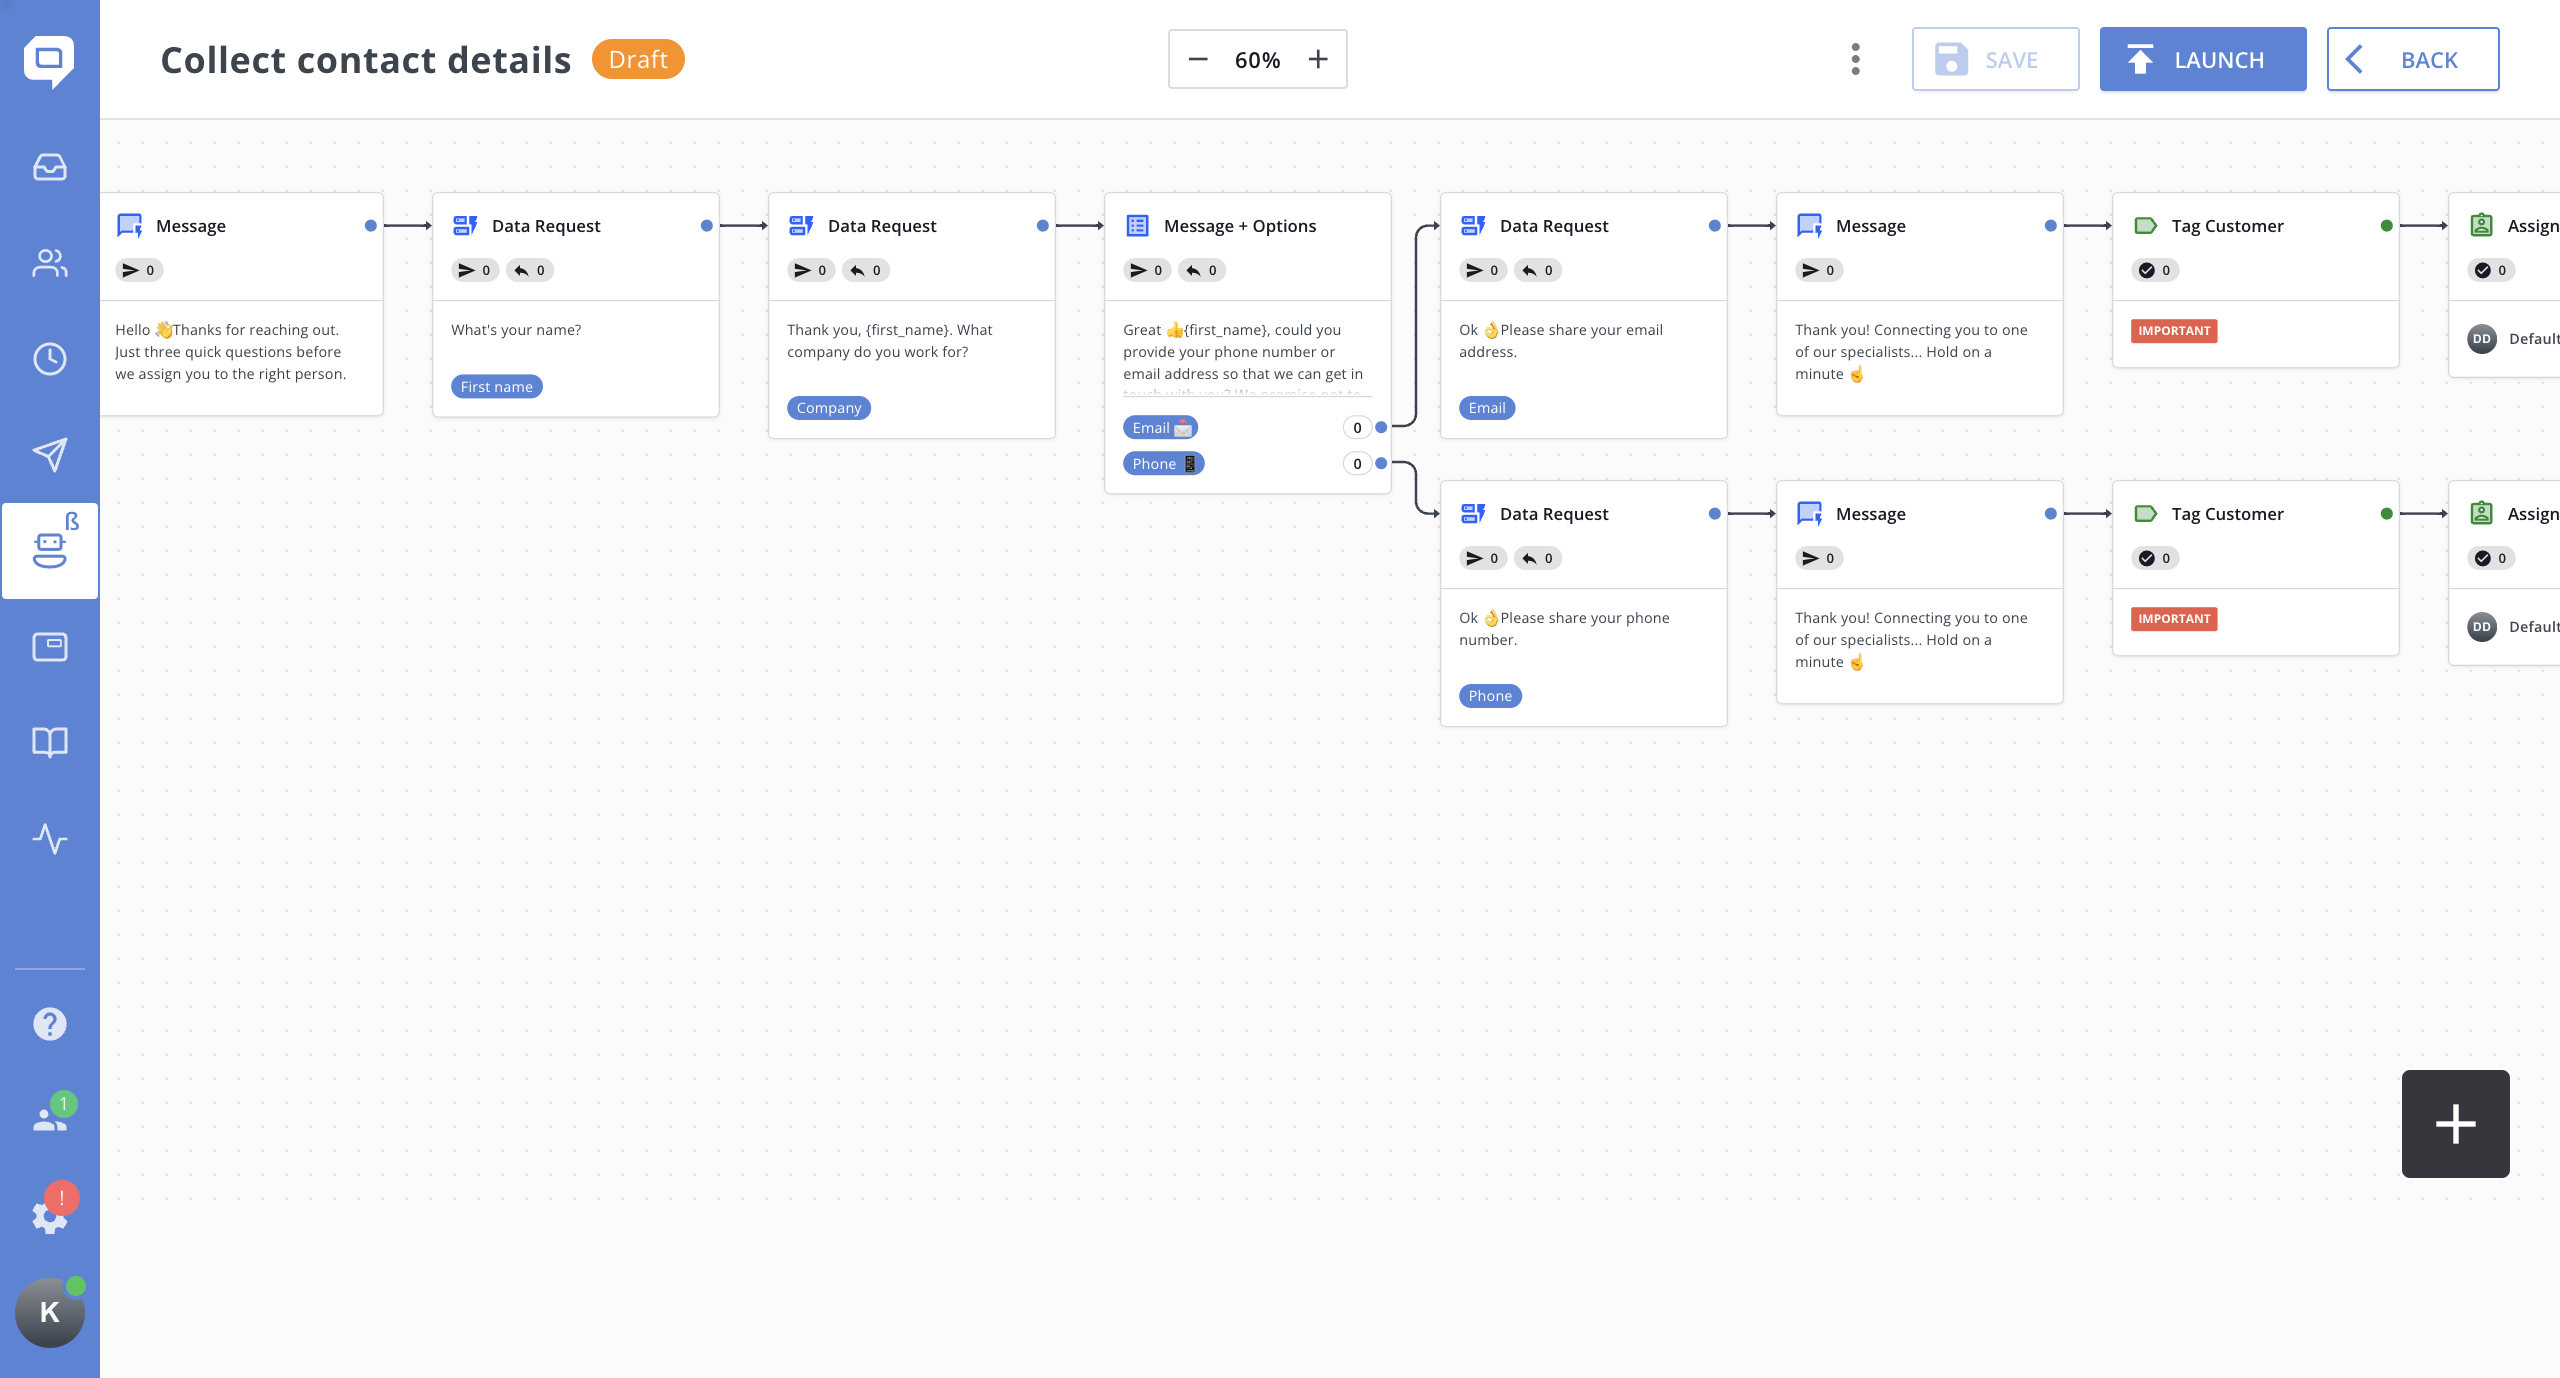
When the flow is ready, you can save it as a draft or Launch using the corresponding button at the top right.
By clicking the three dots menu, you can modify flow settings, check metrics, and duplicate or delete it.