Here’s what you need to do to install HelpCrunch on your 3dcart store:
STEP 1. Log in to your 3DCart dashboard and go to Settings → Design →Themes and styles.
STEP 2. Click the 'More' button at the top right corner of the page and choose 'Edit Template (HTML)' from the dropdown menu.
STEP 3. Select a webpage you want to edit, click the gear icon and press 'Edit' in the dropdown menu. You’ll get a box with html code in front of you.
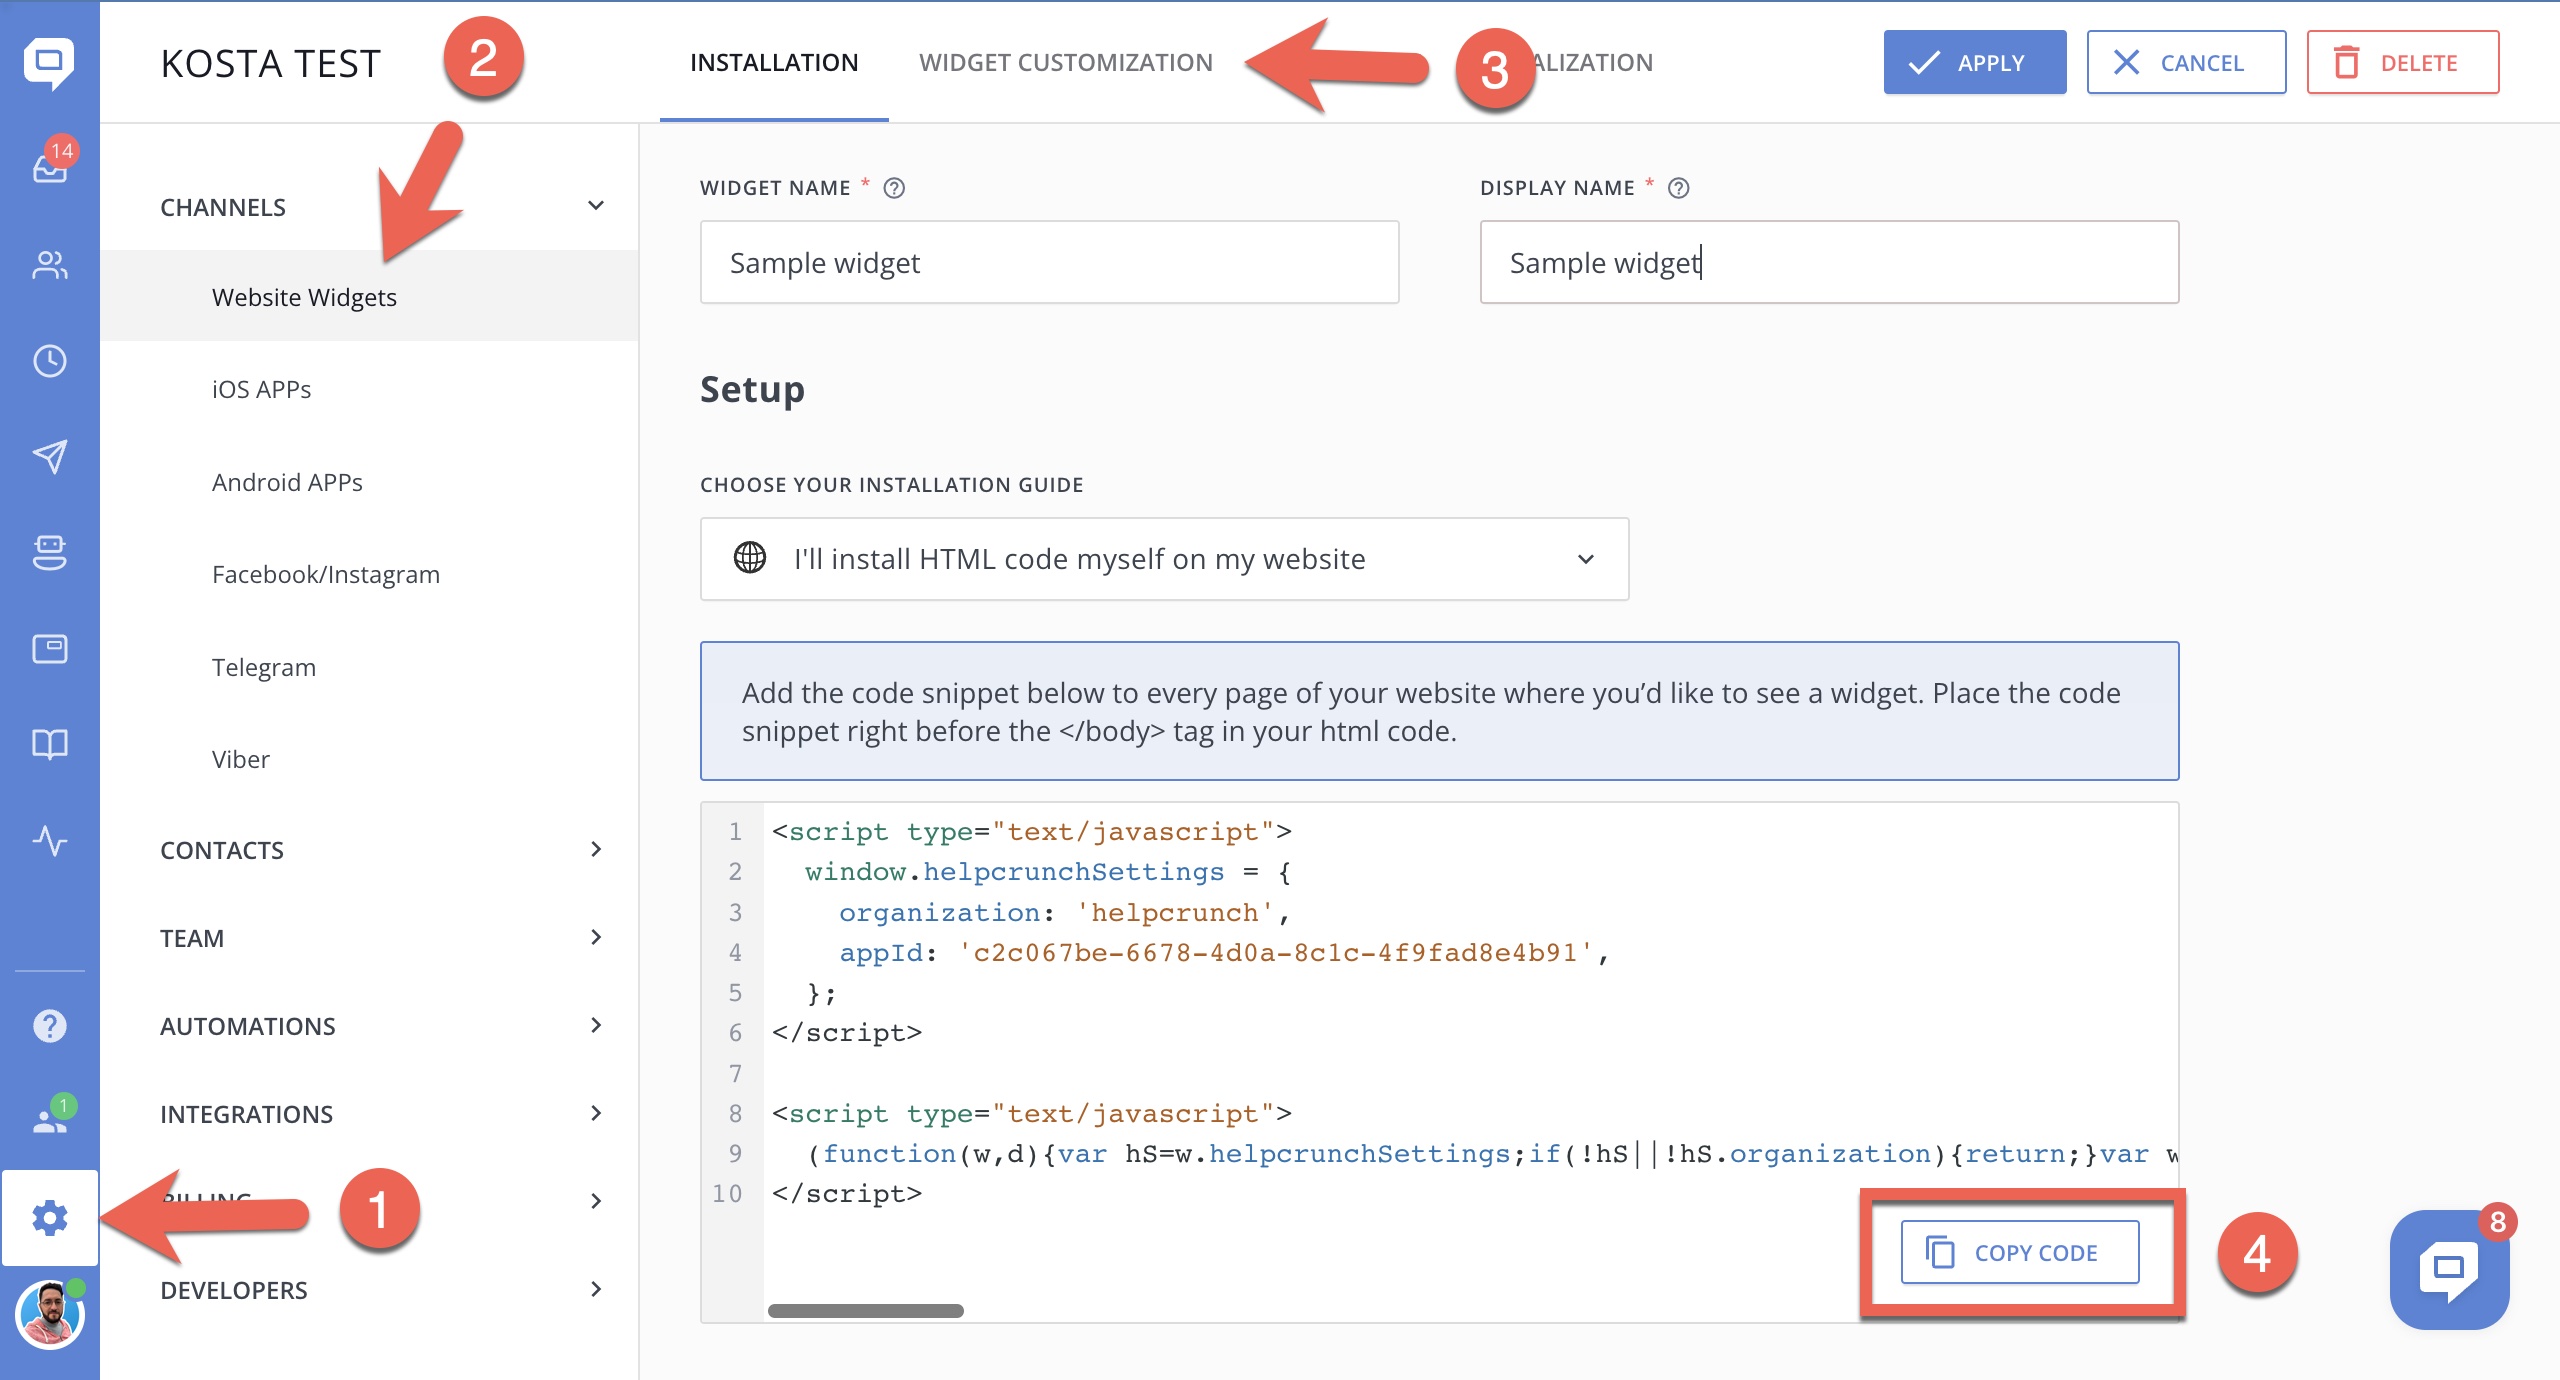
STEP 4. To get the HelpCrunch installation code, log in to your HelpCrunch account, go to Settings → Website Widgets → Your Website and copy your JavaScript code snippet.

STEP 5. Go back to 3dcart and paste the code into the html box just before the closing </body> tag. Click 'Save' at the top right corner.
After this, you can click the green 'View Store' button at the top left corner of the page and see the HelpCrunch chat widget there.
Success! You’ve installed HelpCrunch on your store!