To install HelpCrunch on your cloud-based OpenCart store, follow these simple steps:
STEP 1. Log in to your OpenCart account and go to Design → Theme editor. Choose the footer.tpl / footer.twix file from the 'Common' folder.
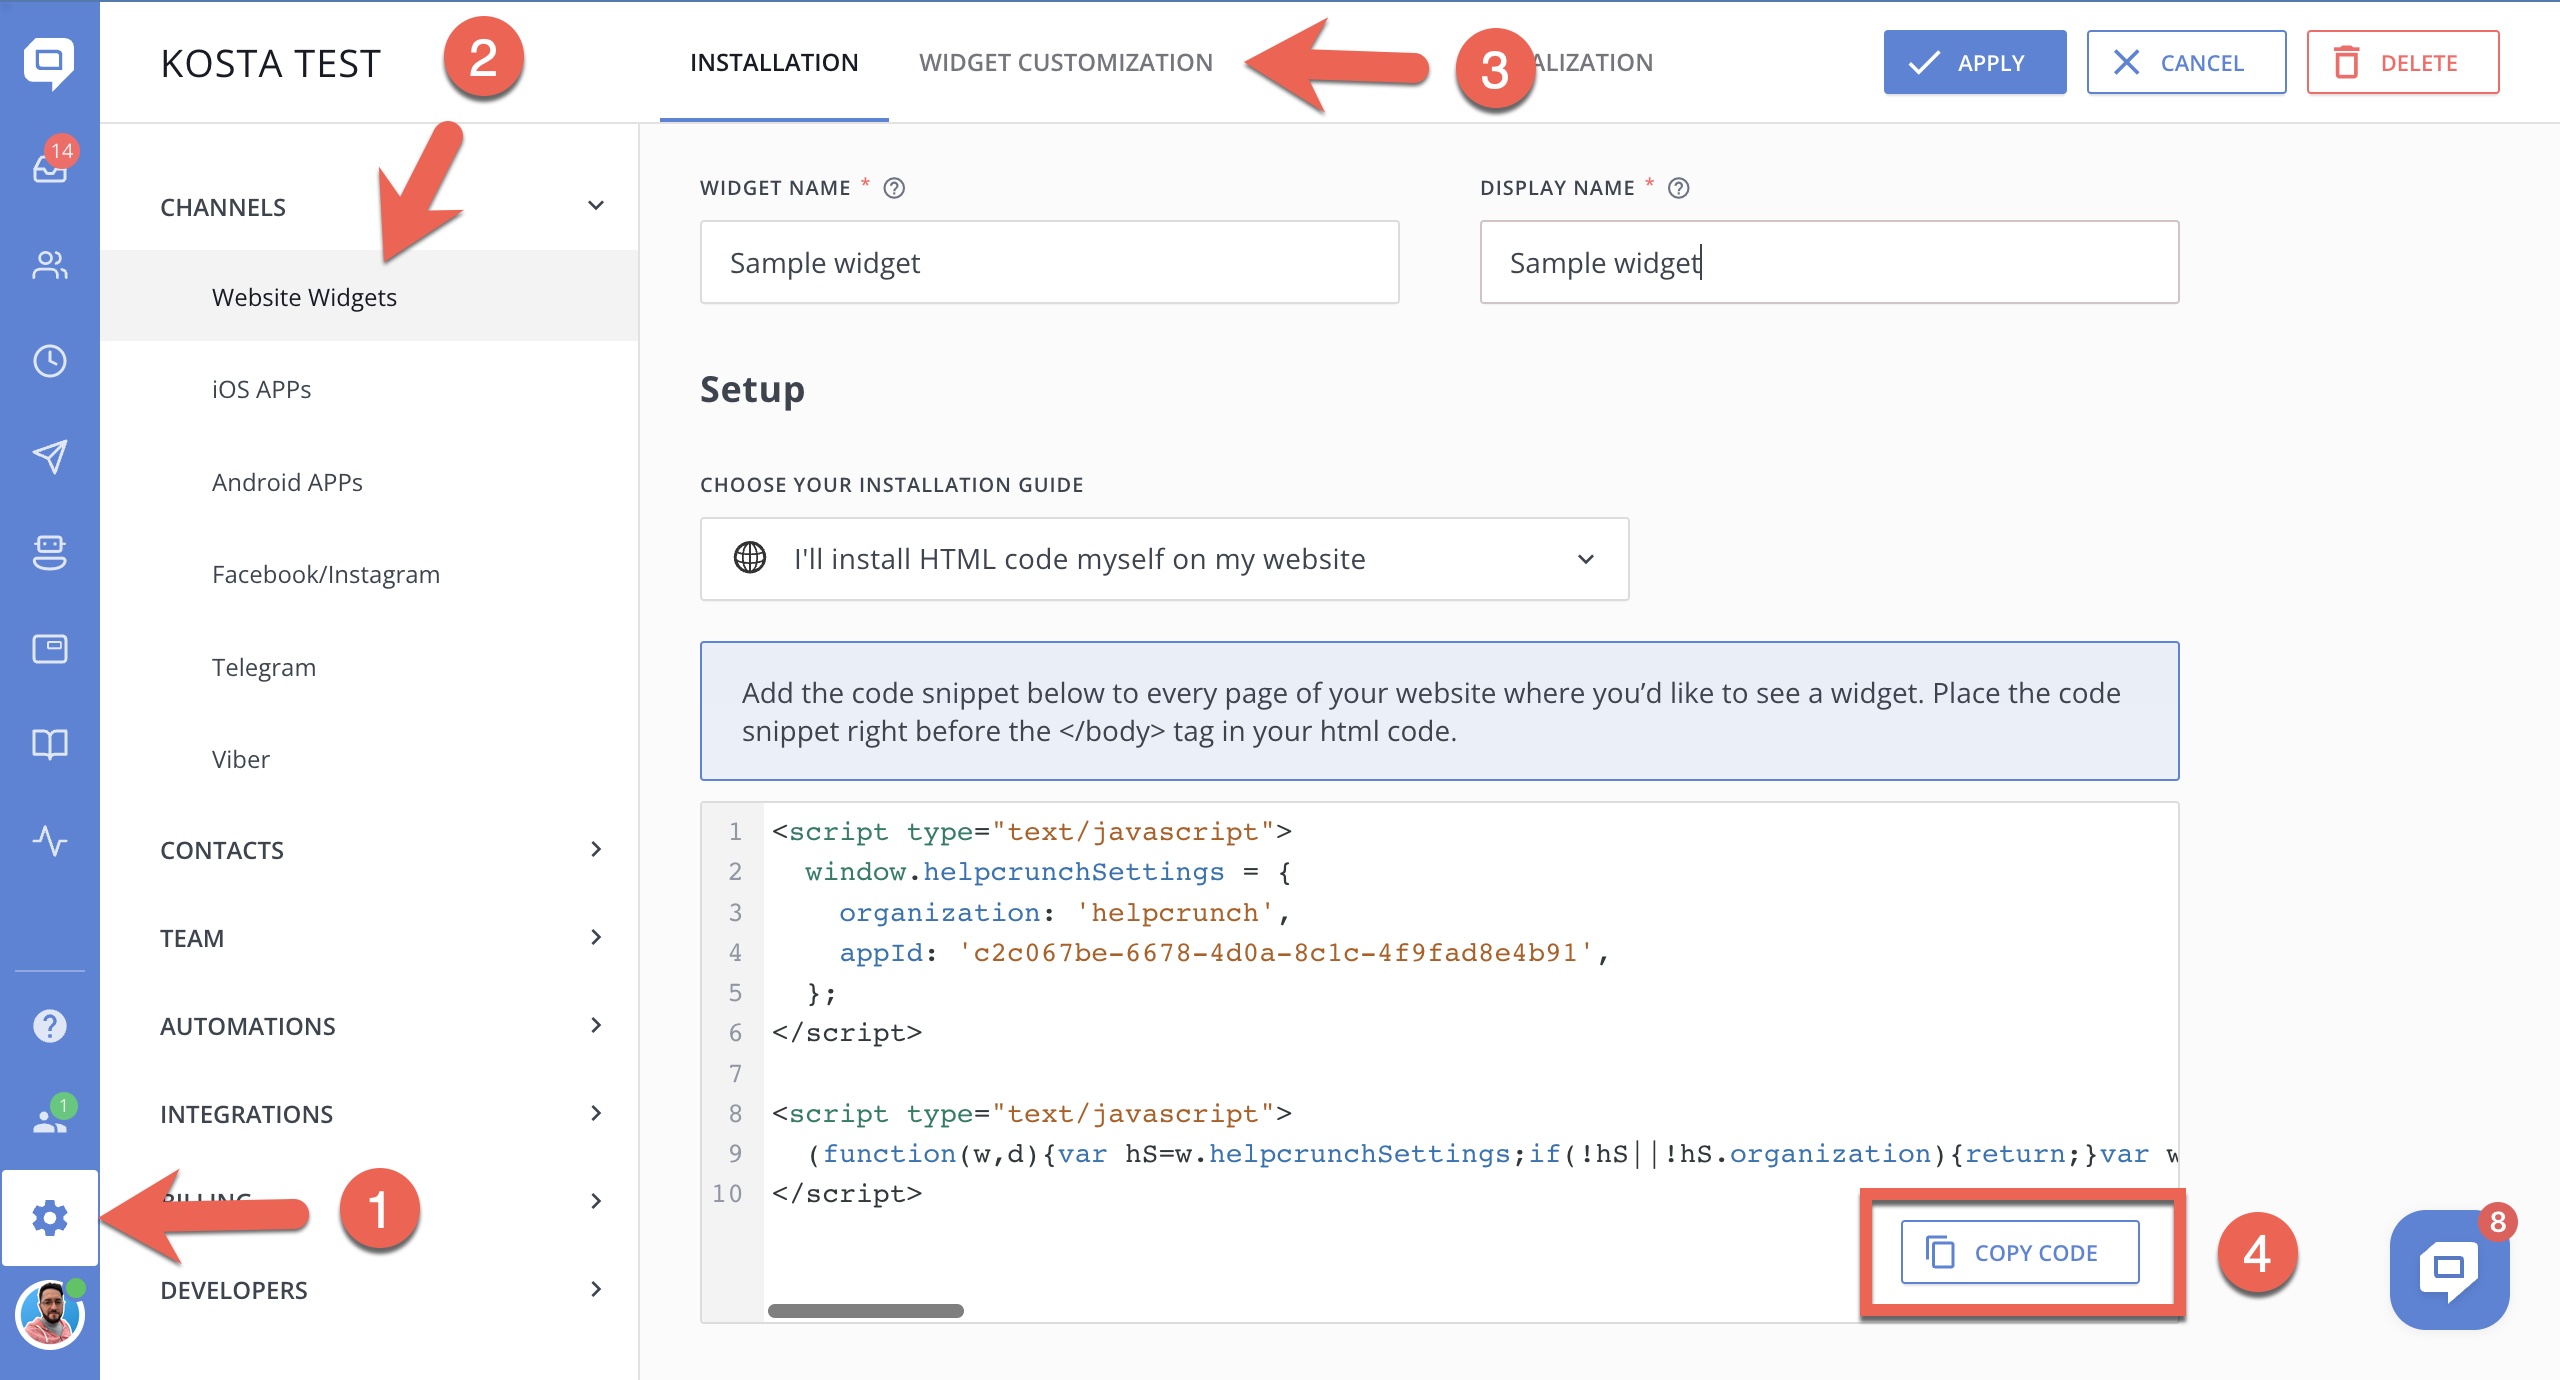
STEP 2. Now, you log in to your HelpCrunch account, go to Settings → Website Widgets → Your Website and copy your JavaScript code.
STEP 3. Go back to your OpenCart account and paste the HelpCrunch code snippet just before the closing </body> tag of the 'footer.twig' file. Don't forget to save the changes.
That’s it! Now, you can chat with your customers in real time and get more sales!
If you're running a store on an earlier version of OpenCart:
STEP 1. Log in to your OpenCart account and go to Catalog → View → Theme.
STEP 2. Choose the footer.tpl file in the Theme folder.
STEP 3. Save the footer.tpl file to your computer and open it in any text editor.
STEP 4. Log in to your HelpCrunch account, go to Settings → Website Widgets → Your Website and copy your JavaScript code.
STEP 5. Go back to the footer.tpl file and paste the HelpCrunch code snippet just before the closing </body> tag.