Using Google Tag Manager for installing HelpCrunch is convenient as you won’t have to change the source code of your site.
If you already use GTM, go straight to the second section called 'Installing HelpCrunch with Google Tag Manager'.
Otherwise, follow this short guide to create a GTM account first.
How to install Google Tag Manager
STEP 1. Log in to your Google account and go to your GTM dashboard. Click the 'Create Account' button and fill in your account information in the new window. Click 'Create' to proceed further.
STEP 2. You will see the Terms of Service Agreement. Read and click 'YES' to accept.
STEP 3. After this, the system will generate you a code snippet. Add this code to every page of your website and click 'OK'.

Or you can copy and paste this code right away (don't forget to replace the appId and organization name with the valid data):
<script type="text/javascript">
  window.helpcrunchSettings = {
    organization: 'your_organization_name',
    appId: 'your_app_Id',
  };
</script>

<script type="text/javascript">
  (function(w,d){var hS=w.helpcrunchSettings;if(!hS||!hS.organization){return;}var widgetSrc='https://'+hS.organization+'.widget.helpcrunch.com/';w.HelpCrunch=function(){w.HelpCrunch.q.push(arguments)};w.HelpCrunch.q=[];function r(){if (d.querySelector('script[src="' + widgetSrc + '"')) { return; }var s=d.createElement('script');s.async=1;s.type='text/javascript';s.src=widgetSrc;(d.body||d.head).appendChild(s);}if(d.readyState === 'complete'||hS.loadImmediately){r();} else if(w.attachEvent){w.attachEvent('onload',r)}else{w.addEventListener('load',r,false)}})(window, document)
</script>
Installing HelpCrunch with Google Tag Manager
STEP 1. Go to your Google Tag Manager dashboard and choose the 'New Tag' option.
STEP 2. Proceed by choosing 'Tag Configuration' in the next window and then — the 'Custom HTML' option from the list of tags that will appear.
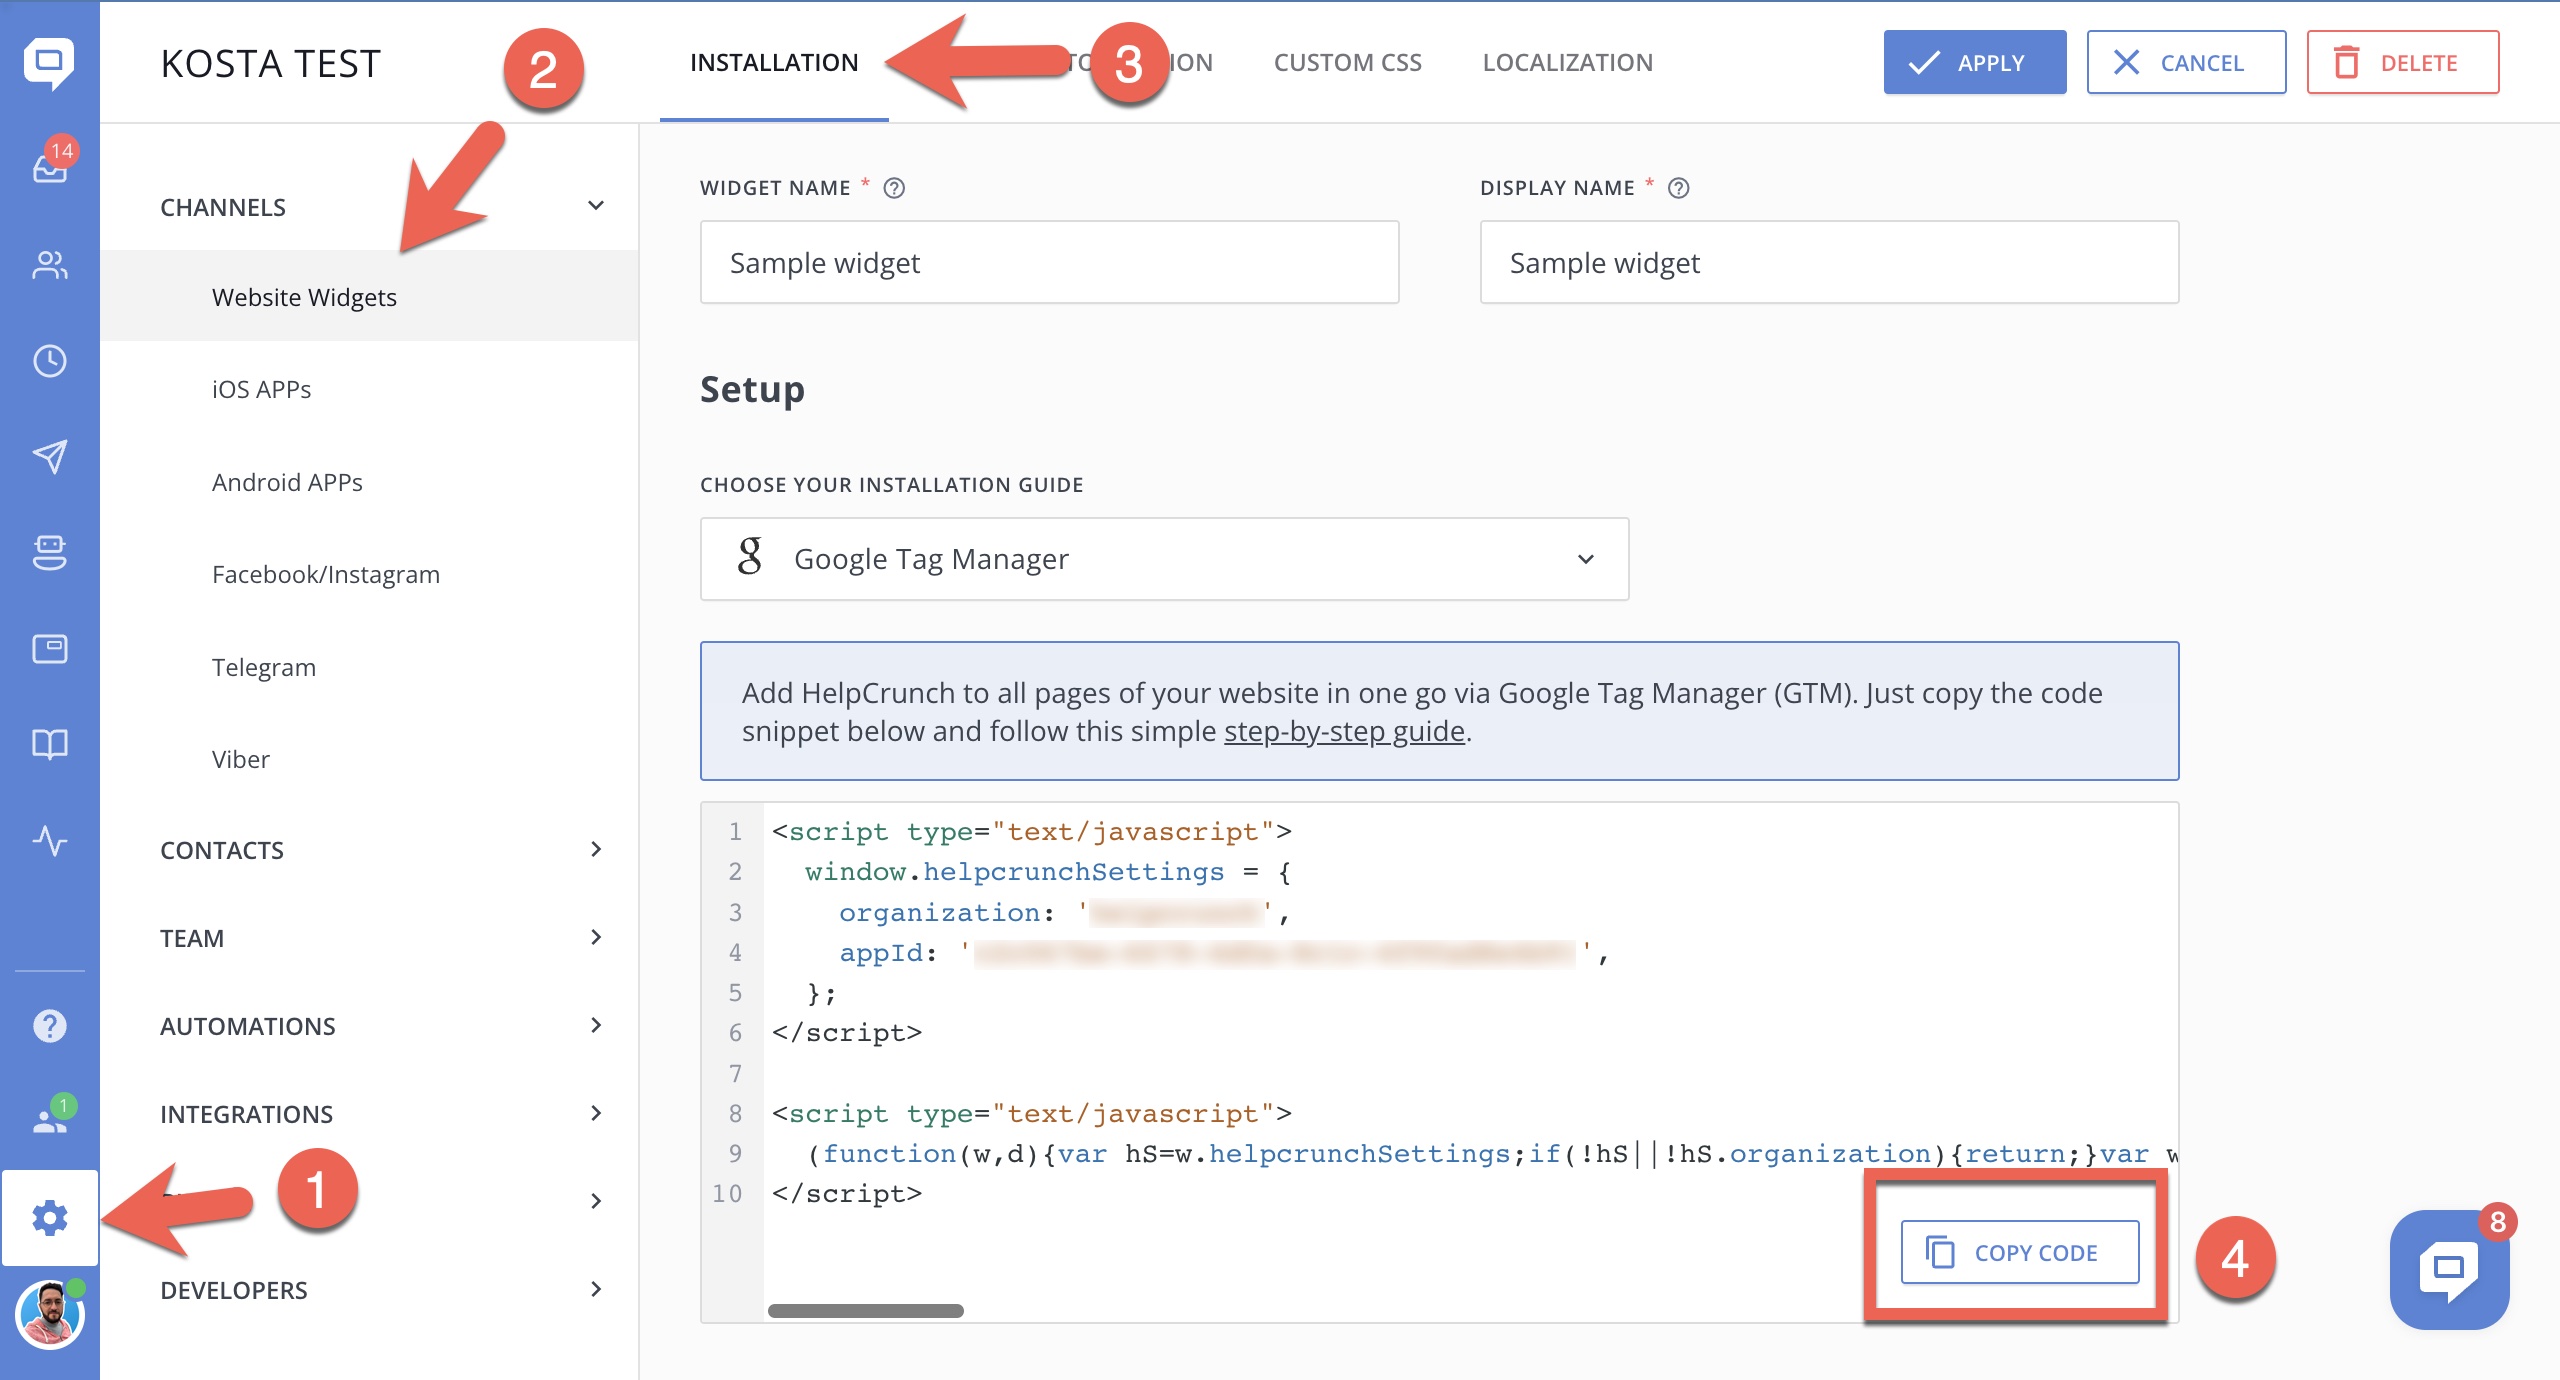
STEP 3. Paste the HelpCrunch code into HTML field and click Save. To get the code, log in to your HelpCrunch dashboard and go to Settings → Website Widgets → Your Website. You will need to copy the code under the 'GTM Code' column.
STEP 4. After you've pasted the code, proceed to the 'Triggering' section at the bottom.
STEP 5. Select the 'All Pages' trigger and click 'Save'.
STEP 6. Now, you must give a name to your tag (for instance, your website’s name). Once you’ve done that, click 'Save'.
STEP 7. To complete the installation, click 'Submit' at the top corner of your dashboard.
Well done! HelpCrunch is now installed on all pages of your website.