You need to start with choosing a live chat software that will fit your website and business needs perfectly. And yeah, you can’t go wrong with HelpCrunch.
The process can differ slightly from tool to tool, but the general guidelines are identical.
After you sign up and create your HelpCrunch account, the whole installation process takes a couple of copy-paste clicks and about 3 minutes. You can either follow the Installation Wizard recommendations or skip it and do the installation from your account’s settings. Plus, you can add live chat to your Wordpress-powered website.
- Adding live chat using the Installation Wizard
- Adding live chat from your HelpCrunch account
- Adding live chat to a Wordpress website
Adding live chat using the Installation Wizard
STEP 1. Choose the goals you want to reach with your live chat (customer support, sales, marketing, or all-in-one solution).
STEP 2. Customize your chat widget: choose button types, icon styles, and change what's written on your widget.
STEP 3. Decide how to add a chat on your website: with a JavaScript code or via a third-party platform (Google Tag Manager, Magento, WordPress, Shopify, Prestashop, 3DCart, Tumblr, Jimdo, Squarespace, SpaceCraft, Big Cartel, iOS Swift, iOS Objective-C).
STEP 4. Paste the live chat HTML code snippet you've copied to every page of your website on which you’d like to have a live chat widget right before the </body> tag.

Why do you need a live chat HTML code for a website?
Basically, HTML stands for HyperText Markup Language used to develop a markup on a website's page. That is, it "draws" the layout of a page. To add a live chat on your website, HTML alone would be of little help.
One might also need a back-end script (PHP/Django/Flask/NodeJS/JSP etc.) for a seamless live chat implementation. Otherwise, your system wouldn't be able to process user requests. To keep user data and preferences, a Database (MySQL/Oracle SQL/Server SQL/SQLite/NoSQL) is also required.
To make your live chat look nice and user-friendly, leverage other programming languages, such as CSS (Cascadian Style Sheets) for page static design and JavaScript/jQuery to process requests at client's side.
How does a live chat HTML code work in HelpCrunch?
Once you paste and run the HelpCrunch live chat HTML code on any of your website's pages, an iframe element is created. The HelpCrunch chat widget is generated inside this element.
All the next processes depend on the methods that are launched via the HelpCrunch function (e.g. initialization, authorization, widget's display, etc).
Adding live chat from your HelpCrunch account
STEP 1. Log in to your HelpCrunch account.
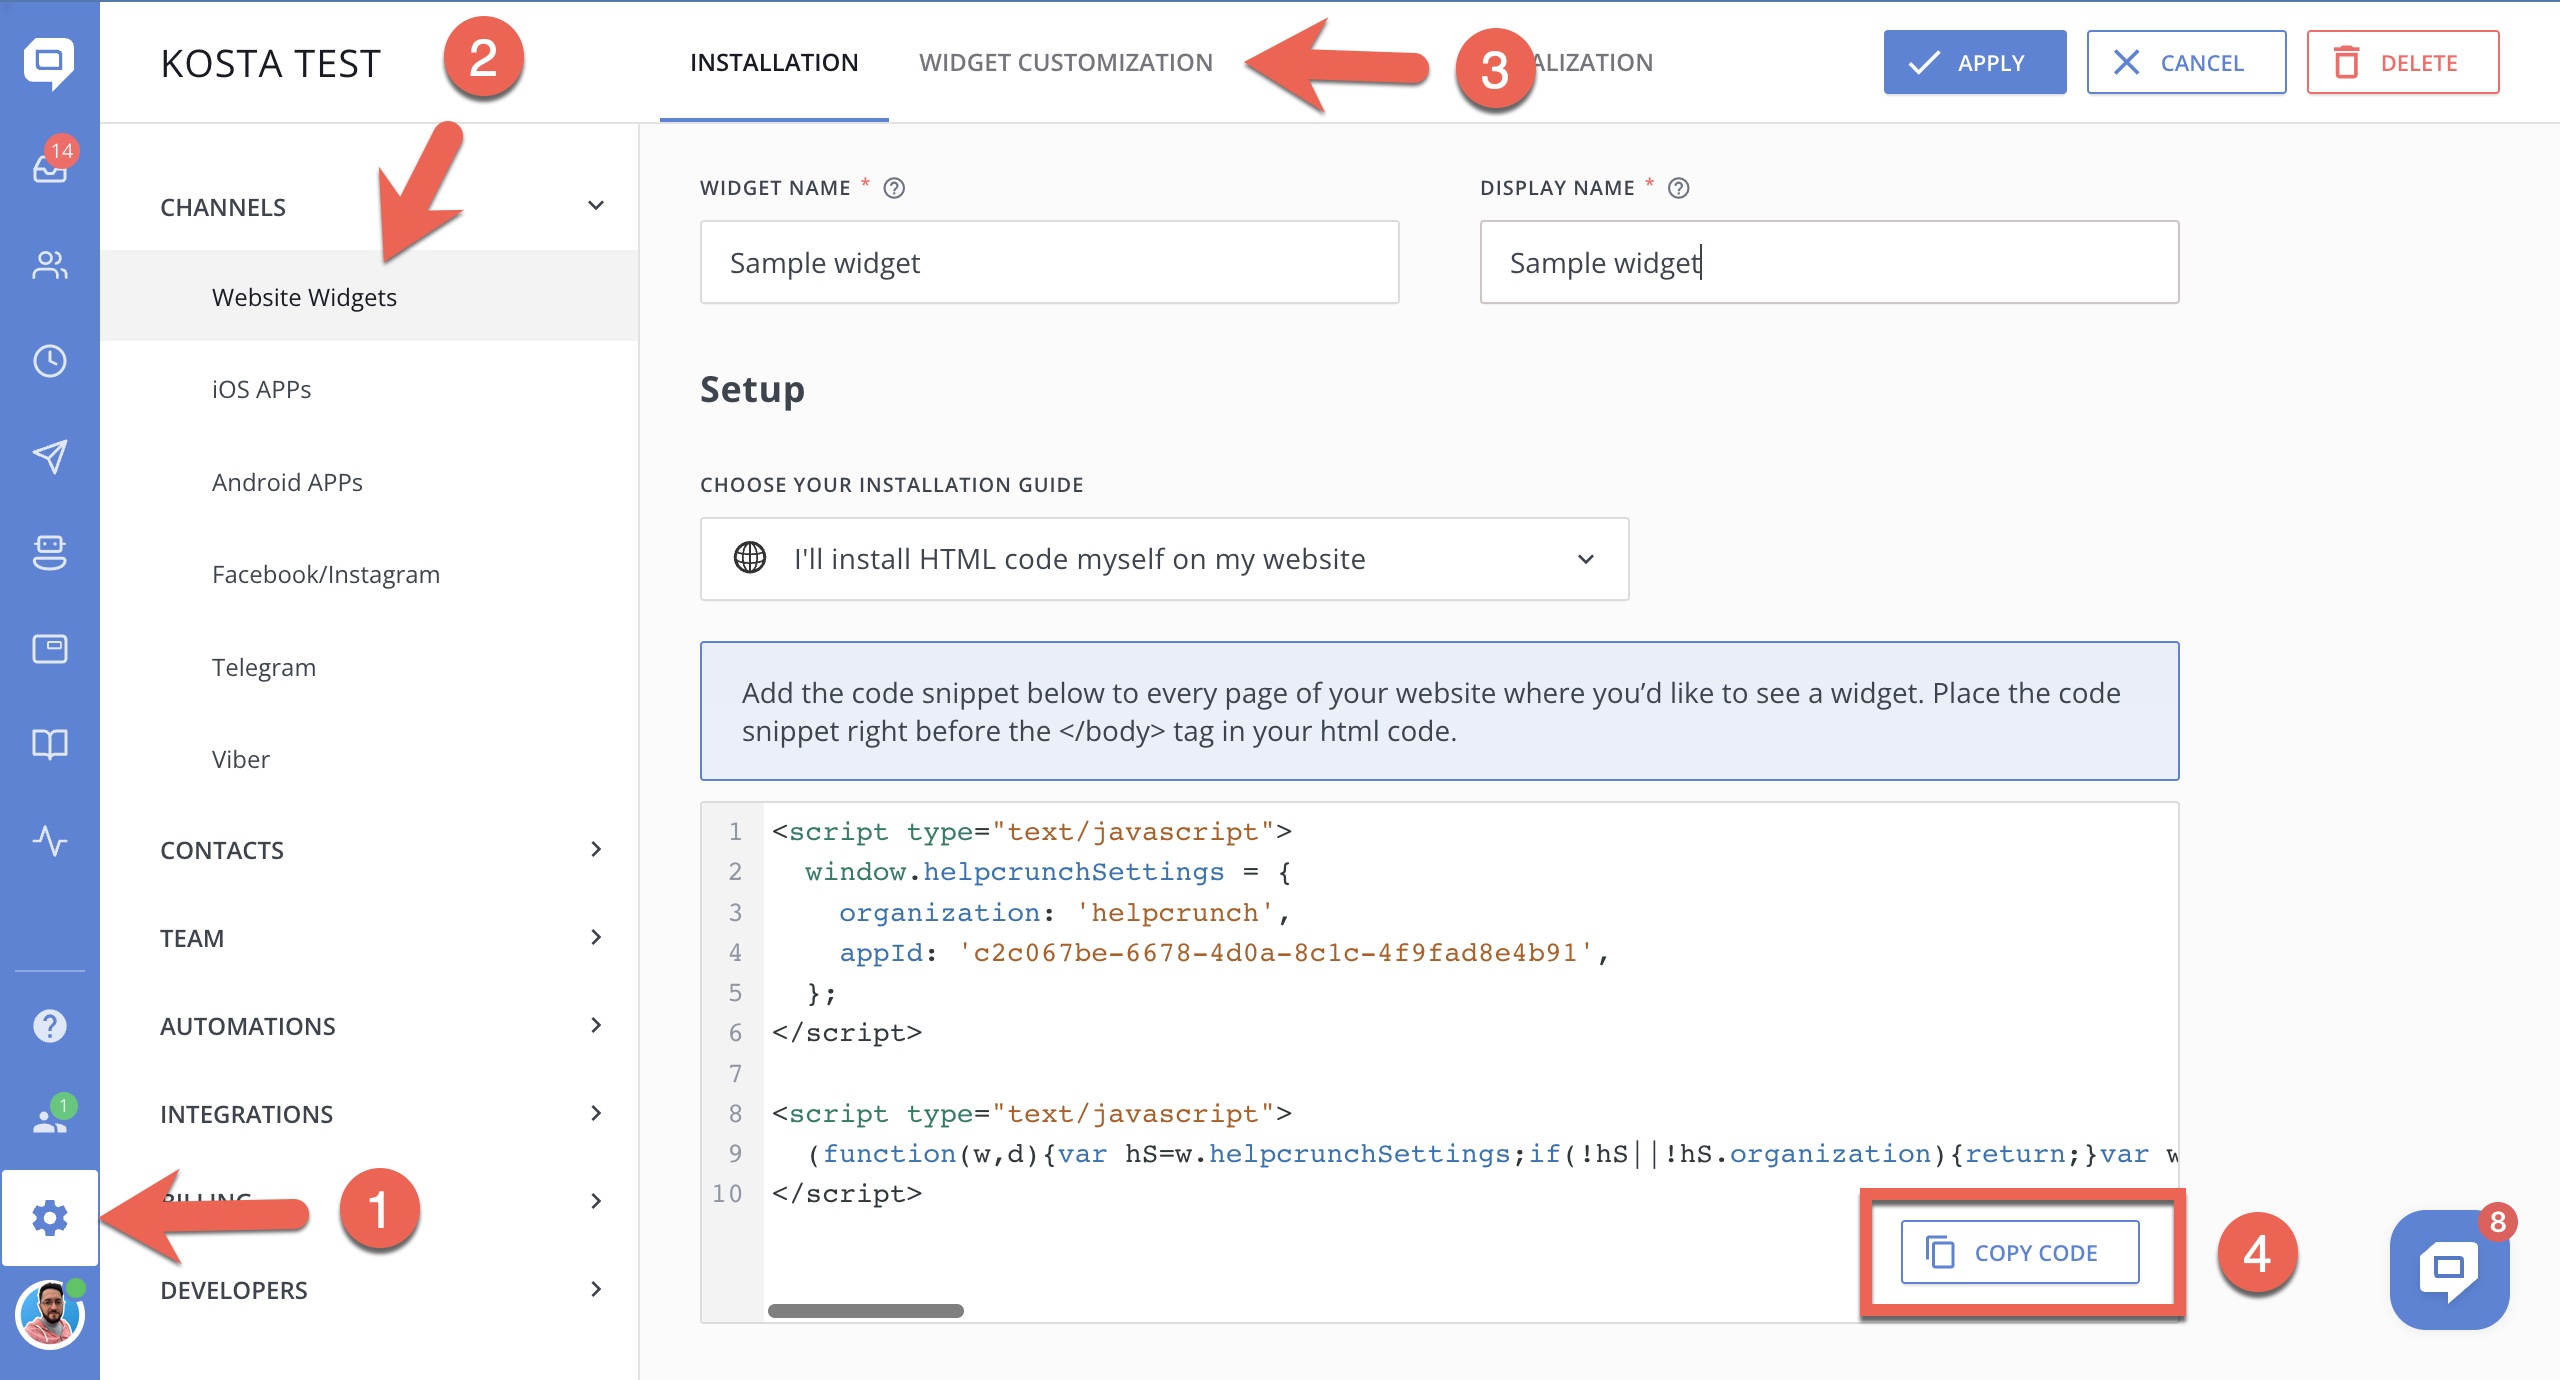
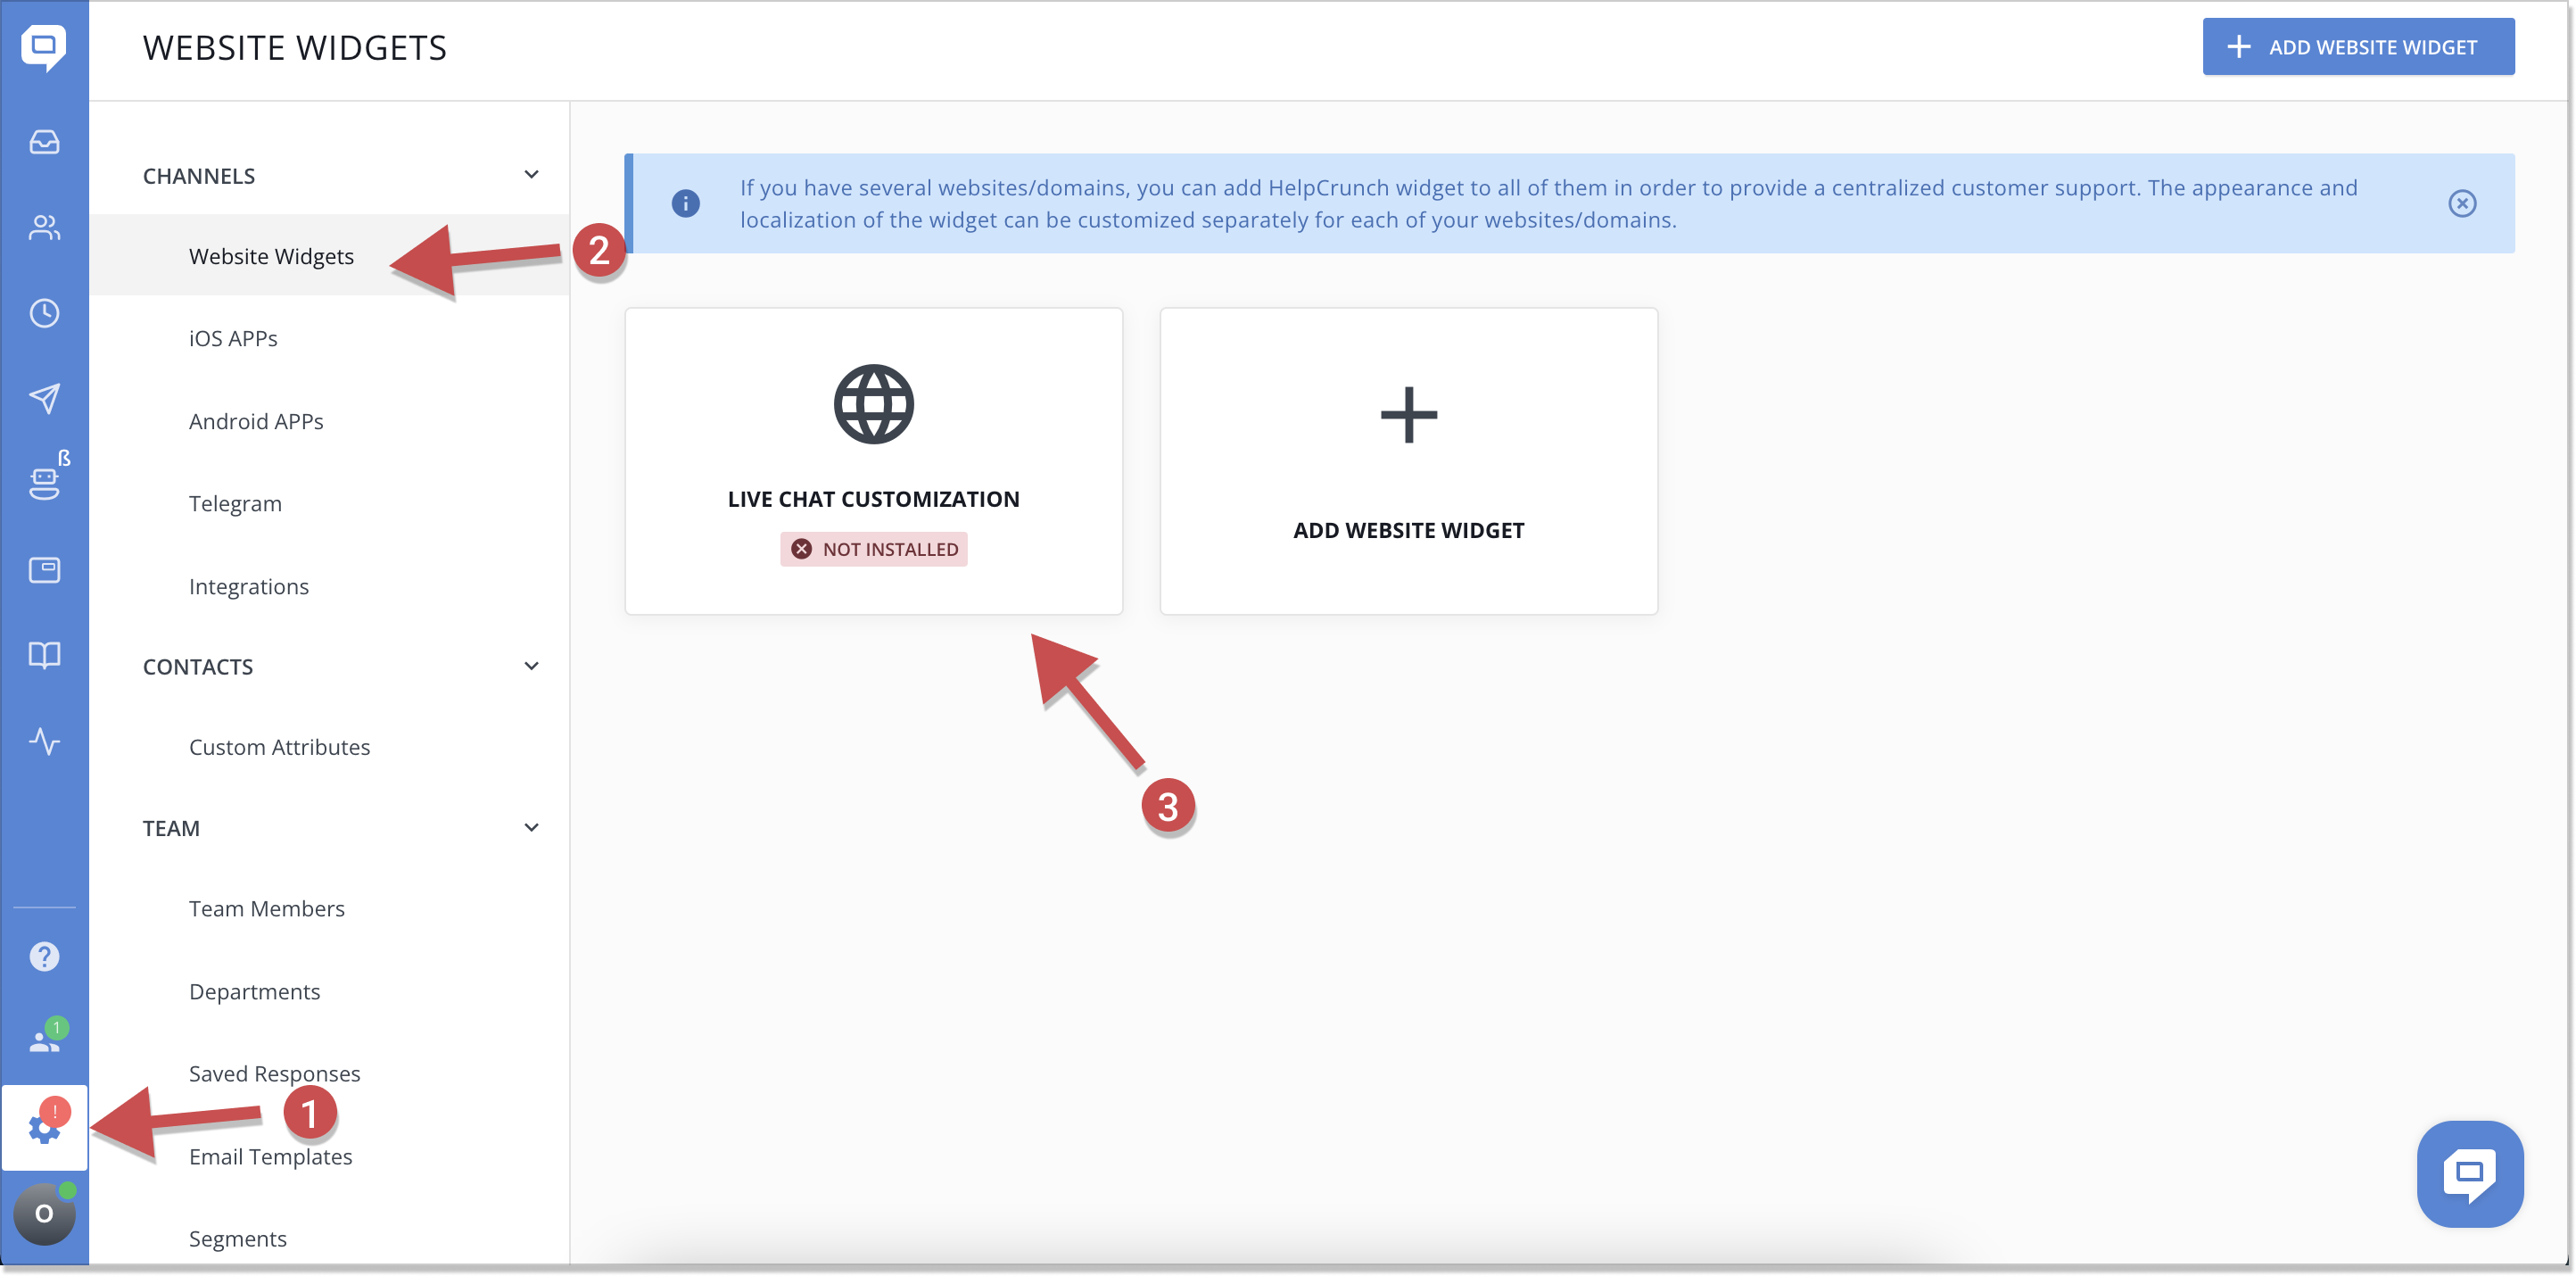
STEP 2. In the Settings section, find the Set Up & Customize subsection, and click your website domain.
.png)
STEP 3. Copy the JavaScript code and paste it on every relevant page of your website after opening a source code console.
STEP 4. Interact with your customers via live chat!
Adding live chat to a WordPress website
STEP 1. Log into your WordPress account.
STEP 2. Find the Plugins section and press "Add new".
STEP 3. In the Search box, type in "HelpCrunch".
STEP 4. Hit "Install" and "Activate".
STEP 5. Copy the CMS code from the settings section in your HelpCrunch account.
STEP 6. Find the HelpCrunch live chat widget under installed plugins in your WordPress account.
STEP 7. Paste the CMS code in the Settings and save changes.
Voilà! The live chat widget appears on your website!
That’s it, that’s the whole installation. When done, your website or app will have a small live chat button at the bottom right corner.
You can change its look and texts in HelpCrunch settings, but the most important thing is that your customers now have a real-time communication channel with you.