- Create a variable for the events name
- Create triggers for each event you need to track
- Create a tag for customer events
- Create a tag to pass data to GA4
- Customer events
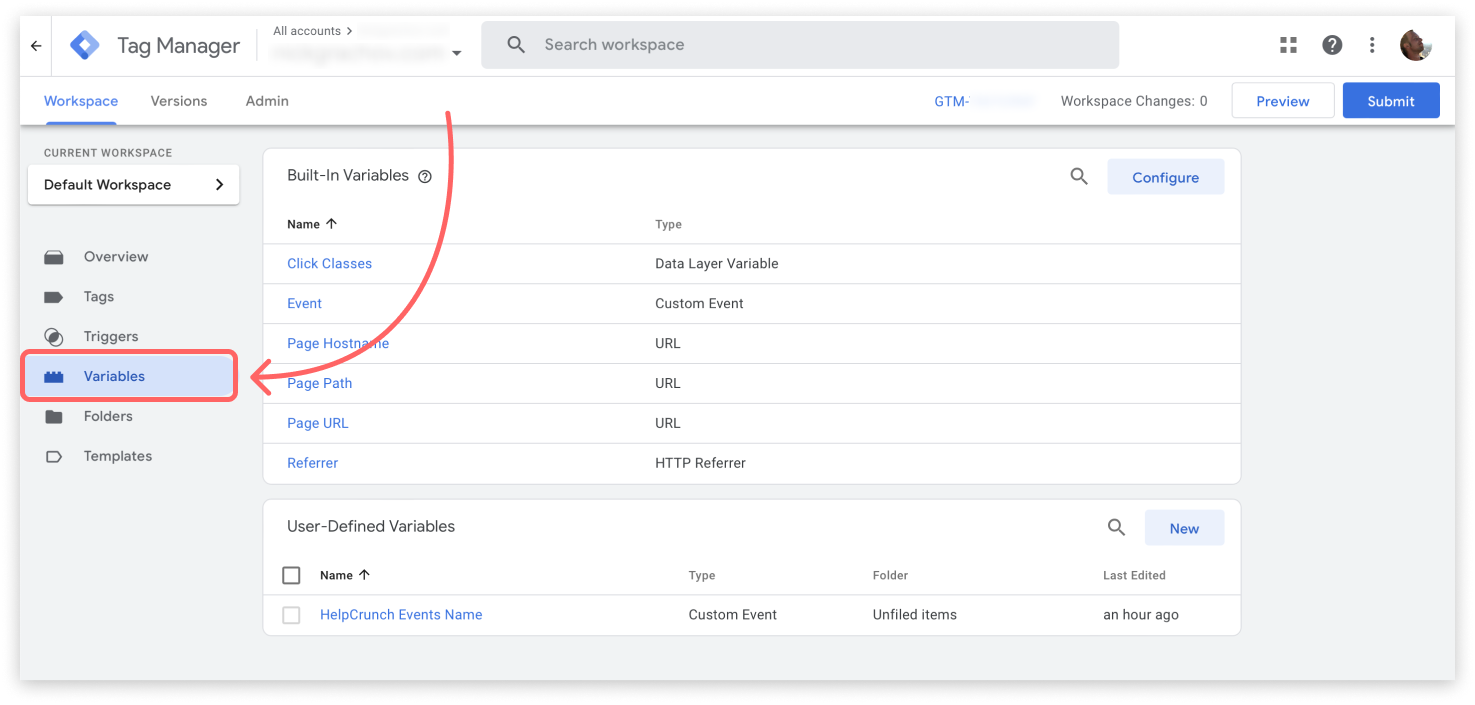
Create a variable for the events name
1. Navigate to your GTM workspace and click ‘Variables’ on the left panel:
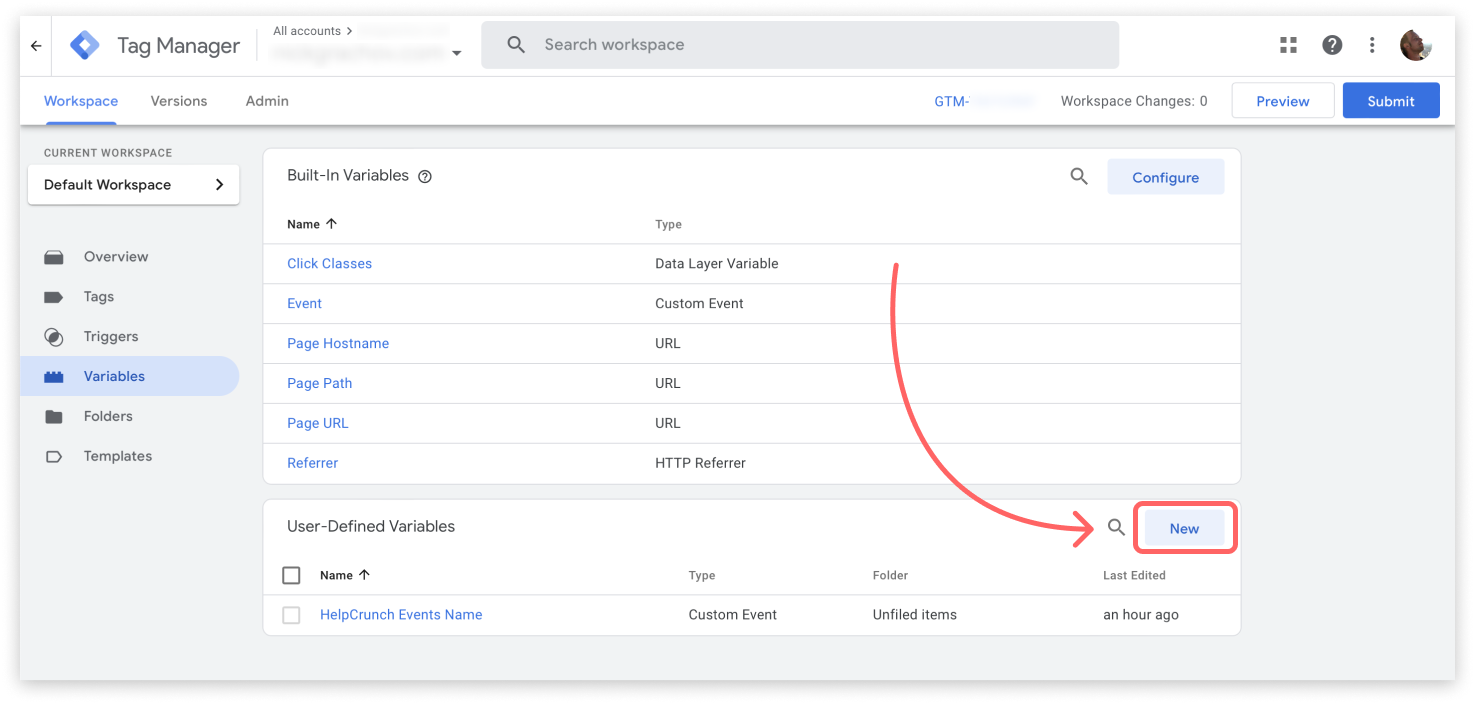
2. To add your user-defined variable click ‘New’:
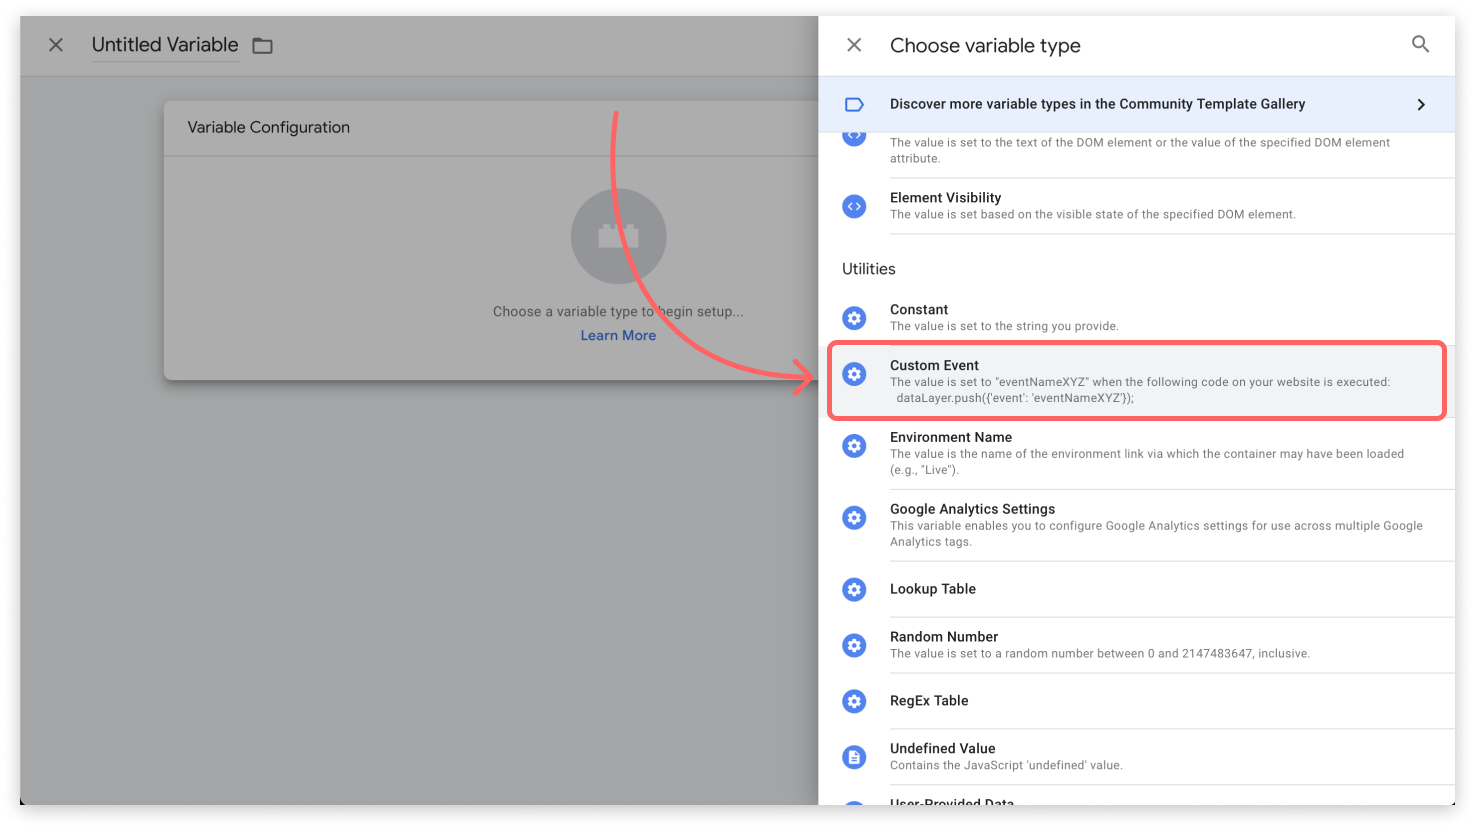
3. To configure your variable click the ‘Variable Configuration’. Then find and select ‘Custom Event’:
4. Name your variable as ‘HelpCrunch - Events Name’ or of your choice, and save.
Create triggers for each event you need to track
1. Decide what events you need to track. You can find their list below in the section ‘Customer events’.
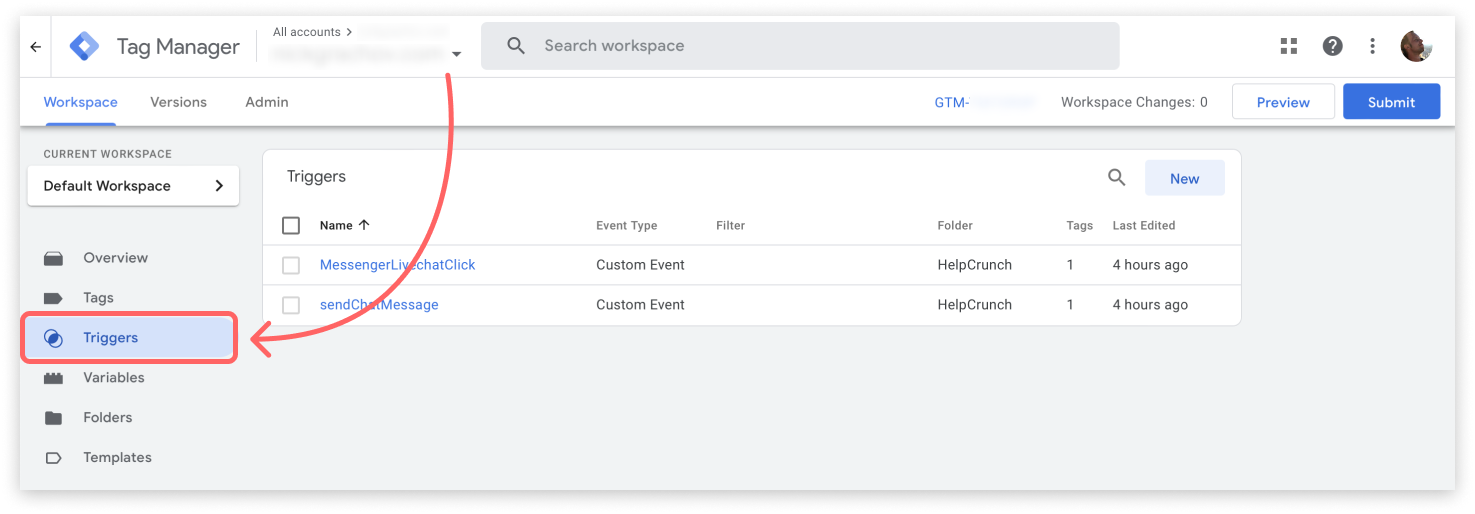
2. Click ‘Triggers’ on the left panel:
3. To add a new trigger click ‘New’:

4. To configure your trigger click ‘Trigger Configuration’. Then find and select ‘Custom Event’:
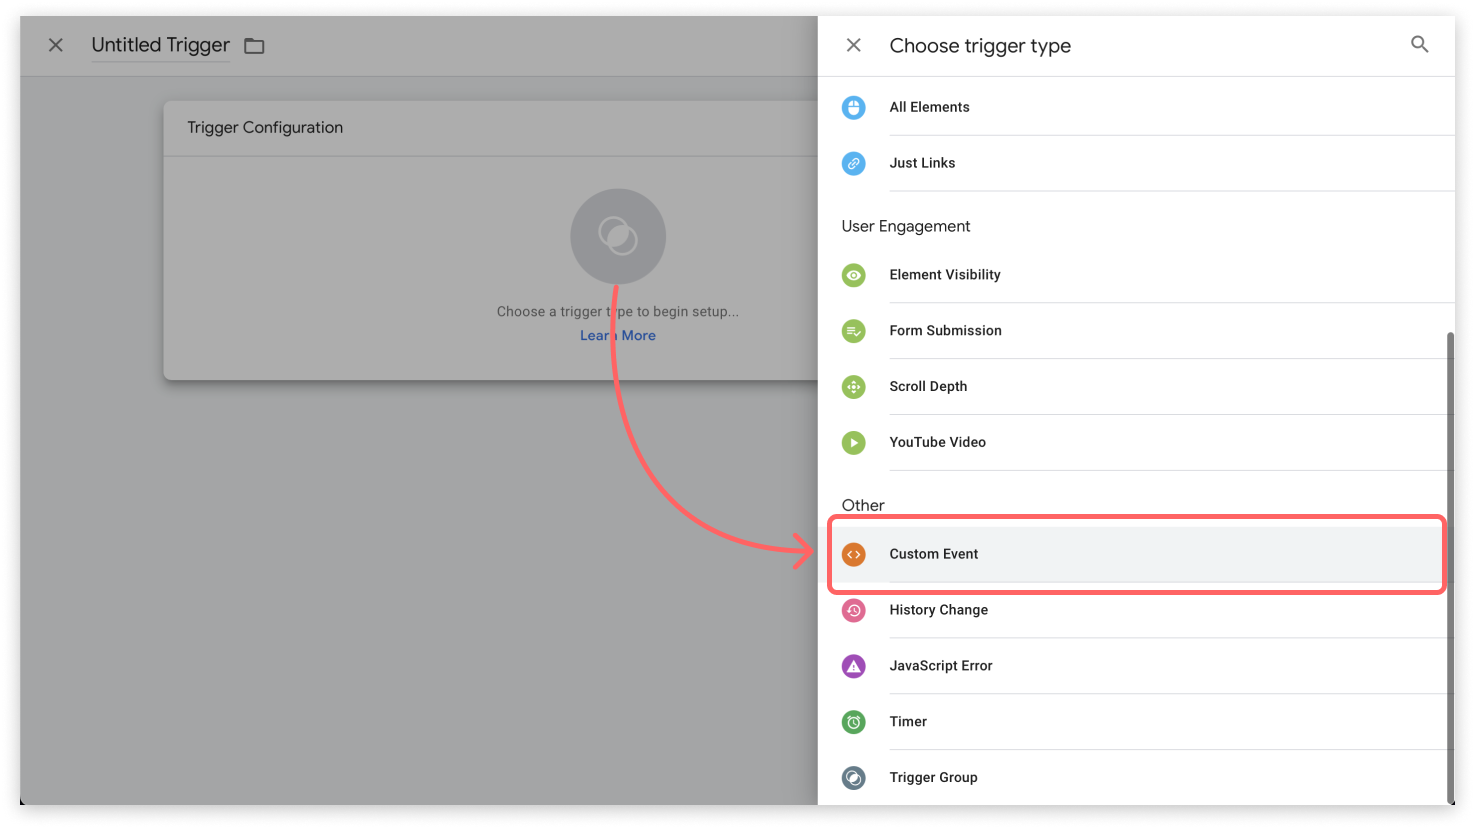
5. Fill in the event name for your trigger. You can copy it from the code snippets in ‘Customer events’ below. For example, to track when a customer sends a message:
<script type="text/javascript">
  HelpCrunch('onCustomerMessage', function(event) {
    dataLayer.push({
    'event': 'sendChatMessage',
    });
  });
</script>
sendChatMessage is the event name you need to paste into the field.
6. Name your trigger as ‘HelpCrunch - sendChatMessage’ or of your choice, and save.
7. Repeat for each event you need to track.
Create a tag for customer events
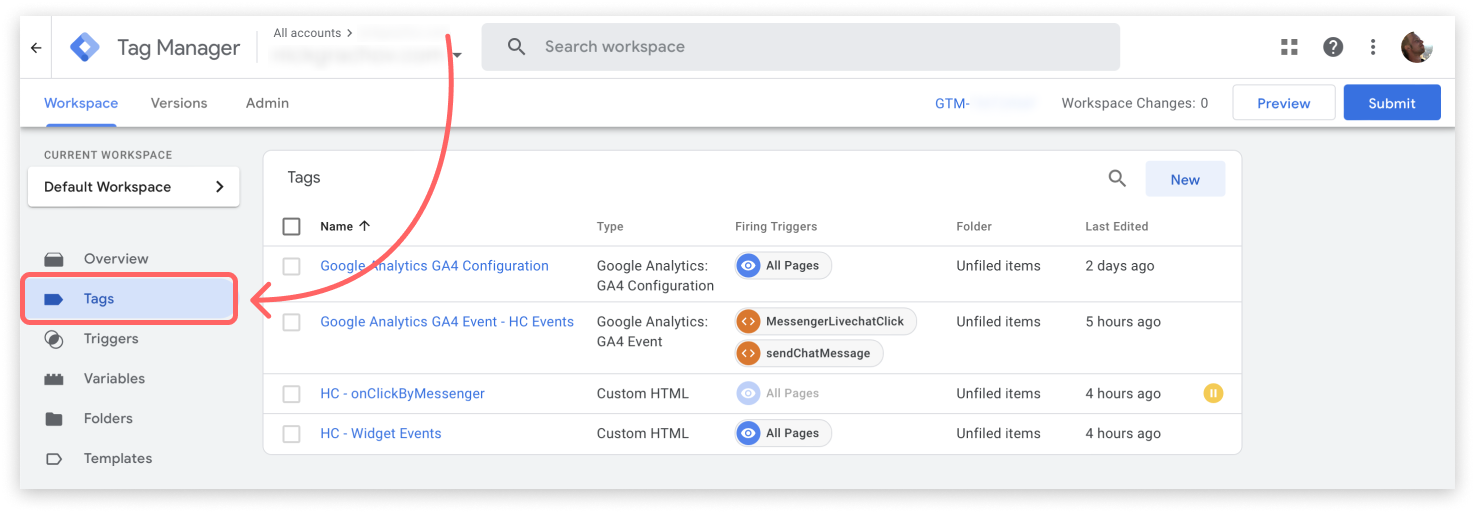
1. Click ‘Tags’ on the left panel:
2. To add a new tag click ‘New’:

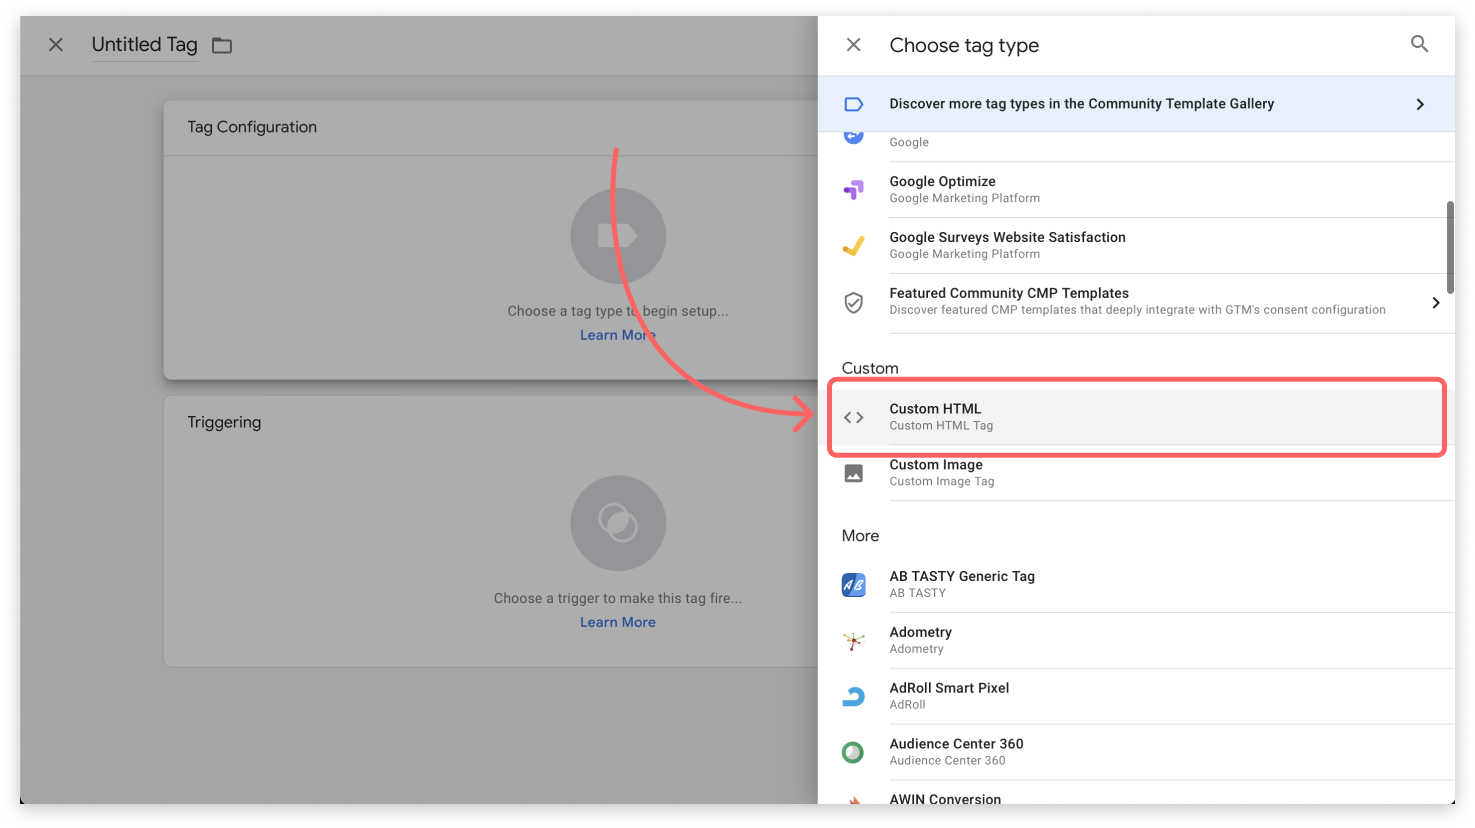
3. To configure your tag click ‘Tag Configuration’. Then find and select ‘Custom HTML’:
4. Copy a code for the event you need to track from the section ‘Customer Events’ and paste it into the HTML field:
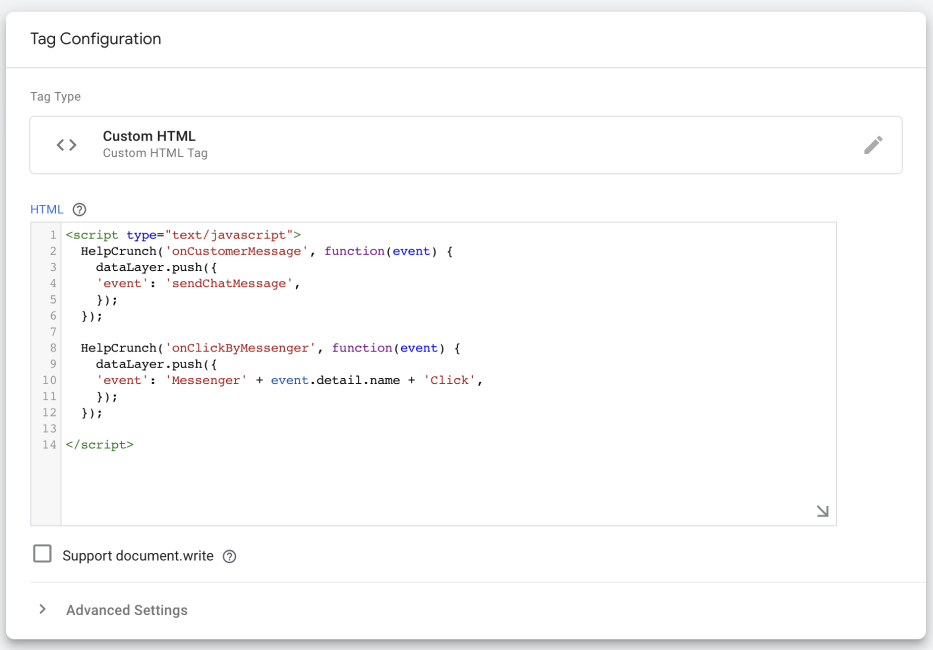
5. Combine several codes under one script if you need to track multiple events. For example:
<script type="text/javascript">
  HelpCrunch('onCustomerMessage', function(event) {
    dataLayer.push({
    'event': 'sendChatMessage',
    });
  });

  HelpCrunch('onClickByMessenger', function(event) {
    dataLayer.push({
    'event': 'Messenger' + event.detail.name + 'Click',
    });
  });
</script>
6. Click on ‘Triggering’ and select ‘All pages’:
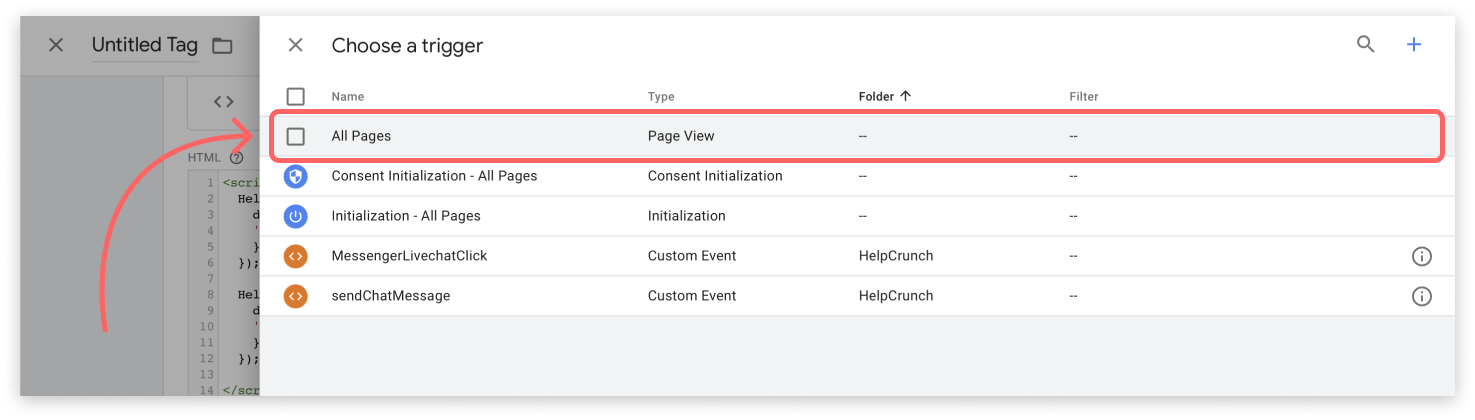
7. Name your tag as ‘HelpCrunch - Events’ or of your choice, and save.
Create a tag to pass data to GA4
1. Click ‘New’ above the list of tags:
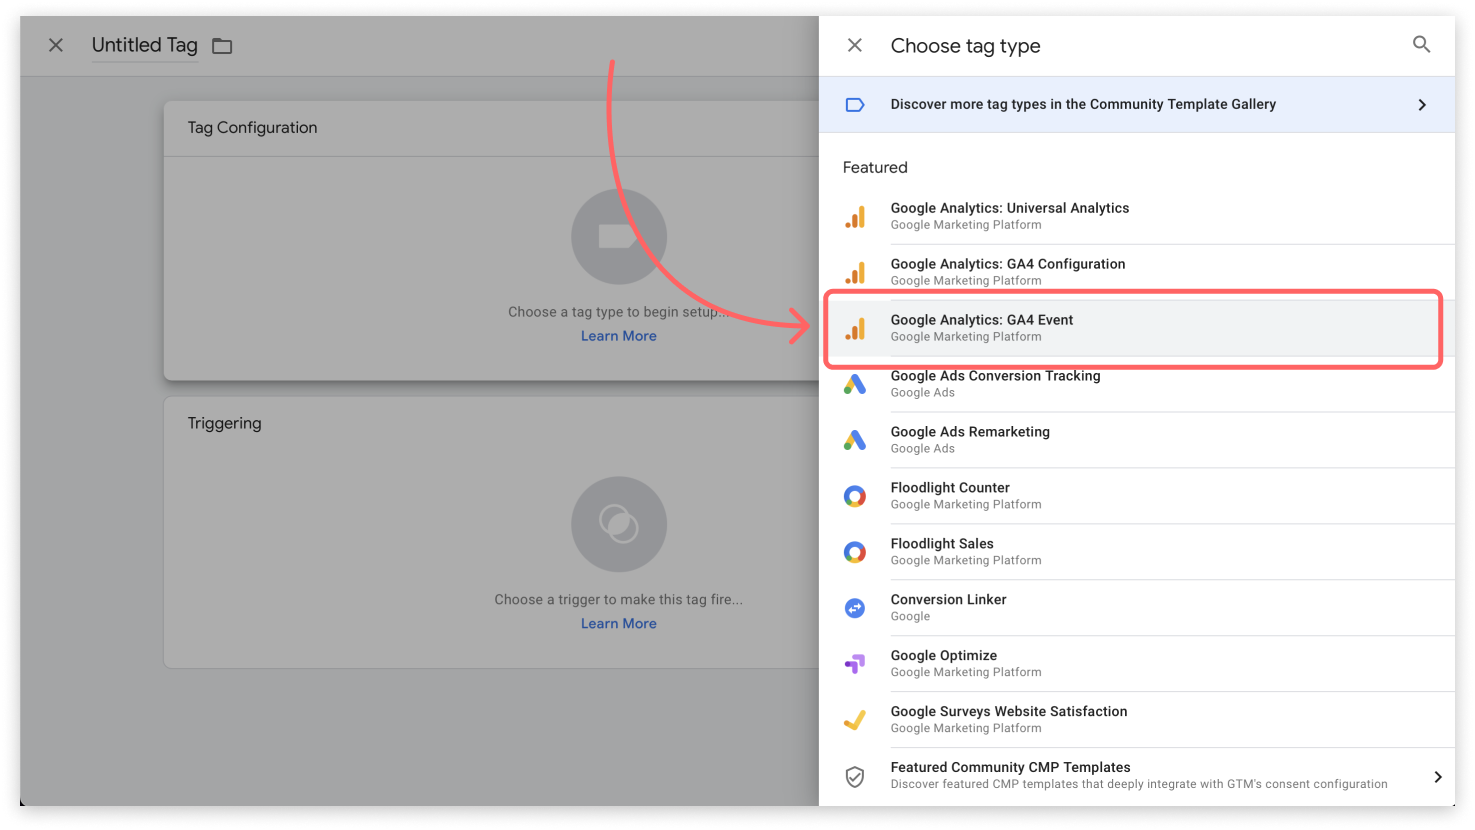
2. Click ‘Tag Configuration’ and select ‘Google Analytics: GA4 Event’:
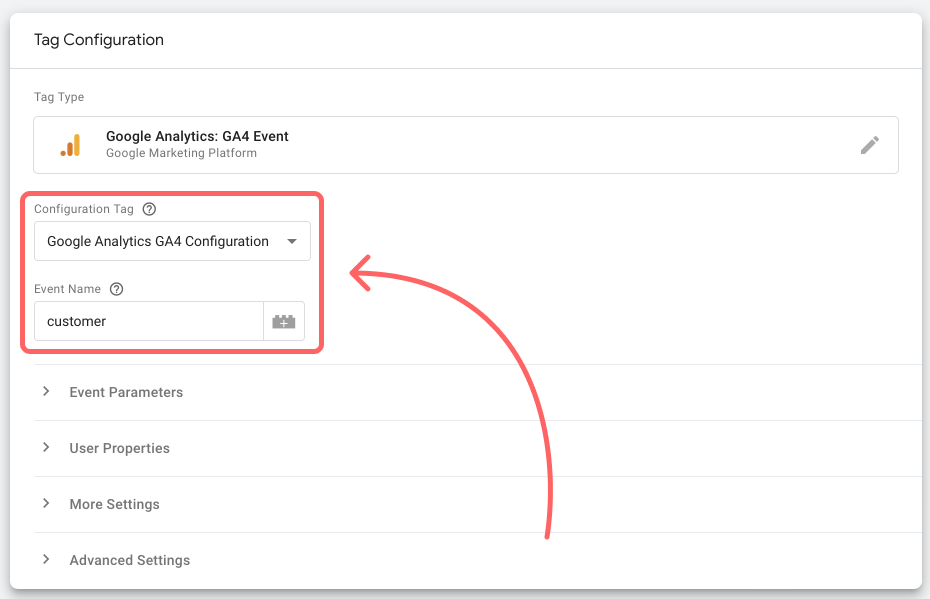
3. Select your GA4 Configuration Tag and add the event name ‘customer’ or of your choice:
4. In the section ‘Event Parameters’ click ‘Add Row’. Fill in the ‘Parameter Name’ field with the ‘Action’. For the ‘Value’ field click on the icon on the right side of the field and select you variable you have created before:

5. Click on ‘Triggering’ and select all triggers you have created for the events.
6. Name your tag and save.
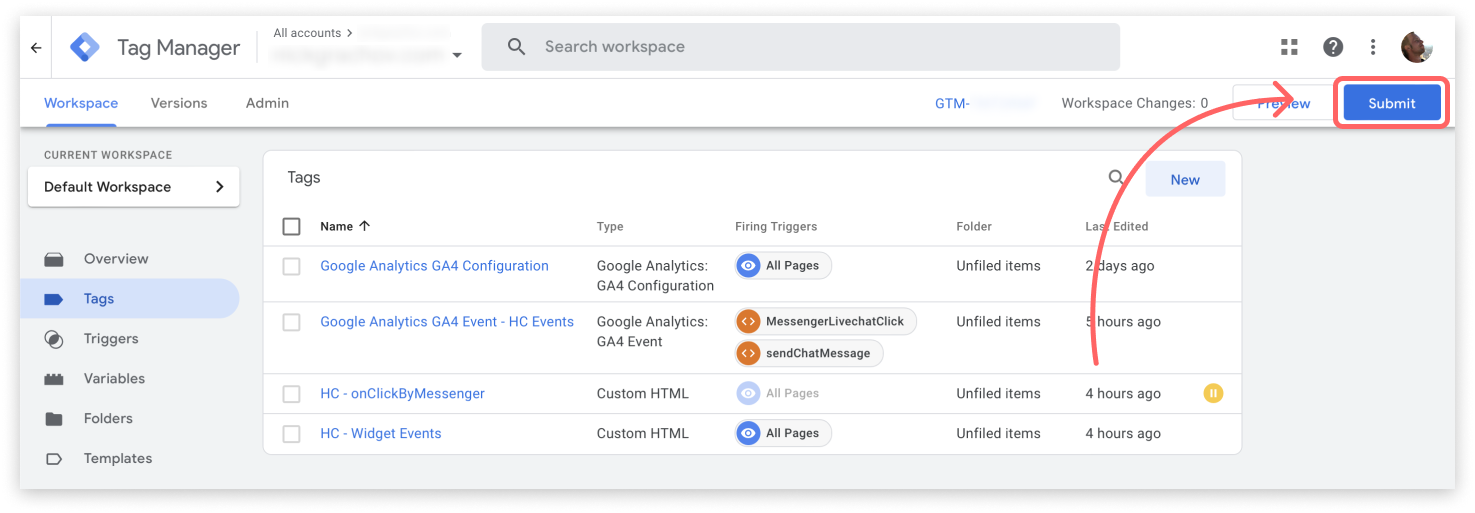
Publish your workspace
Click ‘Submit’ in the top right corner. Name your version, add a description if needed, and click ‘Publish’:
Customer events
Use these code snippets for creating your triggers in Google Tag Manager.
Customer opens a website widget
<script type="text/javascript">
  HelpCrunch('onChatOpen', function(event) {
    dataLayer.push({
    'event': 'opensChat',
    });
  });
</script>
Customer closes a website widget
<script type="text/javascript">
  HelpCrunch('onChatClose', function(event) {
    dataLayer.push({
    'event': 'closesChat',
    });
  });
</script>
Customer selects messenger integration on website widget button
<script type="text/javascript">
  HelpCrunch('onClickByMessenger', function(event) {
    dataLayer.push({
    'event': 'messenger' + event.detail.name + 'Click',
    });
  });
</script>
Use these event names for trigger settings:
messengerLivechatClick- for Live ChatmessengerTelegramClick- for TelegrammessengerViberClick- for VibermessengerInstagramClick- for InstagrammessengerFacebookClick- for Facebook MessengermessengerWhatsappClick- for WhatsAppmessengerHelpcenterClick- for Knowledge Base
Customer sends a message in a chat
<script type="text/javascript">
  HelpCrunch('onCustomerMessage', function(event) {
    dataLayer.push({
    'event': 'sendChatMessage',
    });
  });
</script>
Customer initiates a chat
<script type="text/javascript">
  HelpCrunch('onCustomerMessage', function (event) {
    if(event.detail.isFirstMessage) {
      dataLayer.push({
      'event': 'sendFirstChatMessage',
      });
    }
  });
</script>
Customer receives a new message
<script type="text/javascript">
  HelpCrunch('onNewUnreadChat', function(event) {
    dataLayer.push({
    'event': 'getsNewMessage',
    });
  });
</script>
Customer submits a pre-chat form
<script type="text/javascript">
  HelpCrunch('onPreChatFormSubmit', function(event) {
    dataLayer.push({
    'event': 'submitsPreChatForm',
    });
  });
</script>