Open your category and press the 'Add new' button and select the 'Article' option from the drop-down list to add a new article.

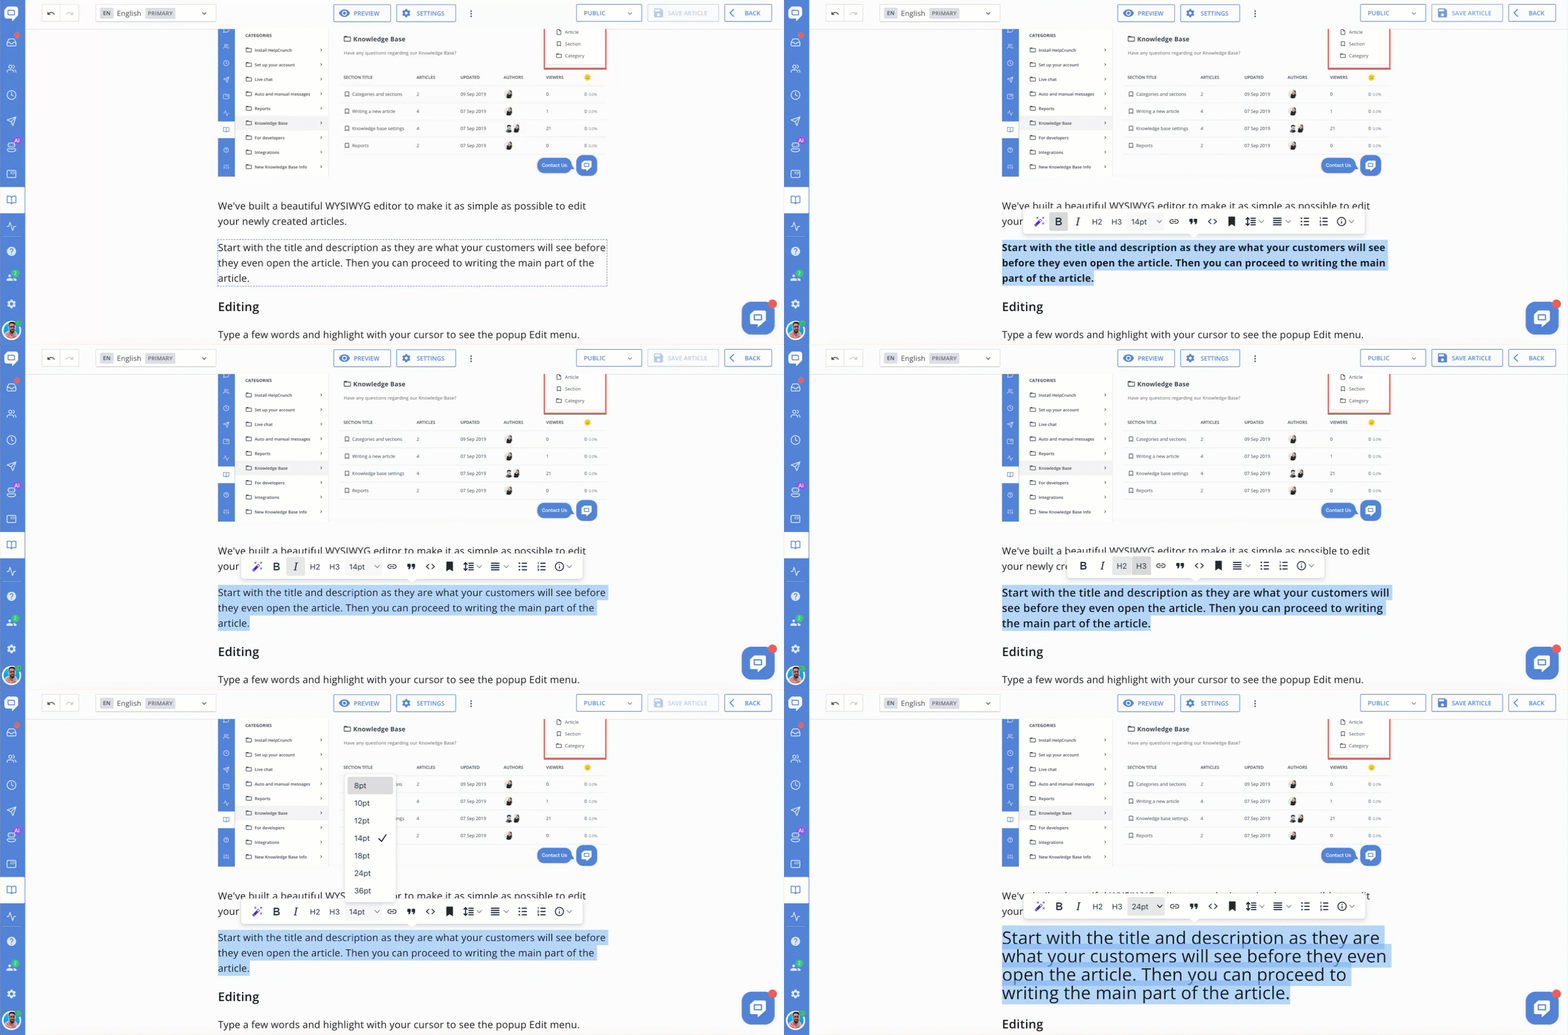
We've built a beautiful WYSIWYG editor to make it as simple as possible to edit your newly created articles.
Start with the title and description as they are what your customers will see before they even open the article. Then you can proceed to writing the main part of the article.
Editing
Type a few words and highlight with your cursor to see the popup Edit menu.
.gif)
It contains all options you might need when editing a word or a phrase:
- Bold/Italics
- Headings and subheadings
- Paragraph font size
- URLs
- Quotes
- Anchor menu
- Paragraph line height
- Text alignment
- Lists
- Advanced notes
Publishing
All articles are in the 'Draft' mode by default. Drafts are only visible for your team members inside your HelpCrunch dashboard.
To publish your article, hit the status menu and change the article's status to 'Public'. Don't forget to press the 'Save article' button after this to save your changes. You can hide the article from customers any time by switching its status back to 'Draft'.

If you want to see how your article will look when published, press the 'Preview' button in the top menu.
Settings
Press the 'Settings' button in the top menu to access settings for your article. You can change the article's name and description there but more importantly you can change its URL slug and move it to another category or section.

You can also edit your article's SEO and social media settings under 'Advanced Settings'.