- Installation
- Demo application
- Configuration
- How to create a customer
- Available methods of the component
- Available events of the component
Installation
To install the component, use the package managers yarn or npm:
yarn add rn-helpcrunch
yarn add [email protected]
npm install --save rn-helpcrunch
npm install --save [email protected]For iOS, you need to take a few additional steps.
Add the line to the file ios/Podfile, immediately after require 'json':
pod 'react-native-webview', :path => '../node_modules/react-native-webview'
After which execute the following commands:
cd ios
rm Podfile.lock
pod install
Demo application
To help you get started quickly, we’ve created a Demo app that showcases the integration of the React Native component for the HelpCrunch widget. You can use it as a reference or starting point for your own implementation. The app demonstrates the basic setup and usage of the component in a real React Native environment.
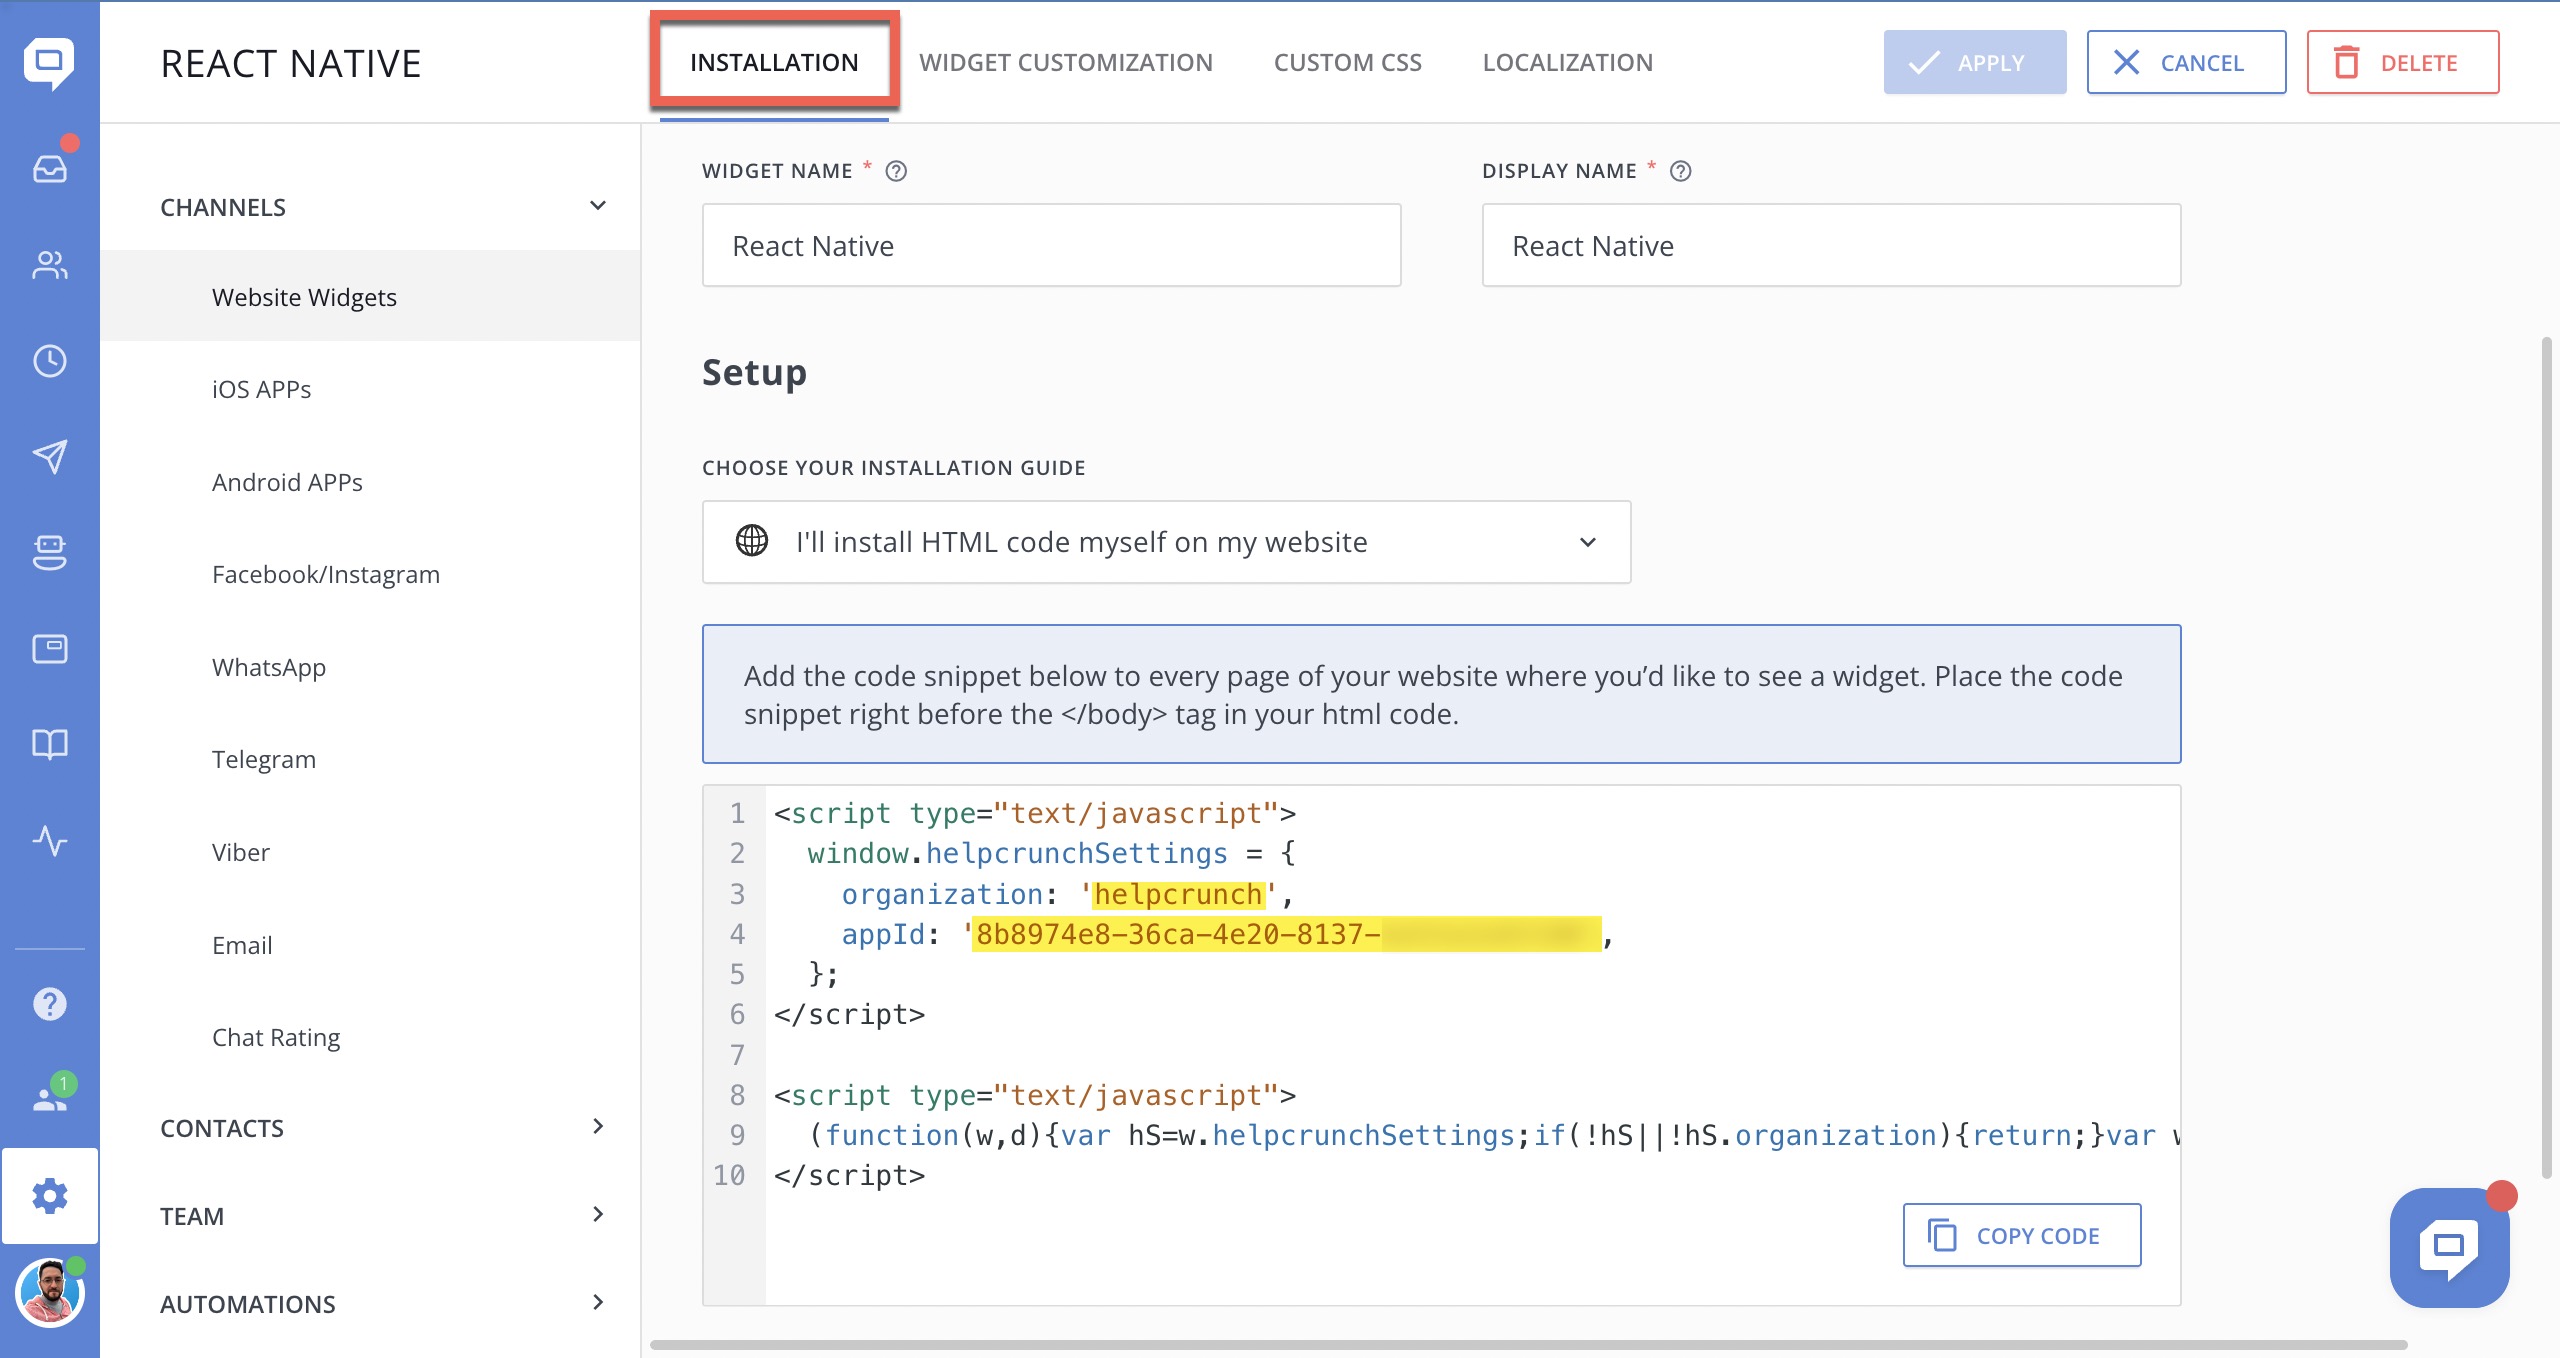
1. Create a widget in Settings→Website Widgets (or open an existing one).

2. Copy 'organizationId' and 'appId'

3. Paste 'organizationId' and 'appId' into the code of the widget component.
import { useRef } from 'react';
import { HelpCrunchWidget, HCWRef } from 'rn-helpcrunch';

// ...
export default function App() {
  const widgetRef = useRef<HCWRef|null>(null);

  const onMessage = (event: any) => { ... }
  const onCustomerMessage = (event: object) => { ... }
  const onAgentMessage = (event: object) => { ... }

  return (
      <HelpCrunchWidget
        organization="@organizationId"     // copy from HelpCrunch settings
        appId="@appId"      // copy from HelpCrunch settings
        onMessage={onMessage}
        onCustomerMessage={onCustomerMessage}
        onAgentMessage={onAgentMessage}
        ref={widgetRef}
      ></HelpCrunchWidget>
  );
}
How to create a customer
To create a user, perform user authentication, and update user information, there are designated methods available:
hcwInit- Initialize the HelpCrunch widget in your app. All methods that were called before this method, will run after it finishes the initialization. There's a similar init method in the JS API.hcwUserAuth- Authorize customers and assign them unique user IDs. It's similar to the userAuth method in the JS API.hcwUpdateUser- It is similar to the updateUser function in the JS API, which is utilized to add or modify the existing customer details like name, email, phone number, and company. Additionally, it can create a new user if there isn't one already initialized for the current visitor.hcwUpdateUserData- This method is useful when user's custom attributes change and you want to see these changes in the HelpCrunch user profile instantly. A similar method updateUserData is available in the JS API.
To authenticate a user, you need to create an object of type 'user' and call the hcwUserAuth(user) function.
import { hcwUserAuth } from 'rn-helpcrunch';
...
  const user = {
    user_id: '123654789'    // generate unique user ID
  };

  useEffect(() => {
    hcwUserAuth(user);
  }, [depts])
...Available methods of the component
hcwInit(data, signature);hcwUpdateUser(user, signature);hcwUserAuth(user, signature);hcwUpdateUserData(userCustomData, signature);hcwHideWidget();hcwShowWidget();hcwToggleWidget(); - toggles widget (show/hide) based on previous state hcwOpenChatById(chatId);hcwTrackEvent(eventName, signature);hcwSetLocalization(phraseListName, signature);hcwSendUserMessage(messageText, signature);hcwTypeUserMessage(messageText, signature);hcwLogout();hcwMuteNotificationSound(isMute, signature);hcwSetOperatingHours(operatingHours, signature);hcwOpenKBArticle(articleData, signature);hcwSetMediaCSS(mediaClassesData, signature);
Available events of the component
onReady={onReady}onScriptLoadedonChatOpen={onChatOpen}onChatClose={onChatClose}onCustomerMessage={onCustomerMessage}onAgentMessage={onAgentMessage}onNewUnreadChat={onNewUnreadChat}onPreChatFormSubmit={onPreChatFormSubmit}onError={onError}
const onReady = () => {}
const onChatOpen = () => {}
const onChatClose = () => {}
const onCustomerMessage = () => {}
const onAgentMessage = () => {}
const onNewUnreadChat = () => {}
const onPreChatFormSubmit = () => {}
const onError = () => {}


<HelpCrunchWidget organization="organization"
                  appId="appId"
                  ref={widgetRef}
                  onReady={onReady}
                  onChatOpen={onChatOpen}
                  onChatClose={onChatClose}
                  onCustomerMessage={onCustomerMessage}
                  onAgentMessage={onAgentMessage}
                  onNewUnreadChat={onNewUnreadChat}
                  onPreChatFormSubmit={onPreChatFormSubmit}
                  onError={onError}
></HelpCrunchWidget>