
If you manage several websites or brands from one HelpCrunch account, you can choose which team members customers see in each widget. For example, one widget can feature your sales team, while another displays customer support agents assigned to a different product or business line.
To configure team member visibility:
- Go to Settings → Channels → Website Widgets.
- Select the widget you want to customize.
- Open the Customization tab.
- Expand the Team Members section.
- Enable the Show toggle next to each team member you want to display.
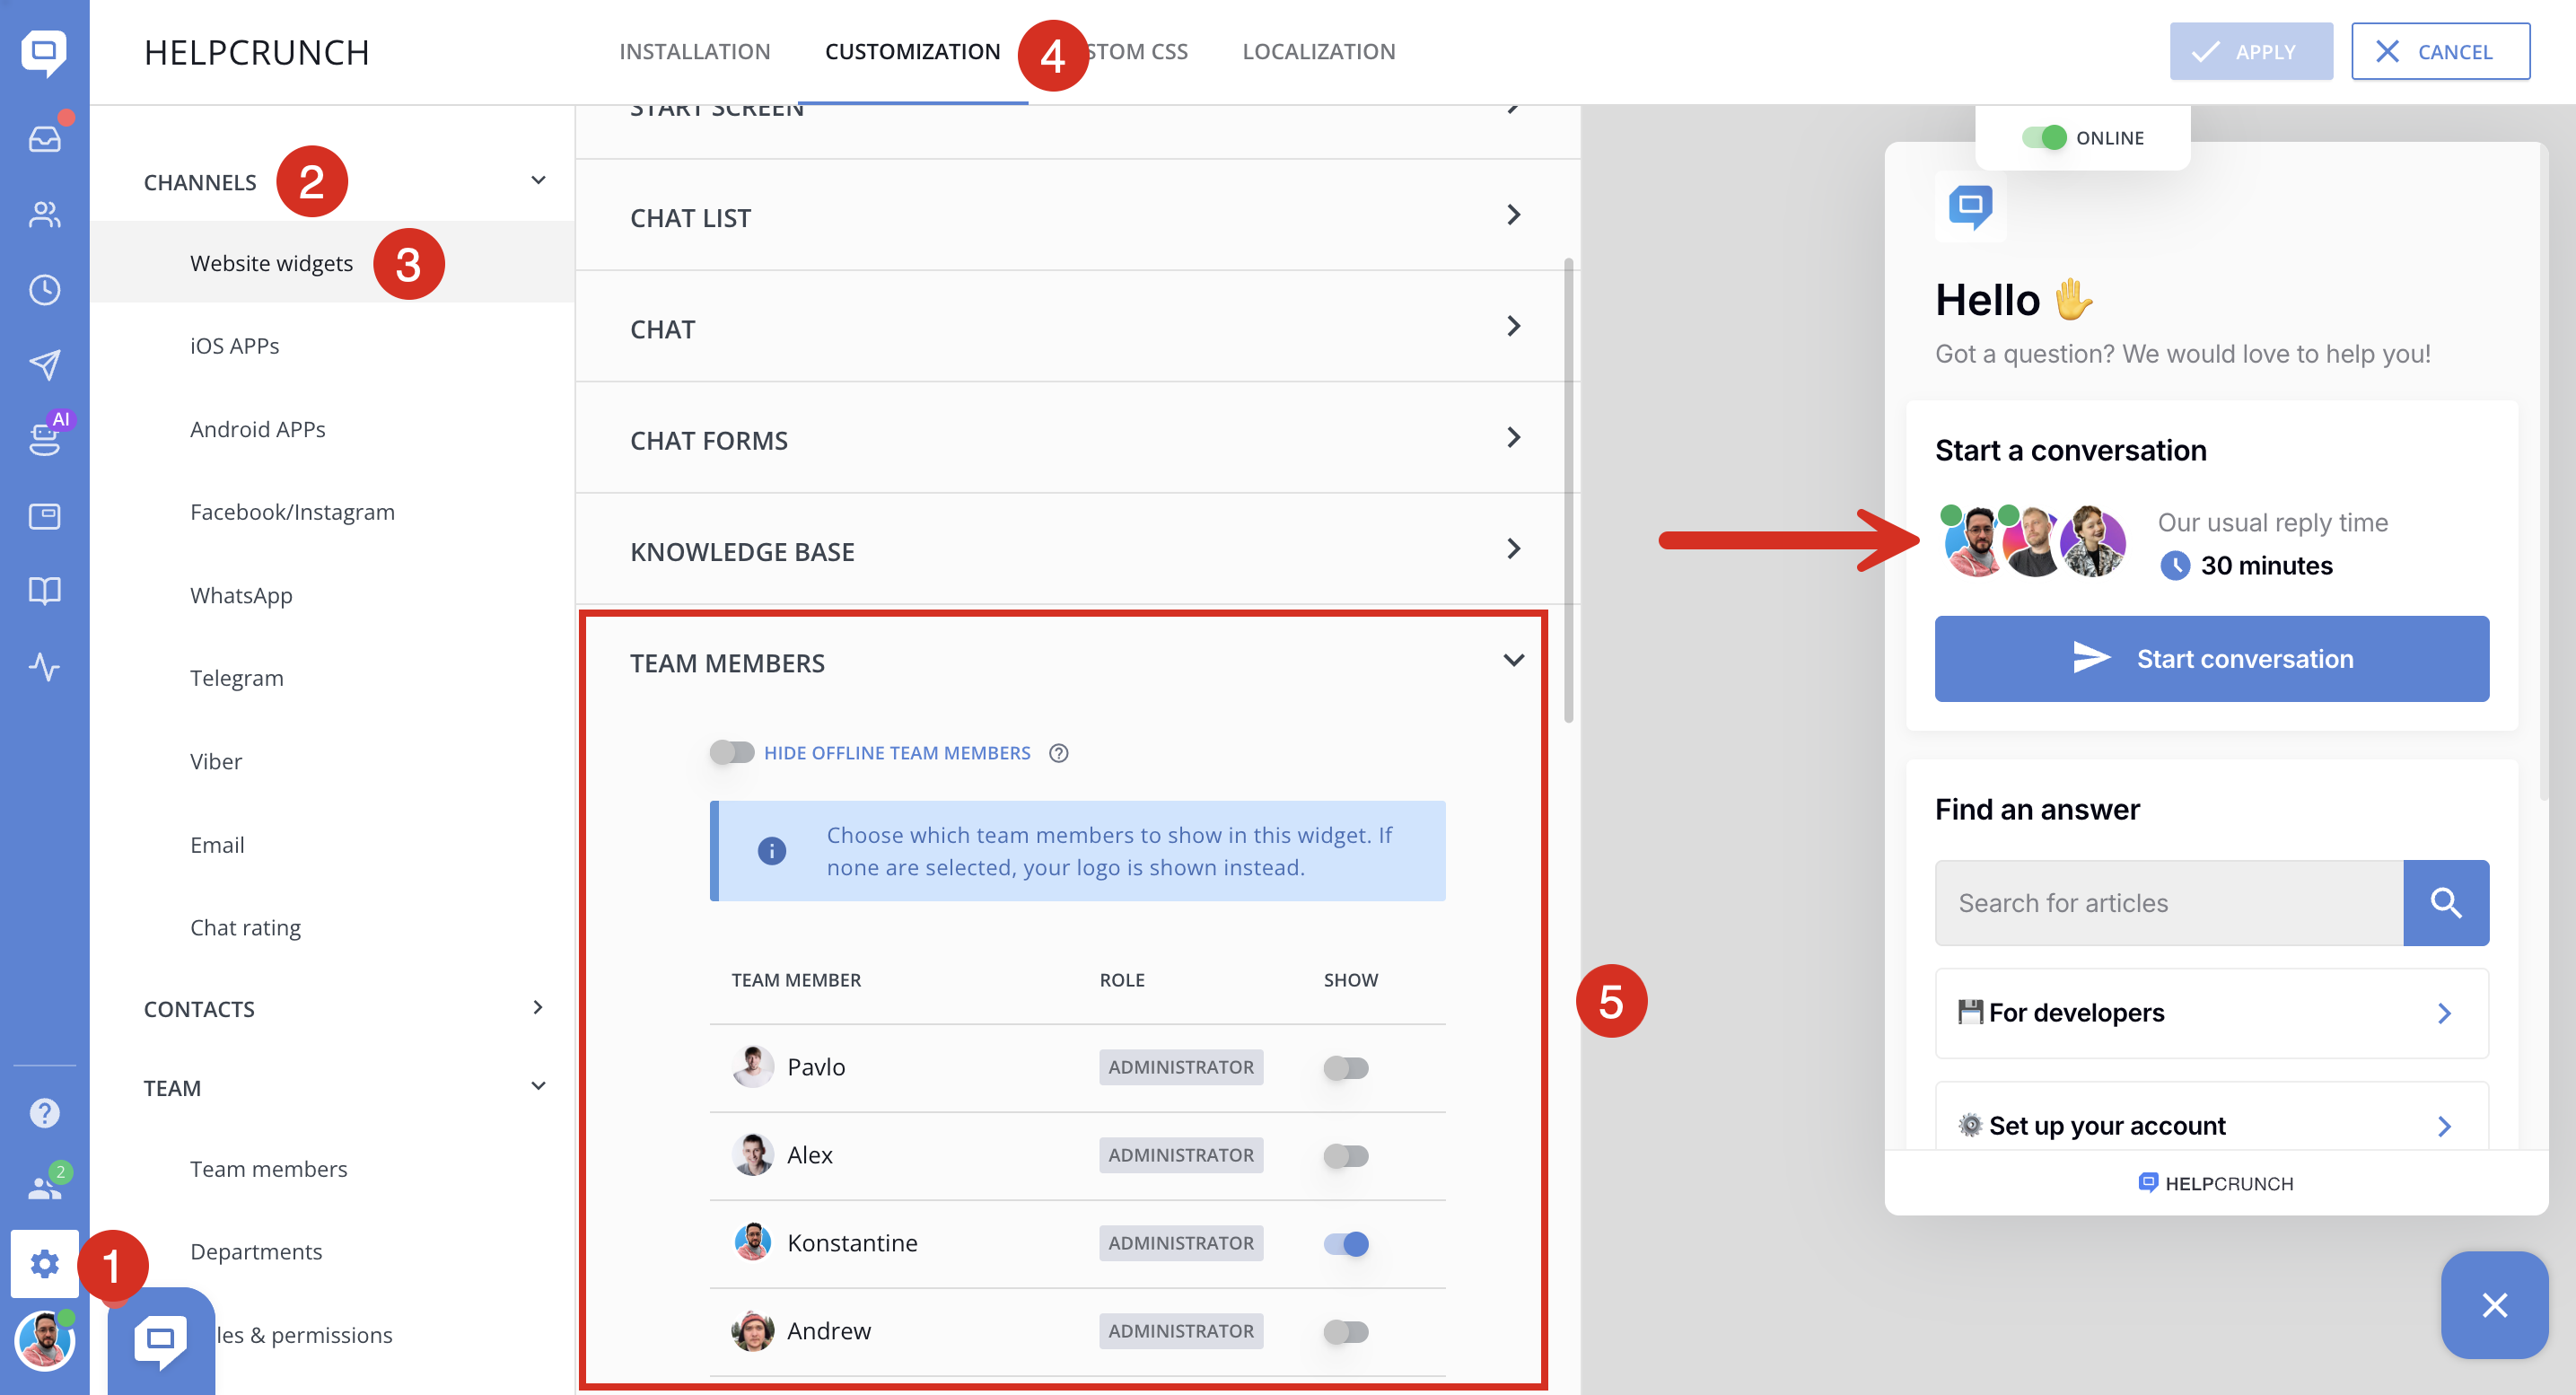
The selected team members’ avatars will appear in the widget’s Start a conversation section. You can check the result immediately in the widget preview on the right.
If no team members are selected, your company logo will be displayed instead.
Hide offline team members
Enable Hide offline team members if you want the widget to display only selected team members who are currently online.
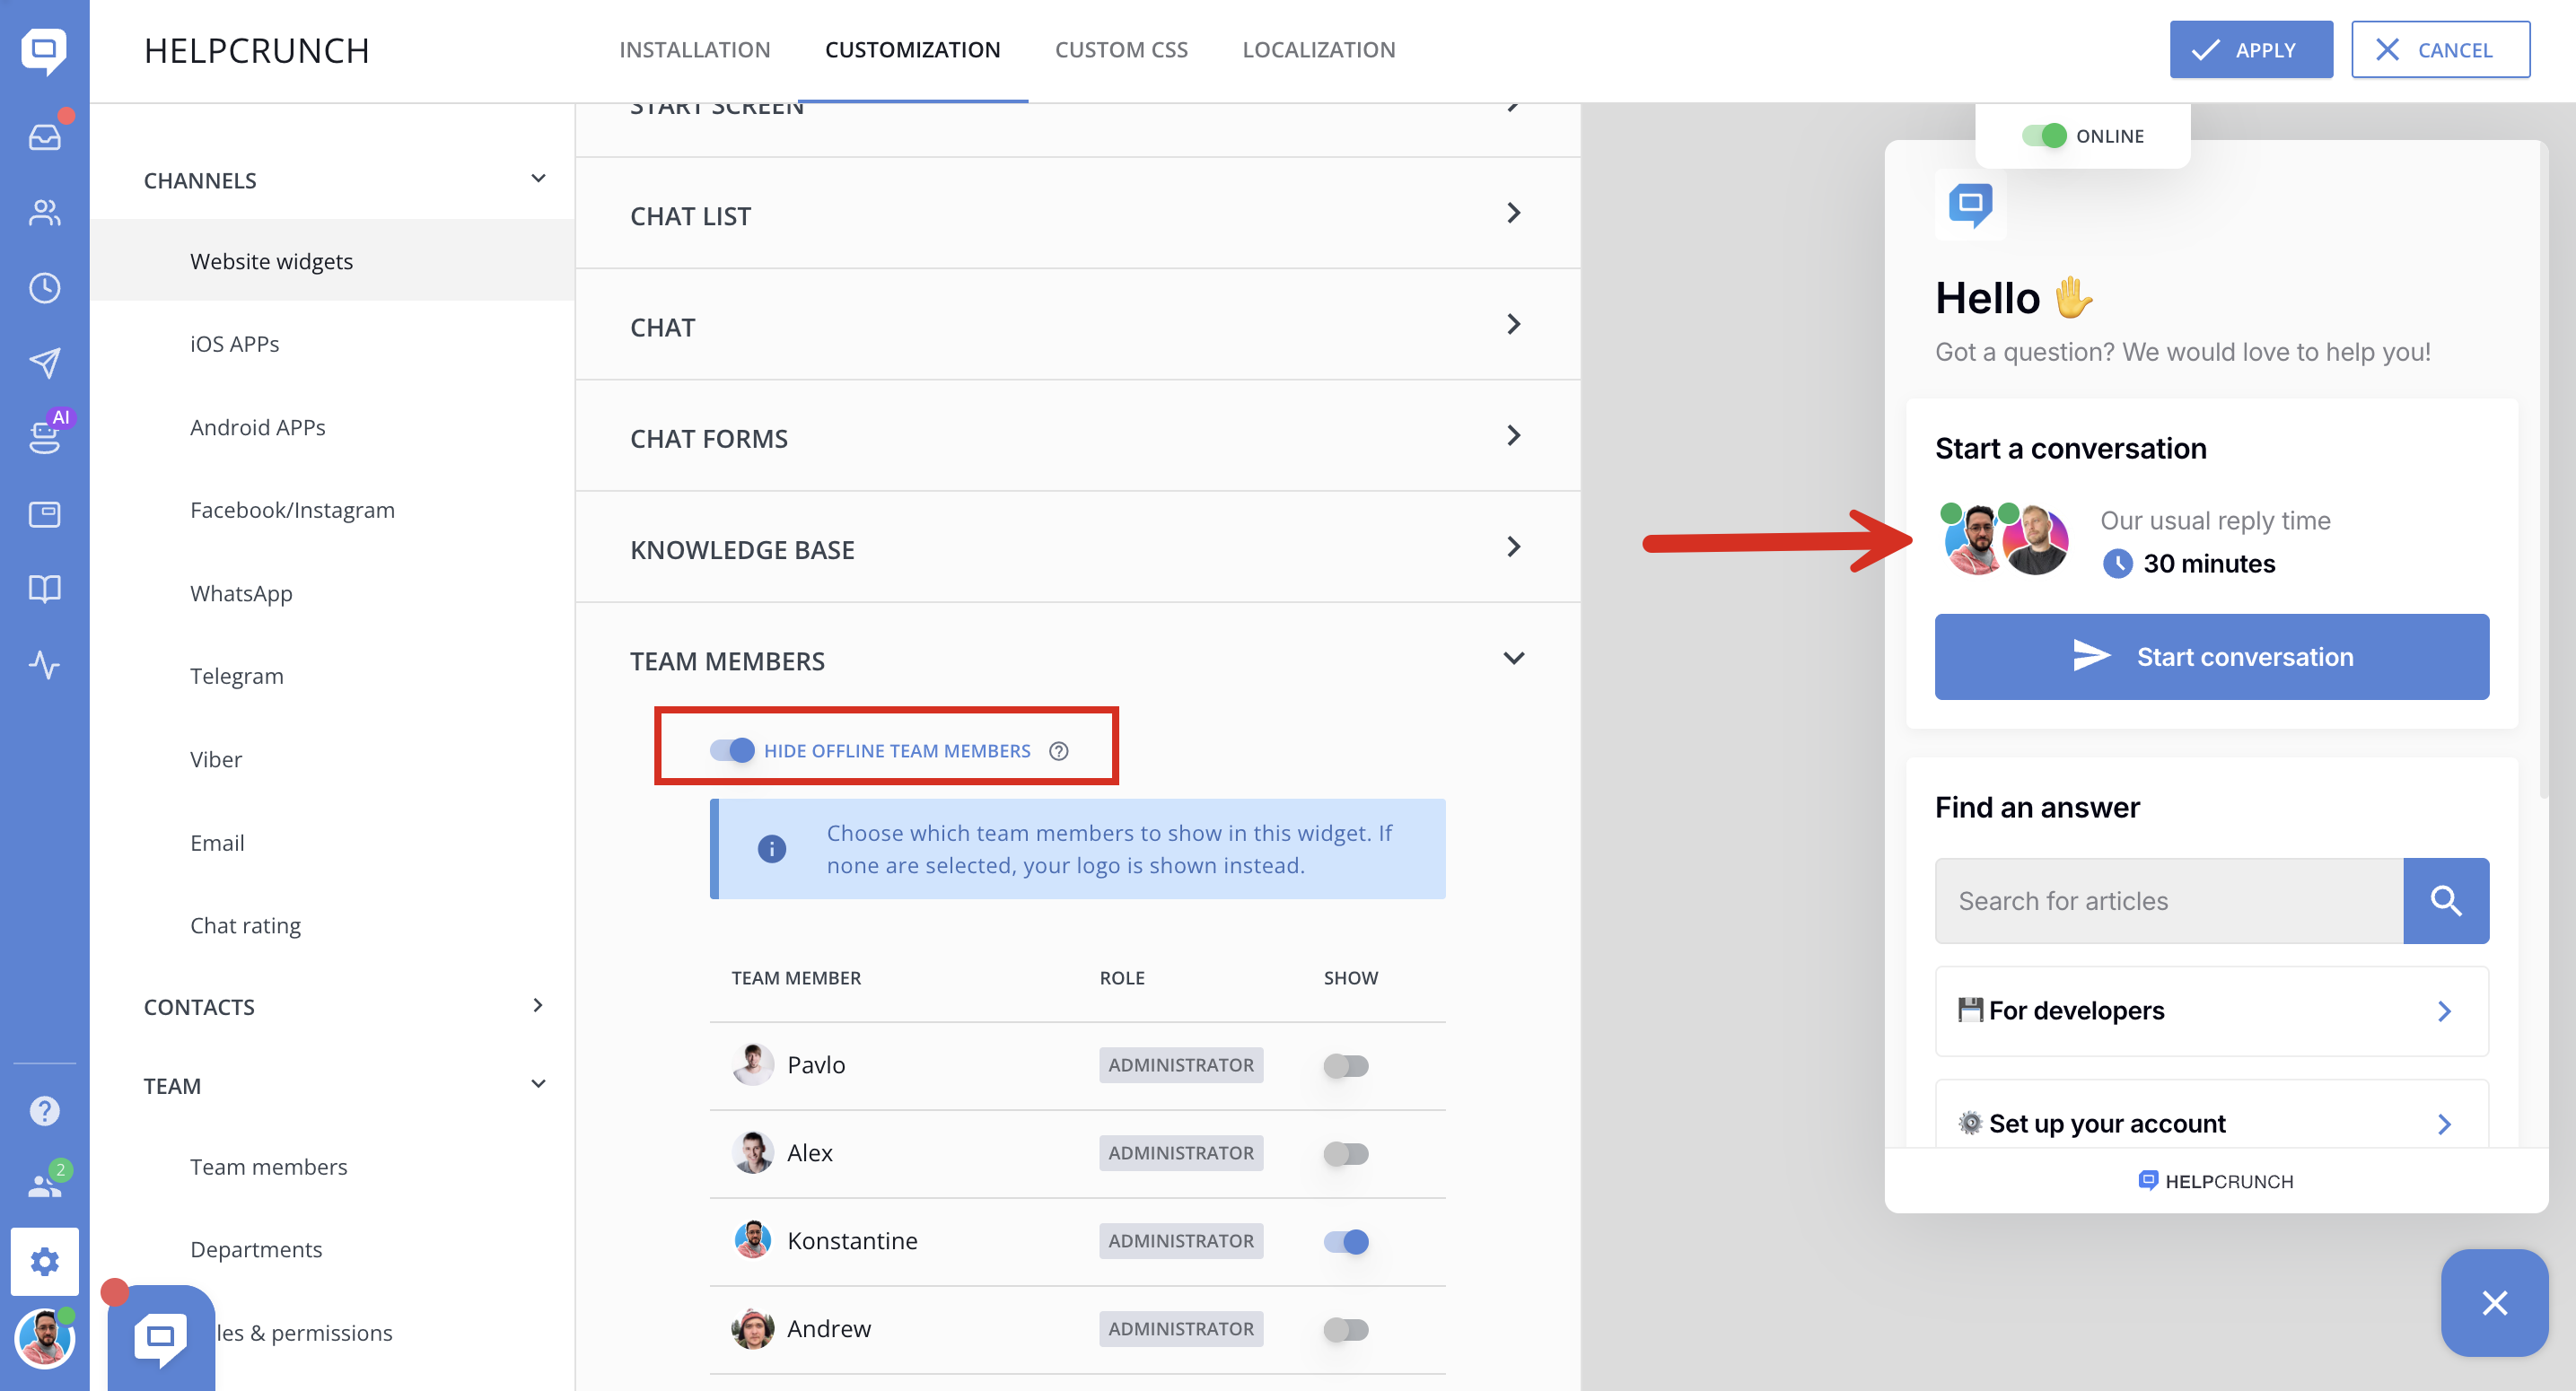
When this option is disabled, all team members selected for this widget can be displayed regardless of their availability.
Click Apply to save your changes.
You can configure the team member list separately for every web widget, making it easier to maintain a consistent customer experience across multiple brands, websites, products, or regional teams.
Note: Chat auto and manual messages display the name and avatar of the agent selected as the sender in the message settings, regardless of the agent’s online/offline status and the widget’s team member visibility settings.
The selected sender is displayed even if they are not included in the widget’s "Team Members" list.
For example, if your widget displays only Agent Anna, a chat auto or manual message sent on behalf of Agent Bob will still appear with Agent Bob’s name and avatar. Read more about auto and manual messages.
Hint: If you manage multiple products in a single HelpCrunch account, you can also set separate operating hours for each widget instead of using the default operating hours across all widgets.
