After the chat widget installation and setting up user auth mode, It's send custom data for your registered users.
HelpCrunch widget allows you to collect your users’ data and use it inside your HelpCrunch account. You can pass the user data during the widget initialization (as we did with user authentication mode) or you can update it dynamically when required.
Dynamically update main user attributes
Main attributes of a customer can be updated at any time, by calling the updateUser method:
var user = {
email: '<user email / email>',
name: '<user name / string>',
user_id: '<user id / string>',
phone: '<phone number / string>'
};
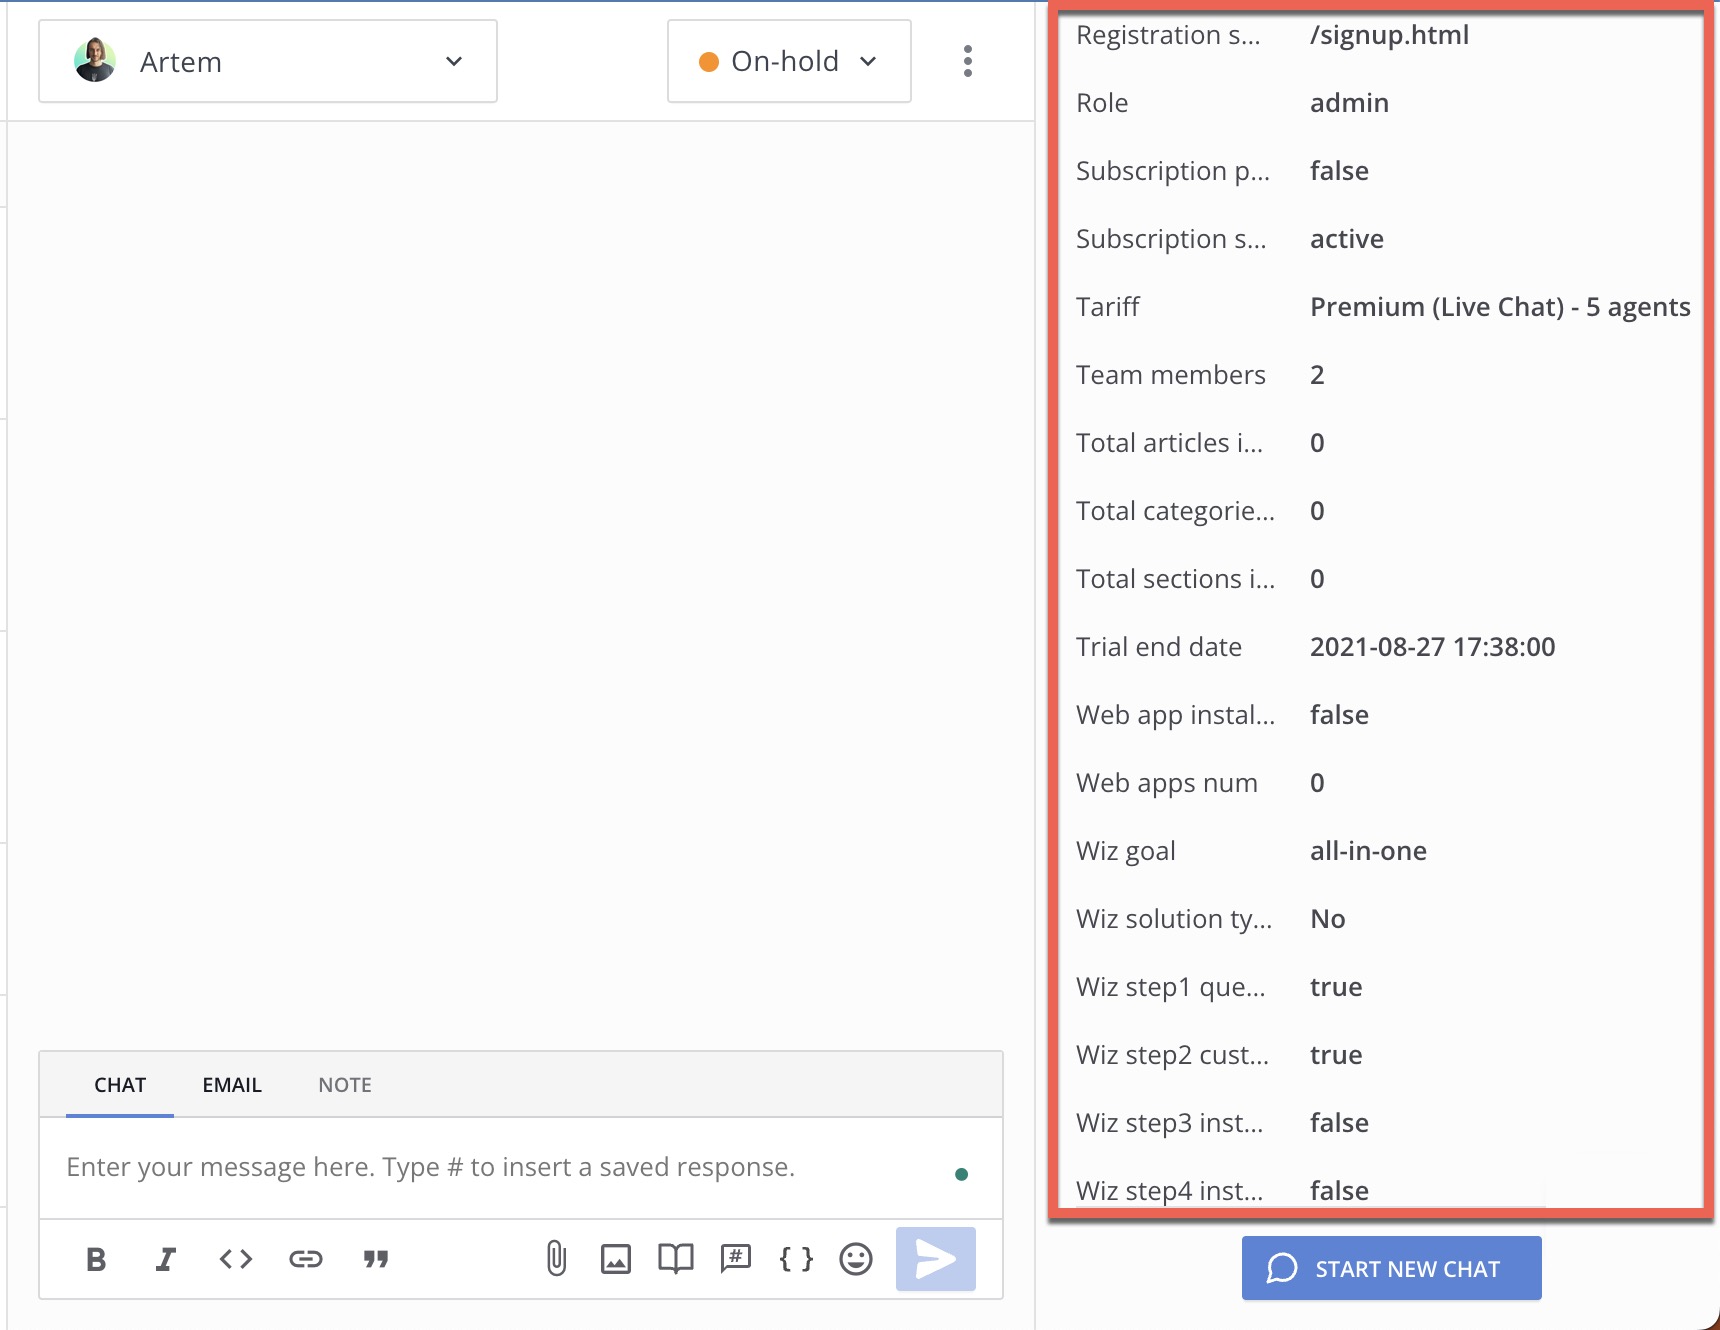
HelpCrunch('updateUser', user);After you added the user data and called HelpCrunch('updateUser', user); this data will appear in this the user's profile in HelpCrunch:

Dynamically update custom user attributes
In addition to the user’s name / email / ID, HelpCrunch lets you to create and update additional attributes in the custom_data object, by calling updateUserData method: HelpCrunch('updateUserData', userData);.
In userData you can send any information about users you wish to track as an object of key/value pairs, that can contain numbers, strings or boolean data. This feature will only work if your user has a user_id attribute:
var userData = {
  money_spent: 2500,
  subscription: 'gold',
  accepted_agreement: true,
};
HelpCrunch('updateUserData', userData);
Custom attributes will appear in customer's profile, in the "Custom Data" section, just below the main user attributes (name, email, user id):
Also, you will be able to search or filter users by custom data on the “Contacts” page and also create user segments based on it.
There are 6 types of custom data you can search by:
- integer
- float
- string
- URL
- boolean
- DateTime (example 2021-06-09T13:16:37+03:00)