Legacy FCM APIs
Google has announced that starting June 20, 2024, the legacy Firebase Cloud Messaging (FCM) APIs will be discontinued. This change will cause the legacy APIs to return an increased number of error responses. The discontinued APIs will be completely shut down by July-August 2024.
Apps using the deprecated FCM legacy APIs for HTTP and XMPP should migrate to the HTTP v1 API as soon as possible. Sending messages (including upstream messages) with those APIs will be removed on June 21, 2024. Read more here.
What does this mean for you?
If you continue using the legacy Firebase/FCM API keys, push notifications from the HelpCrunch Android SDK will stop working. We've handled everything on our end. You just need to generate a new private key file via the Firebase console and upload it to your HelpCrunch account. Follow the steps below to complete this process.
Generate a private key file and upload it to HelpCrunch
STEP 1. Log in to your Firebase console.
STEP 2. Open the project for which you want to generate the private key.
STEP 3. Navigate to Project settings → Service accounts.
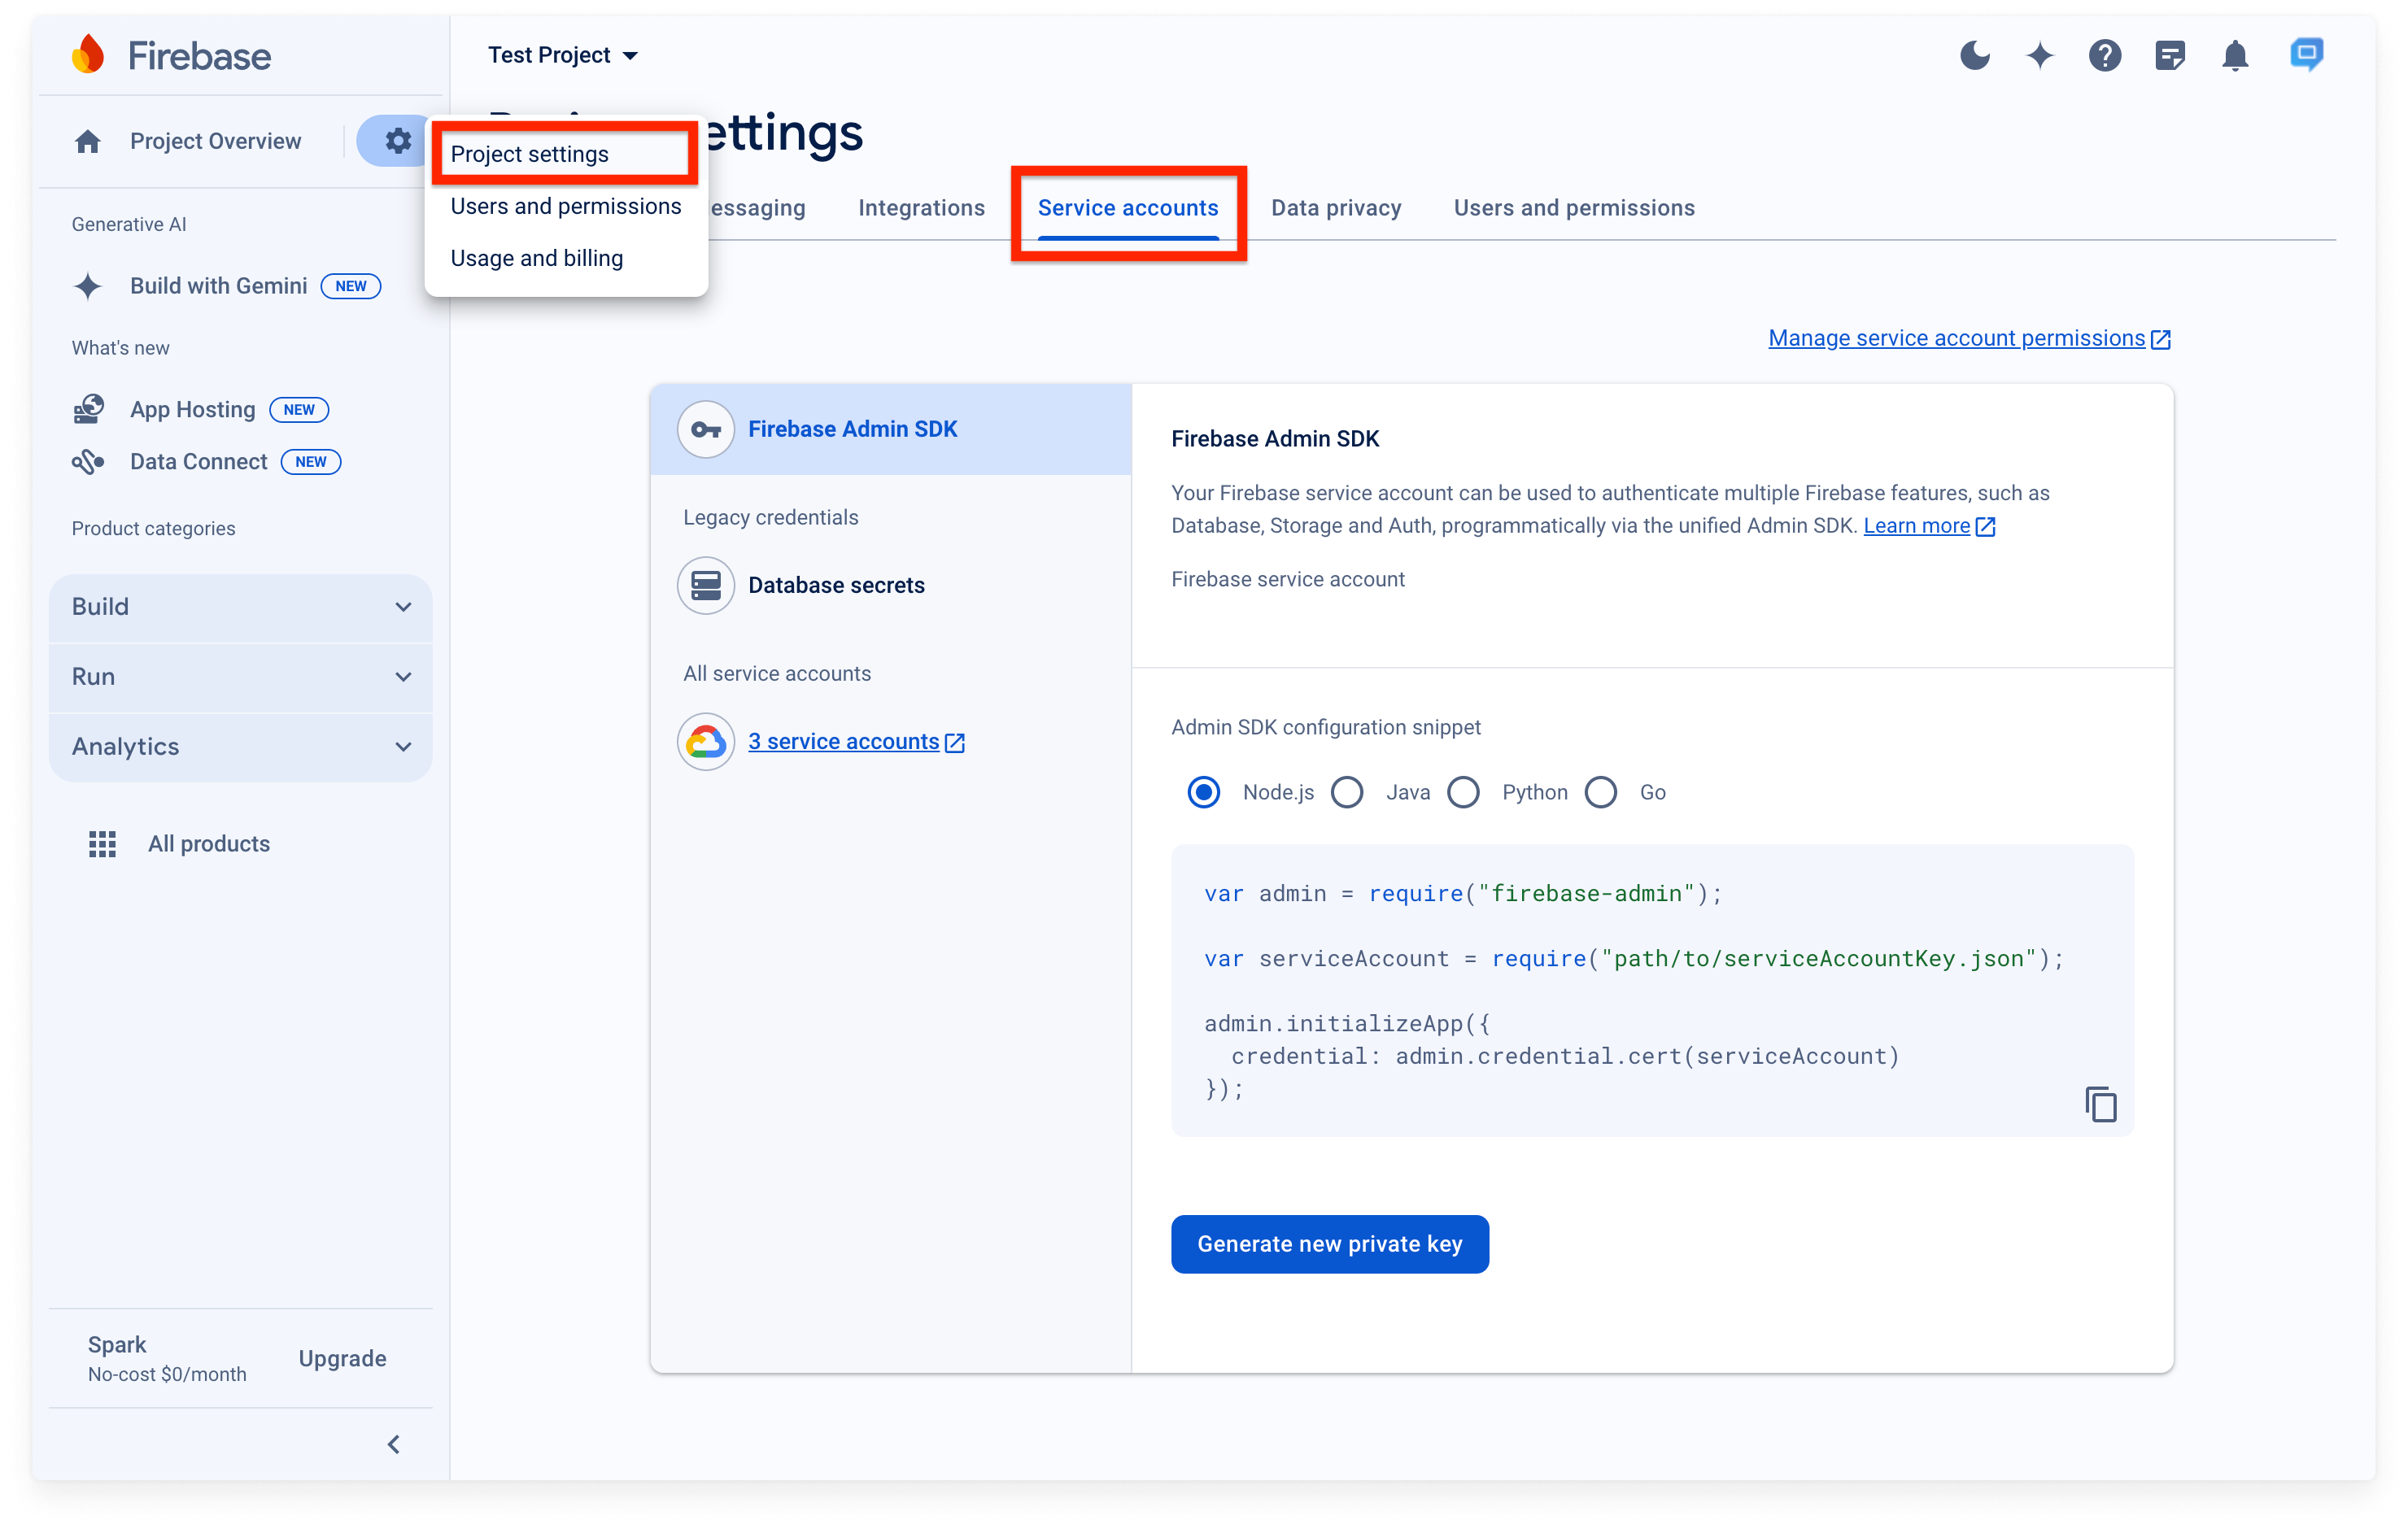
STEP 4. Click the Generate new private key button.
STEP 5. Confirm by clicking the Generate Key button.
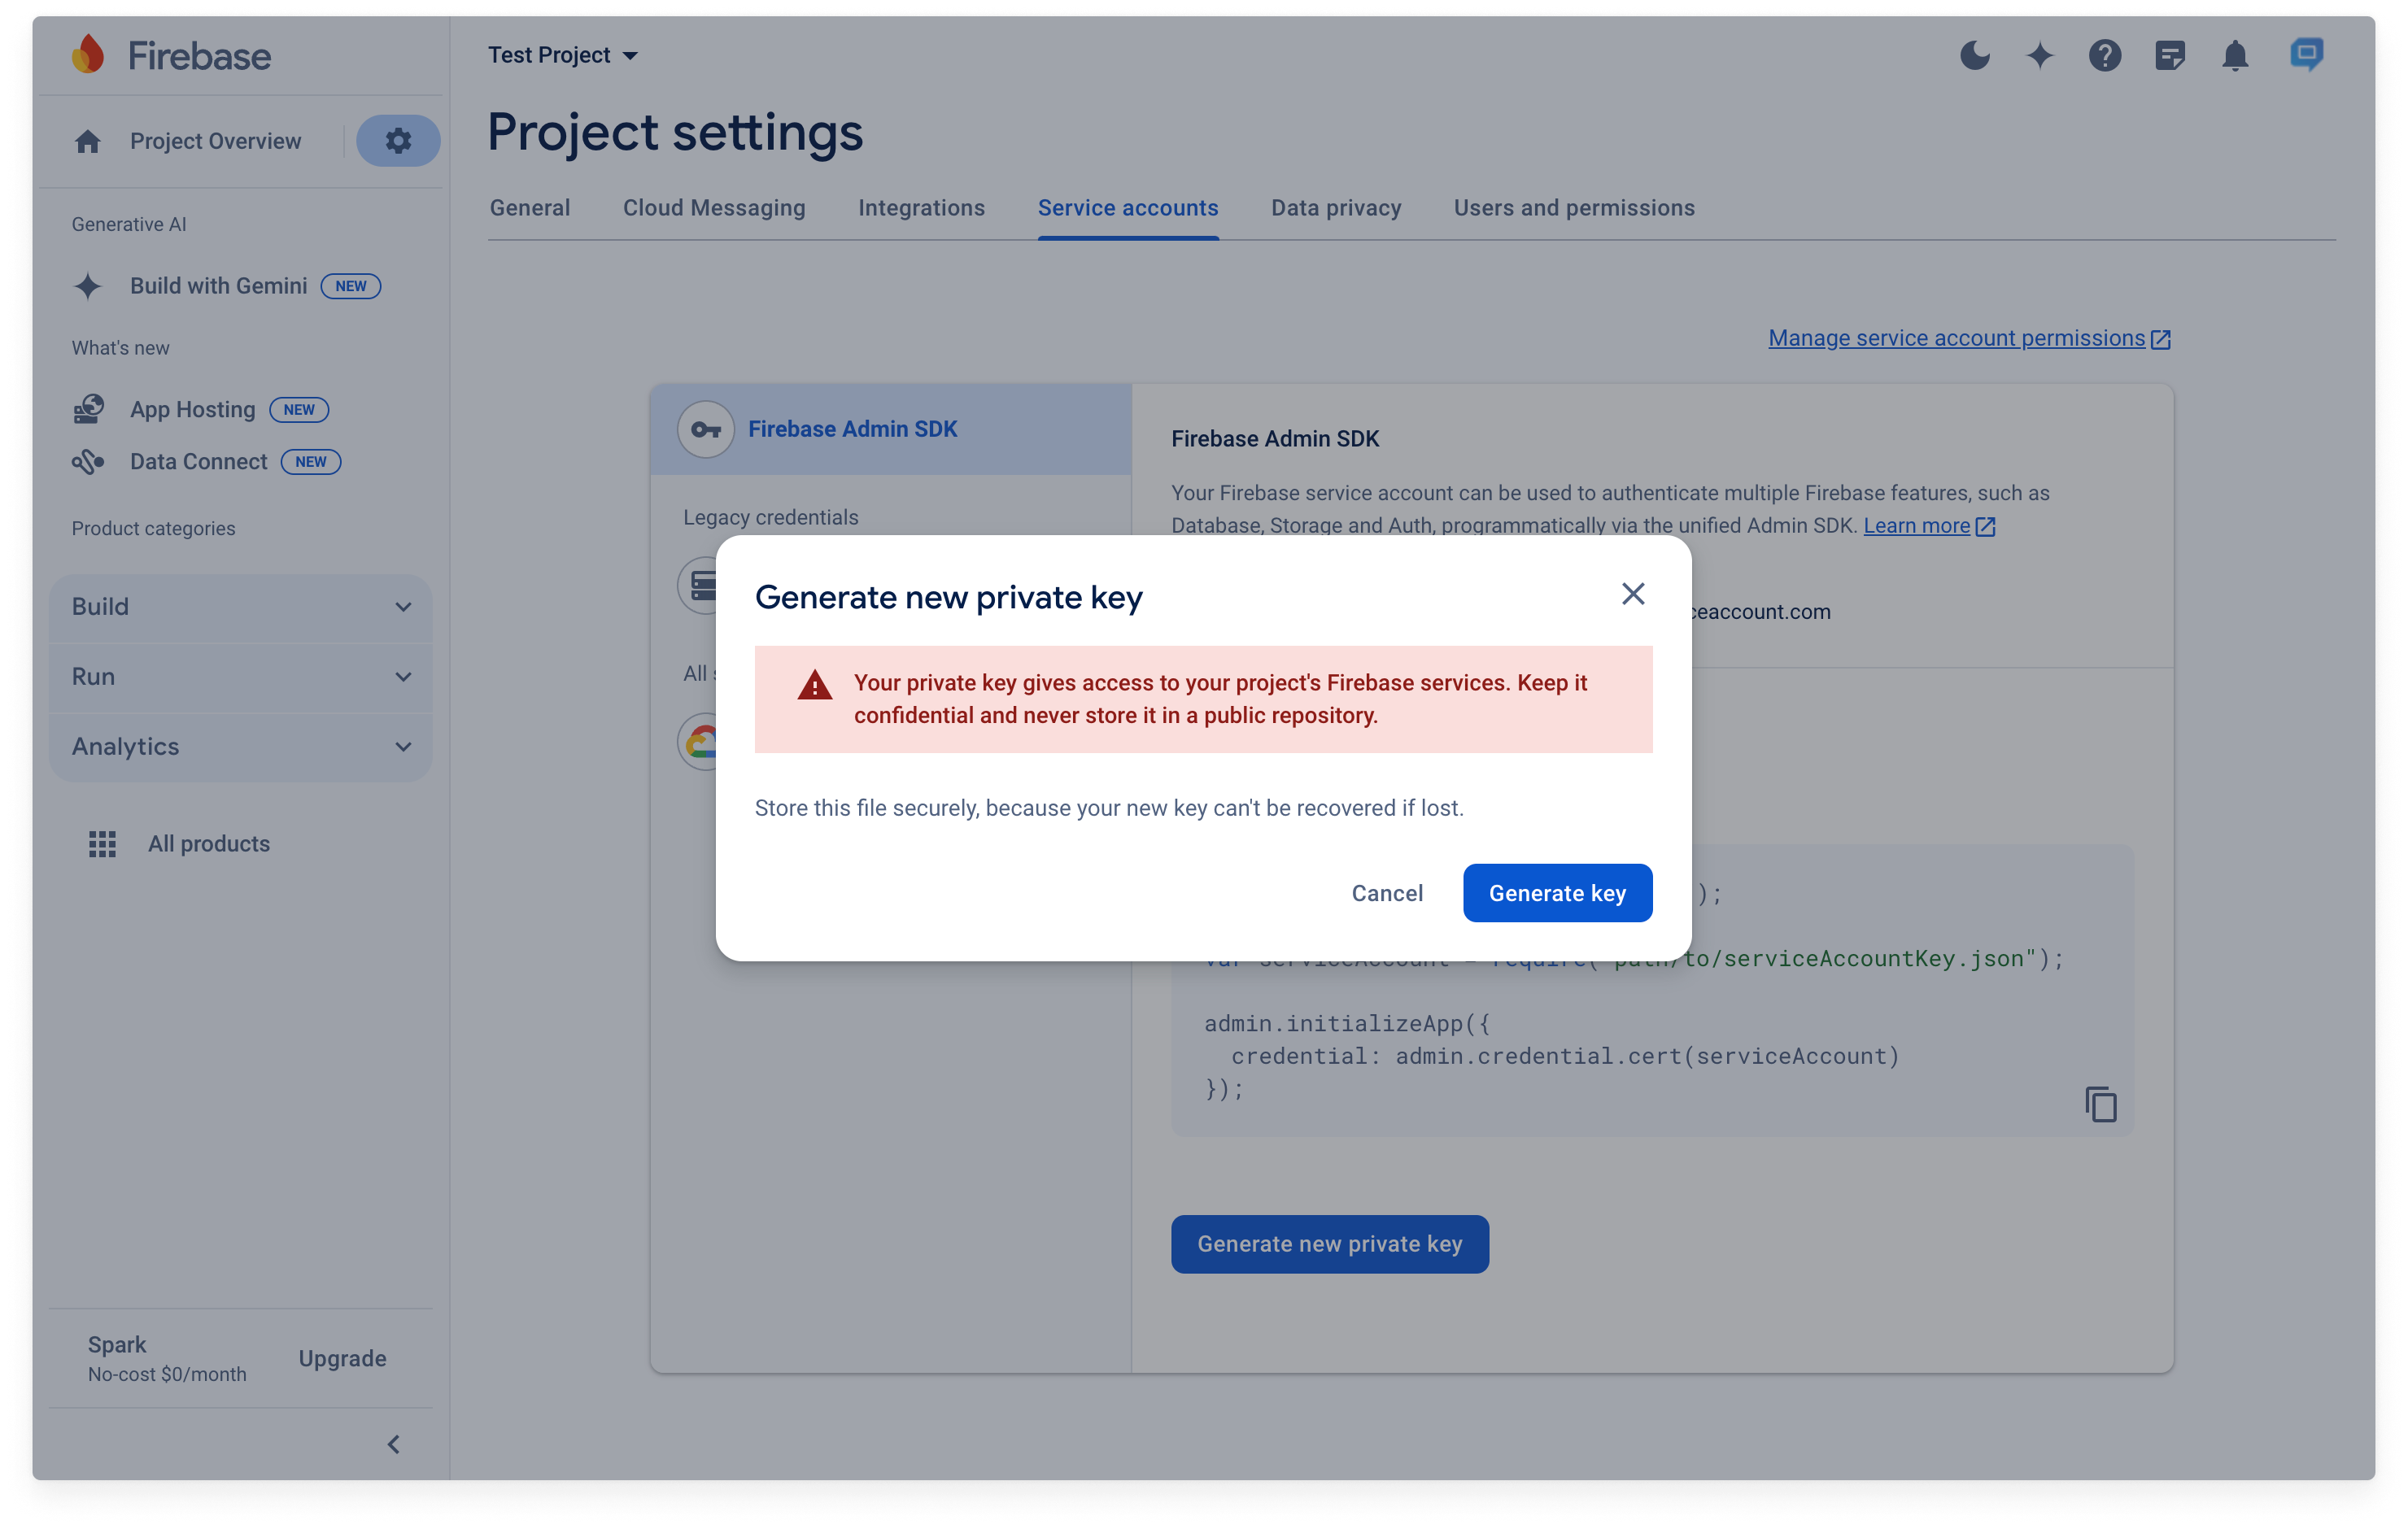
STEP 6. Securely store the JSON file containing the key on your desktop.
STEP 7. Log in to your HelpCrunch account.
STEP 8. Navigate to Settings → Channels → Android APPs
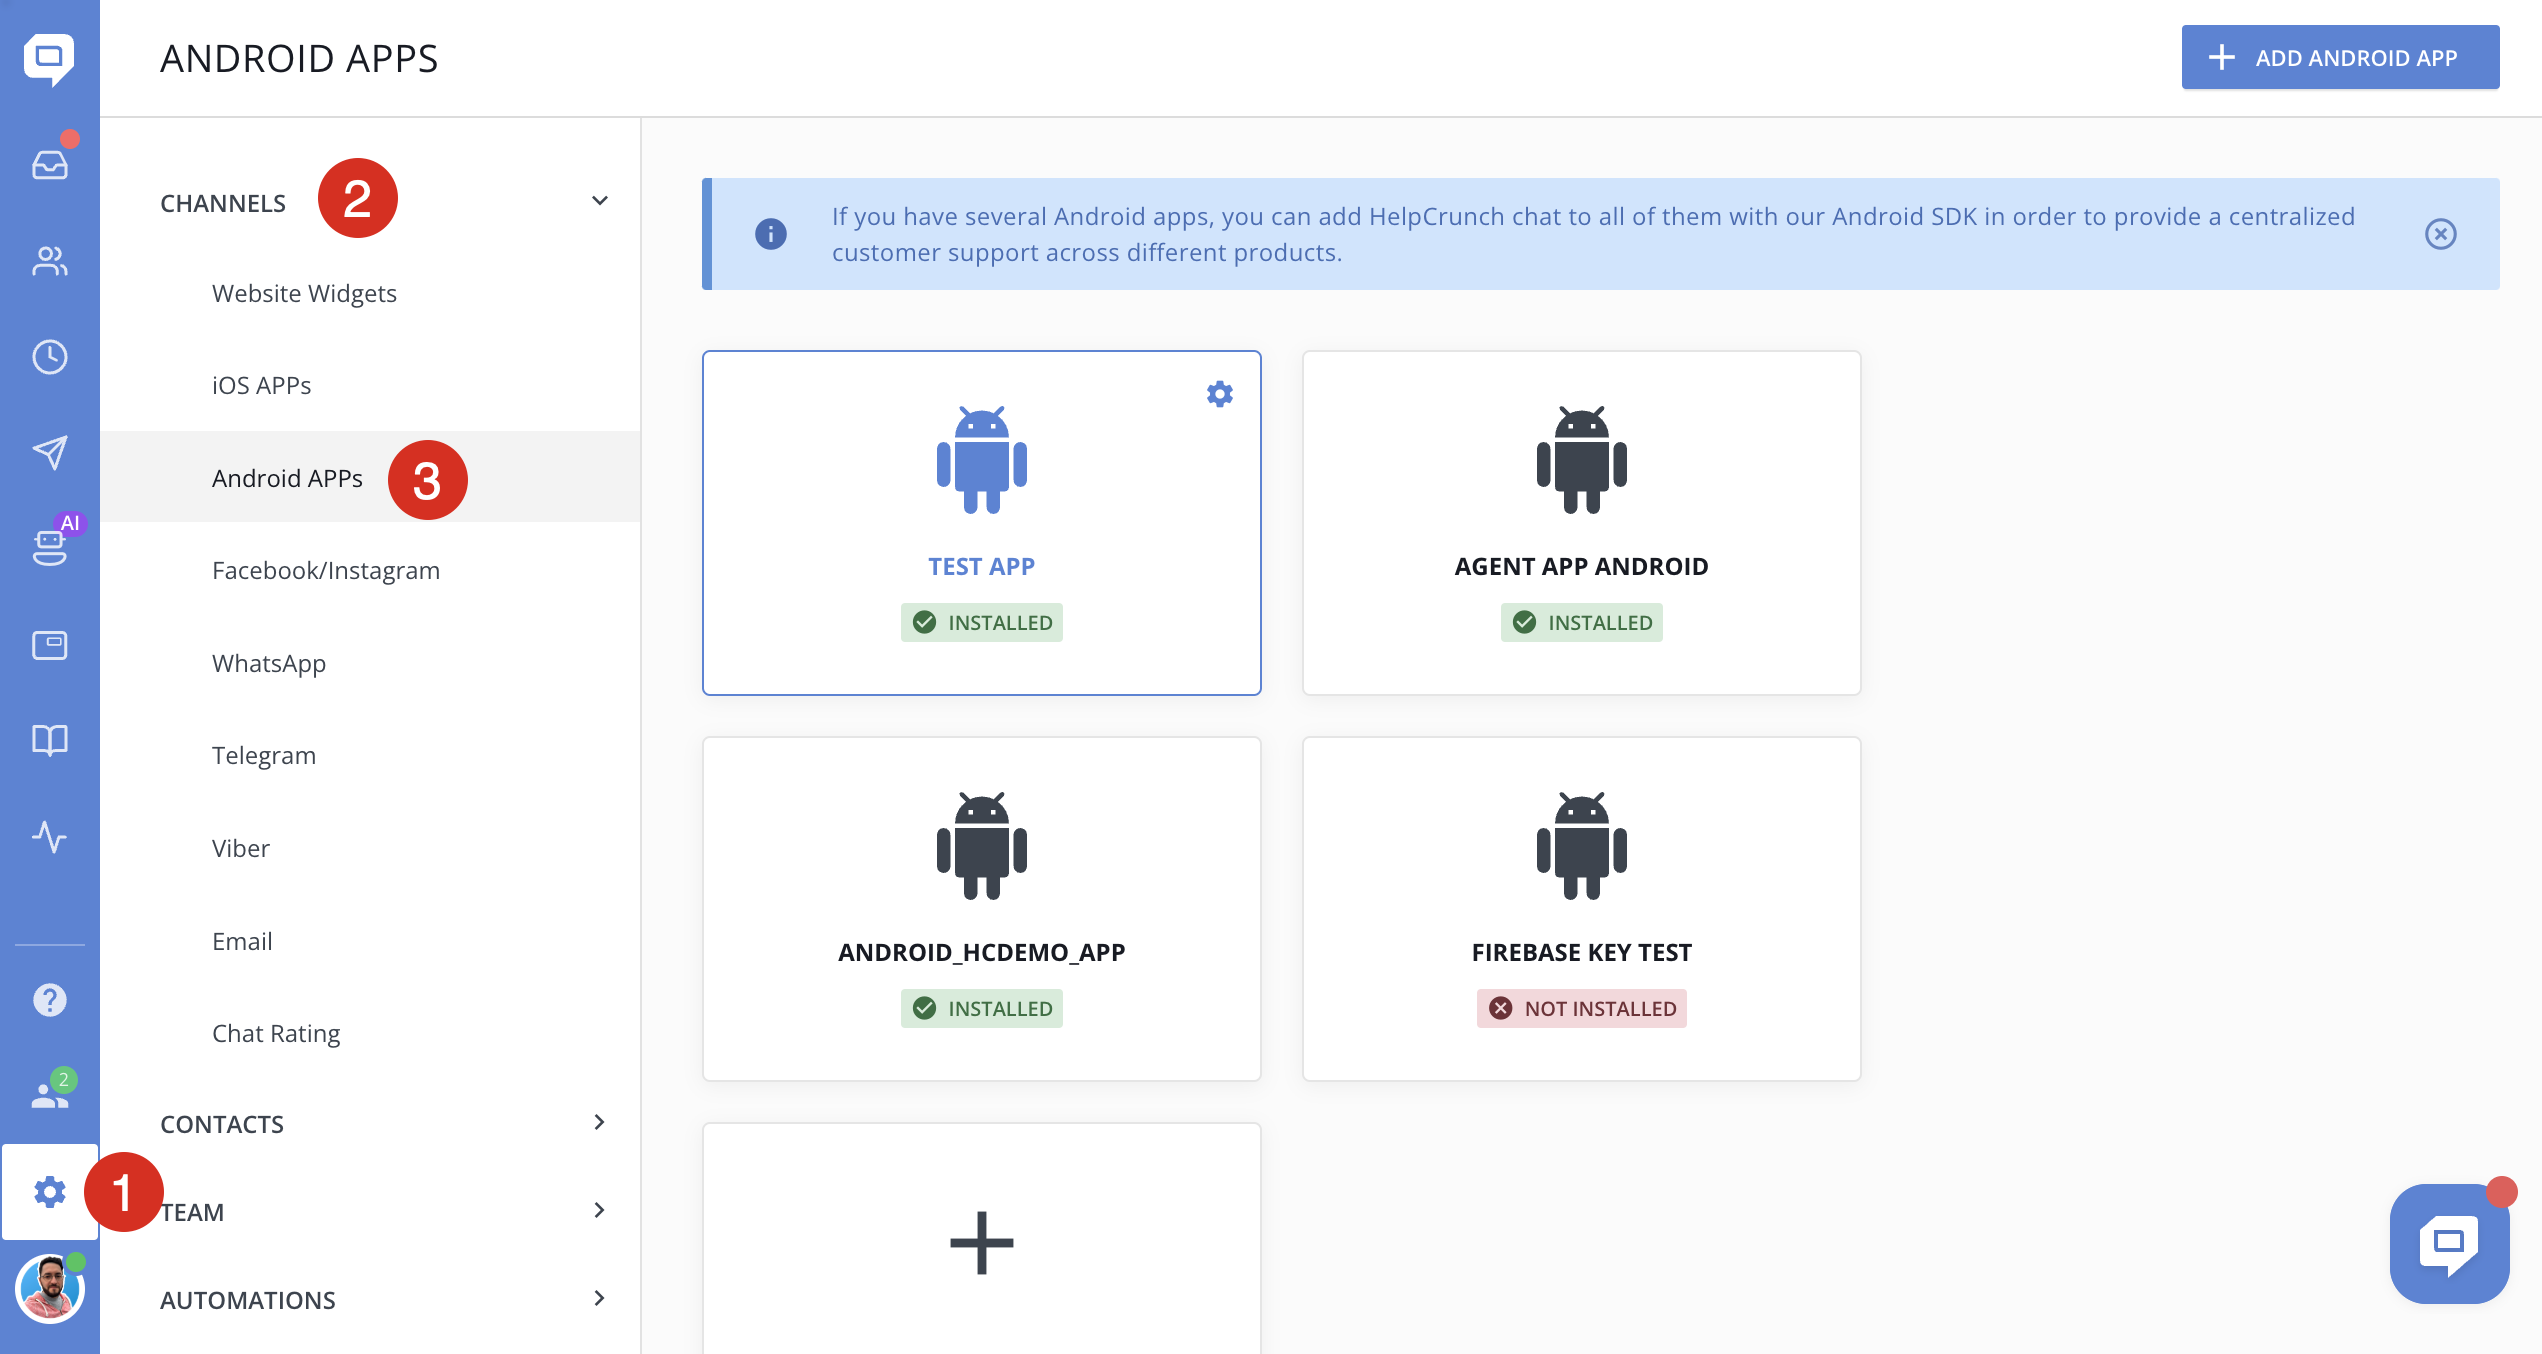
STEP 9. Select the Android app or create a new one.
STEP 10. Open the Installation tab and locate the Google Service Account Key (.JSON) field under the Setup section.
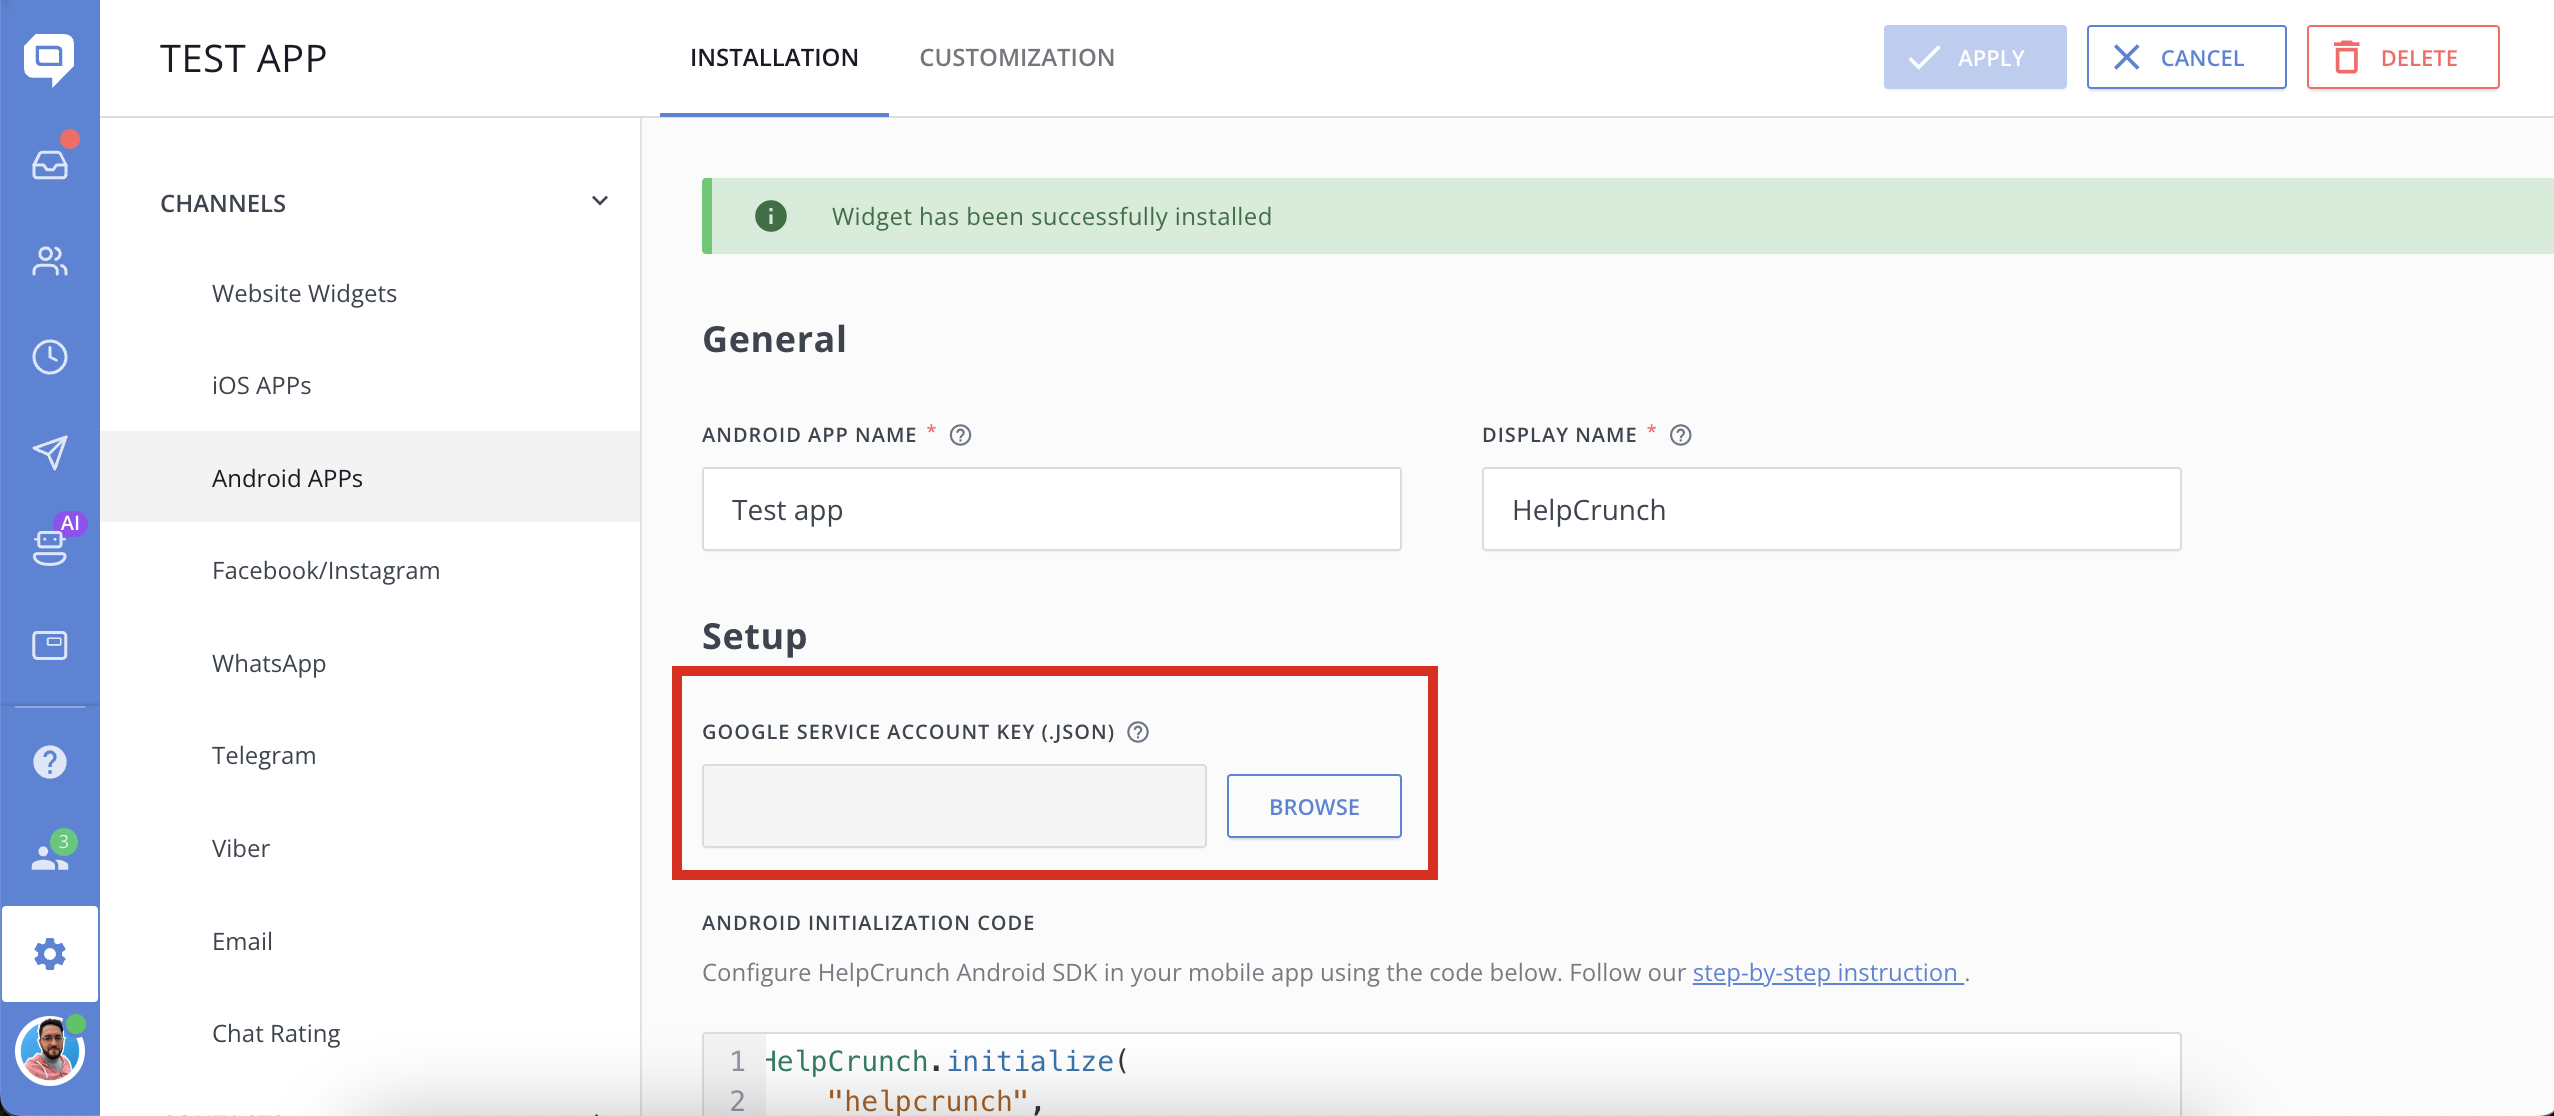
STEP 11. Upload your private key JSON file by clicking on the Browse button.
STEP 12. Once uploaded, confirm the changes by clicking the Apply button.
Read more on how to enable push notifications for Android here.