Troubleshooting push notifications in the HelpCrunch iOS SDK involves several key steps to ensure proper configuration and functionality.
1. Verify Push Notification Setup
Review Developer Documentation: Ensure you've followed the HelpCrunch iOS SDK setup guide meticulously, particularly the sections on enabling push notifications.
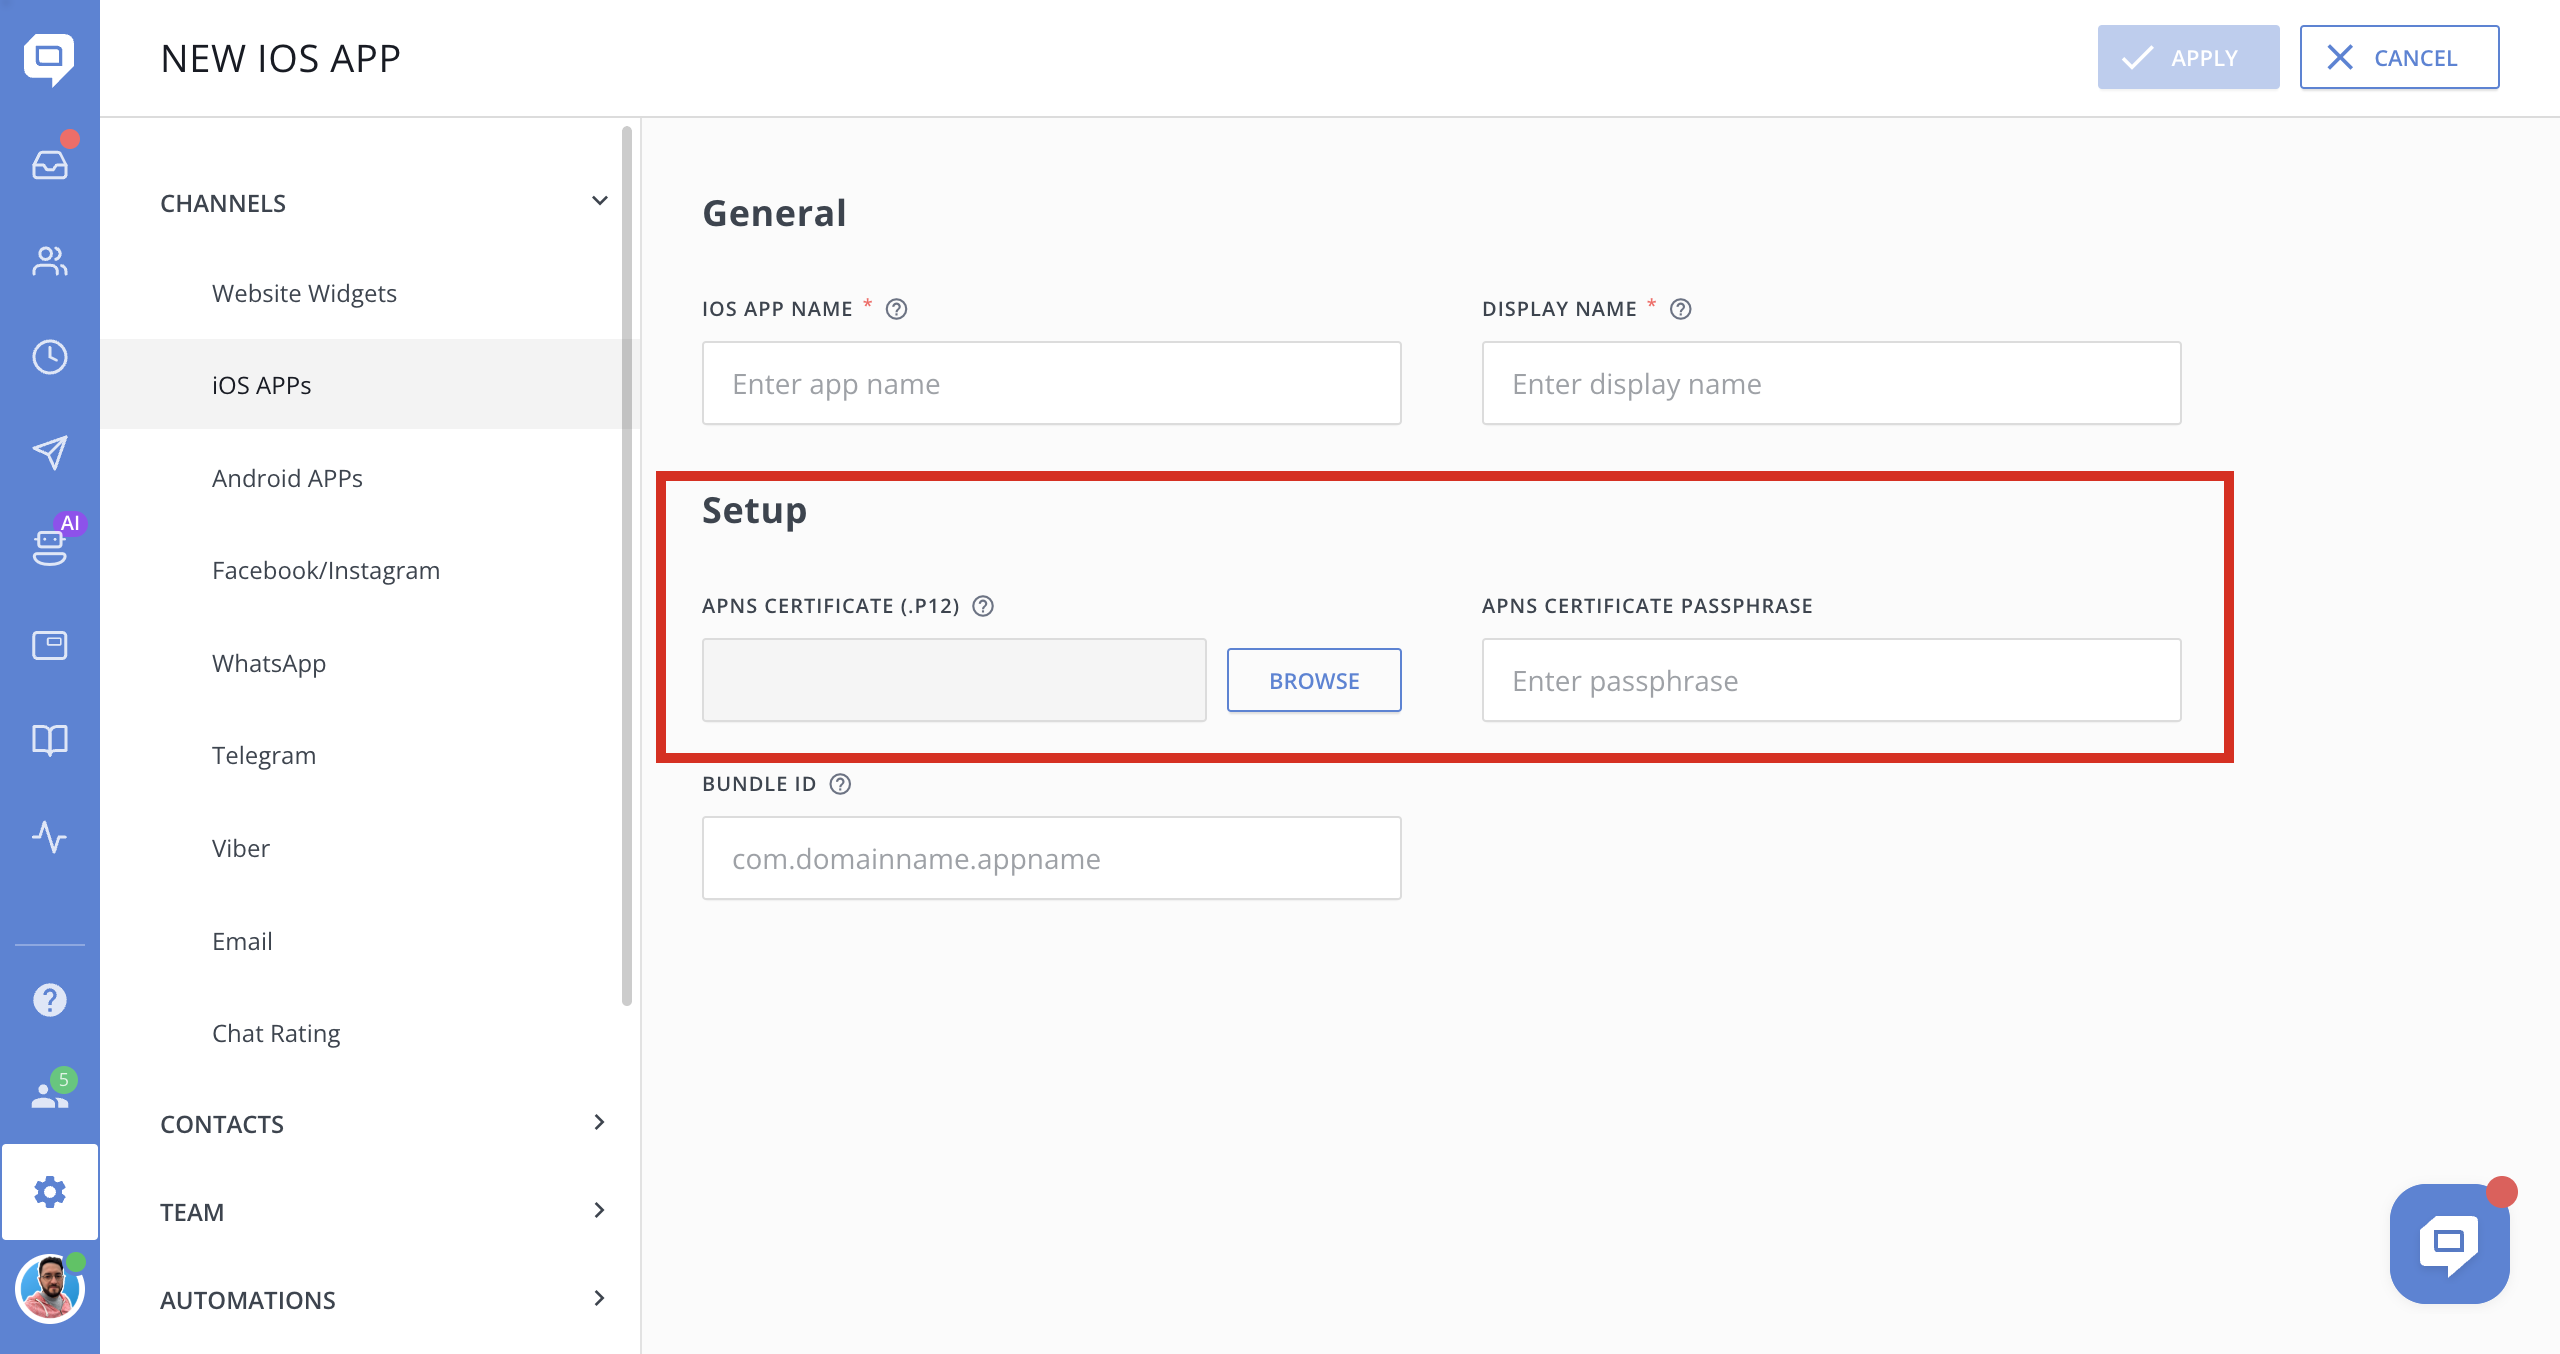
Generate and Upload APNs Certificate: Confirm that you've correctly generated and uploaded the Apple Push Notification service (APNs) certificate to your HelpCrunch account. An improperly configured certificate is a common cause of issues.
Additionally, check:
- If the PASSPHRASE is entered correctly.
- Expiration date of the certificate.
- Apple’s troubleshooting guide.
- When creating the .p12 file, be sure you are exporting the whole public certificate, not just the private certificate, which is inside it.
- Recreate .p12 again from scratch, re-upload, and see if this resolves the issue.
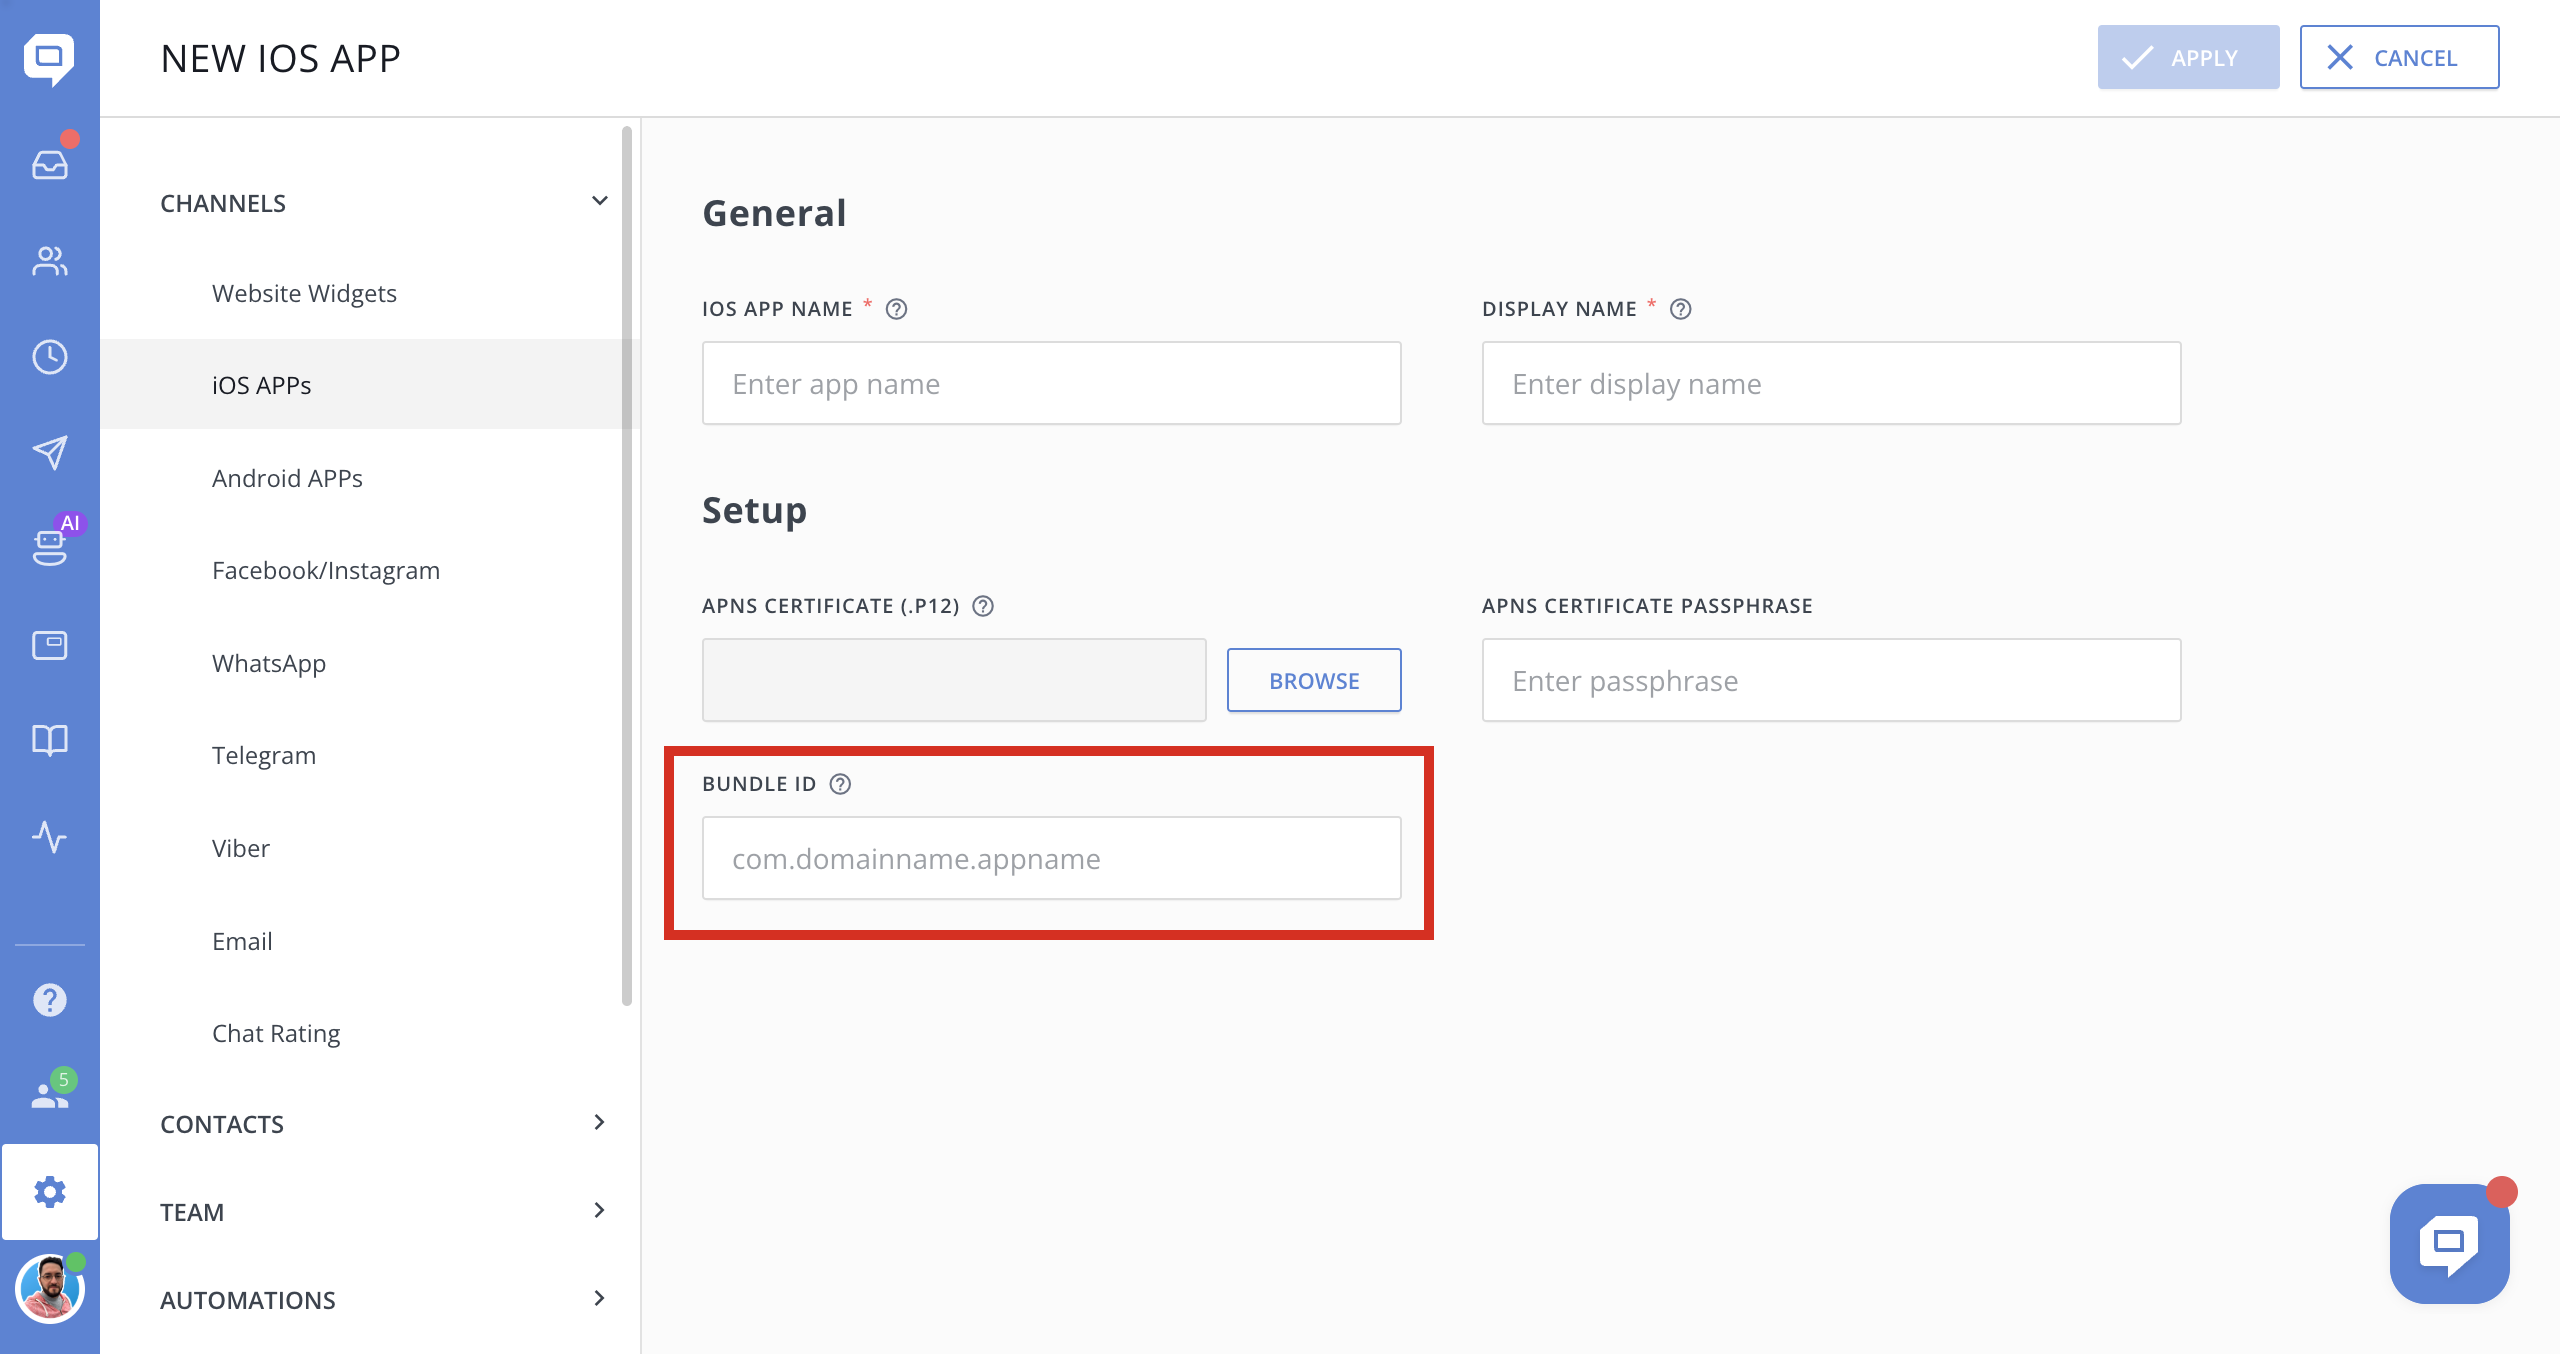
Check Your Bundle ID: Ensure that the Bundle ID of your app matches the one registered in the Apple Developer Portal and HelpCrunch settings. If the Bundle ID is incorrect or different from the one used to generate your push certificate, push notifications may not be delivered. To verify your Bundle ID:
- Open Xcode and navigate to Project Settings.
- Under General→Identity, check the Bundle Identifier.
- Compare it with the Bundle ID registered in the Apple Developer Portal and HelpCrunch settings (Settings→Channels→iOS Apps→Your_app_name).
- If there's a mismatch, update the settings accordingly and regenerate the push certificate if necessary.
2. Test Push Notifications Correctly
App State During Testing: For accurate testing, ensure your app is not running in the foreground. Push notifications may not appear if the app is active, especially if the relevant chat conversation is open.
- Initiate a chat from the client’s side.
- Fully close the application by swiping up from the bottom of the screen and removing the app from the recent apps list.
- Once the app is closed, reply to the chat from the agent’s side and check if the push notification is delivered on the mobile device.
Use Physical Devices: Remember that push notifications cannot be tested on the iOS Simulator; use a physical iOS device for testing (Testflight, for example).
3. Check Device and App Settings
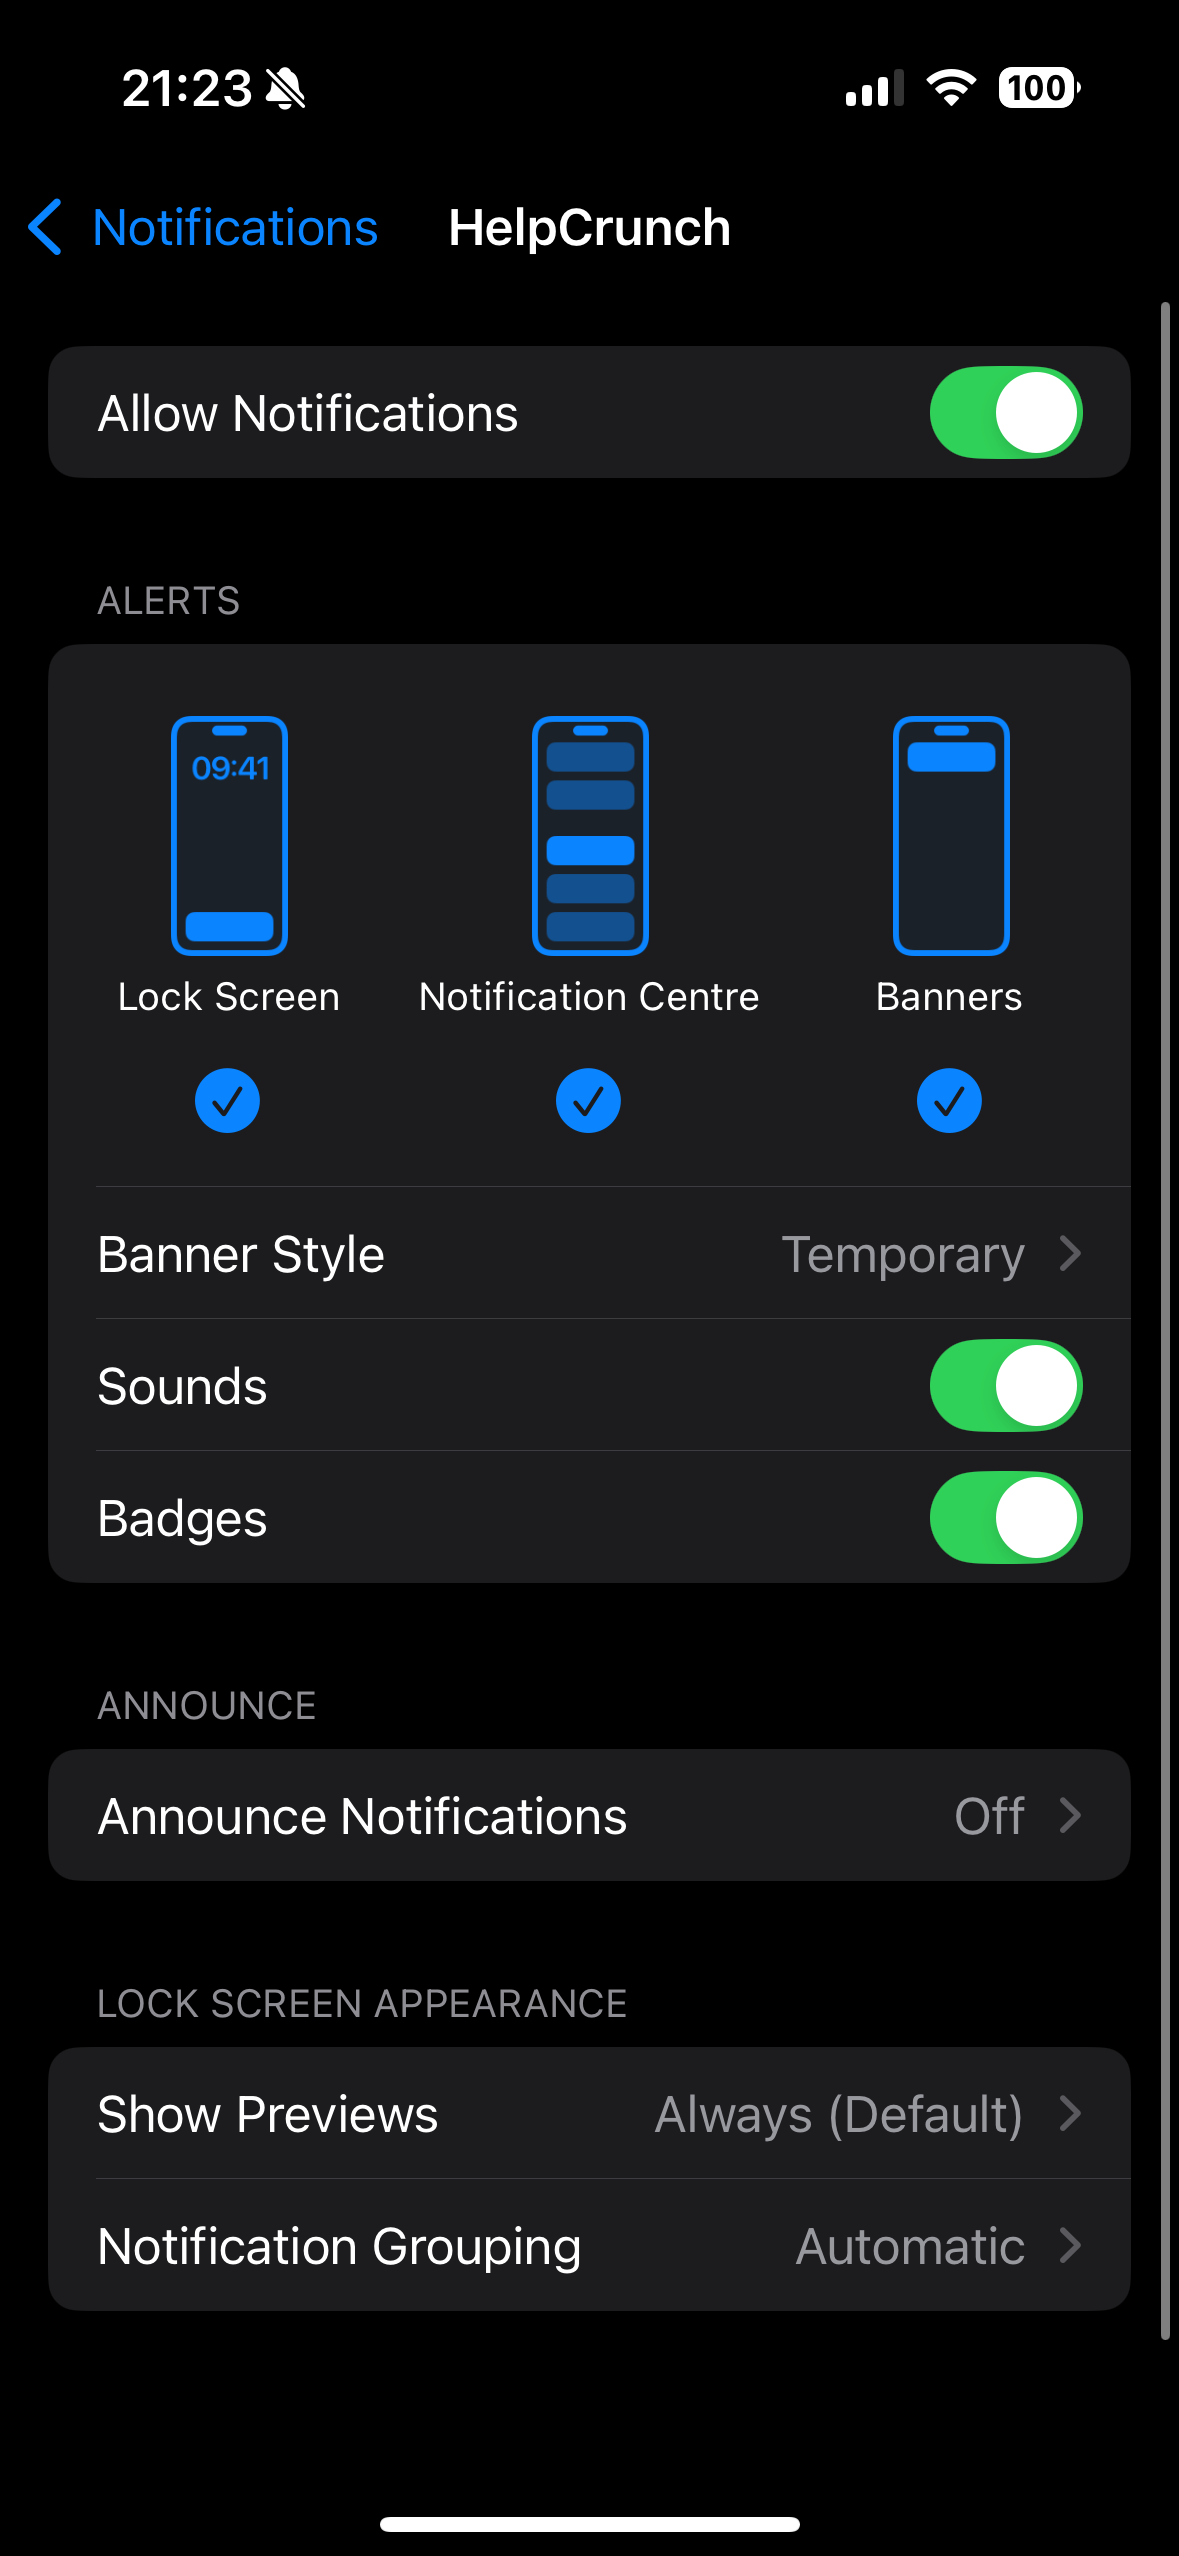
Check the settings for the apps you want notifications from:
-
In the iOS Settings app, tap Notifications.
-
Tap the app that you haven't received notifications from.
-
Enable the Allow Notifications toggle and choose whether notifications appear on your Lock Screen, in Notifications Center, or as a Banner while you use your iPhone.
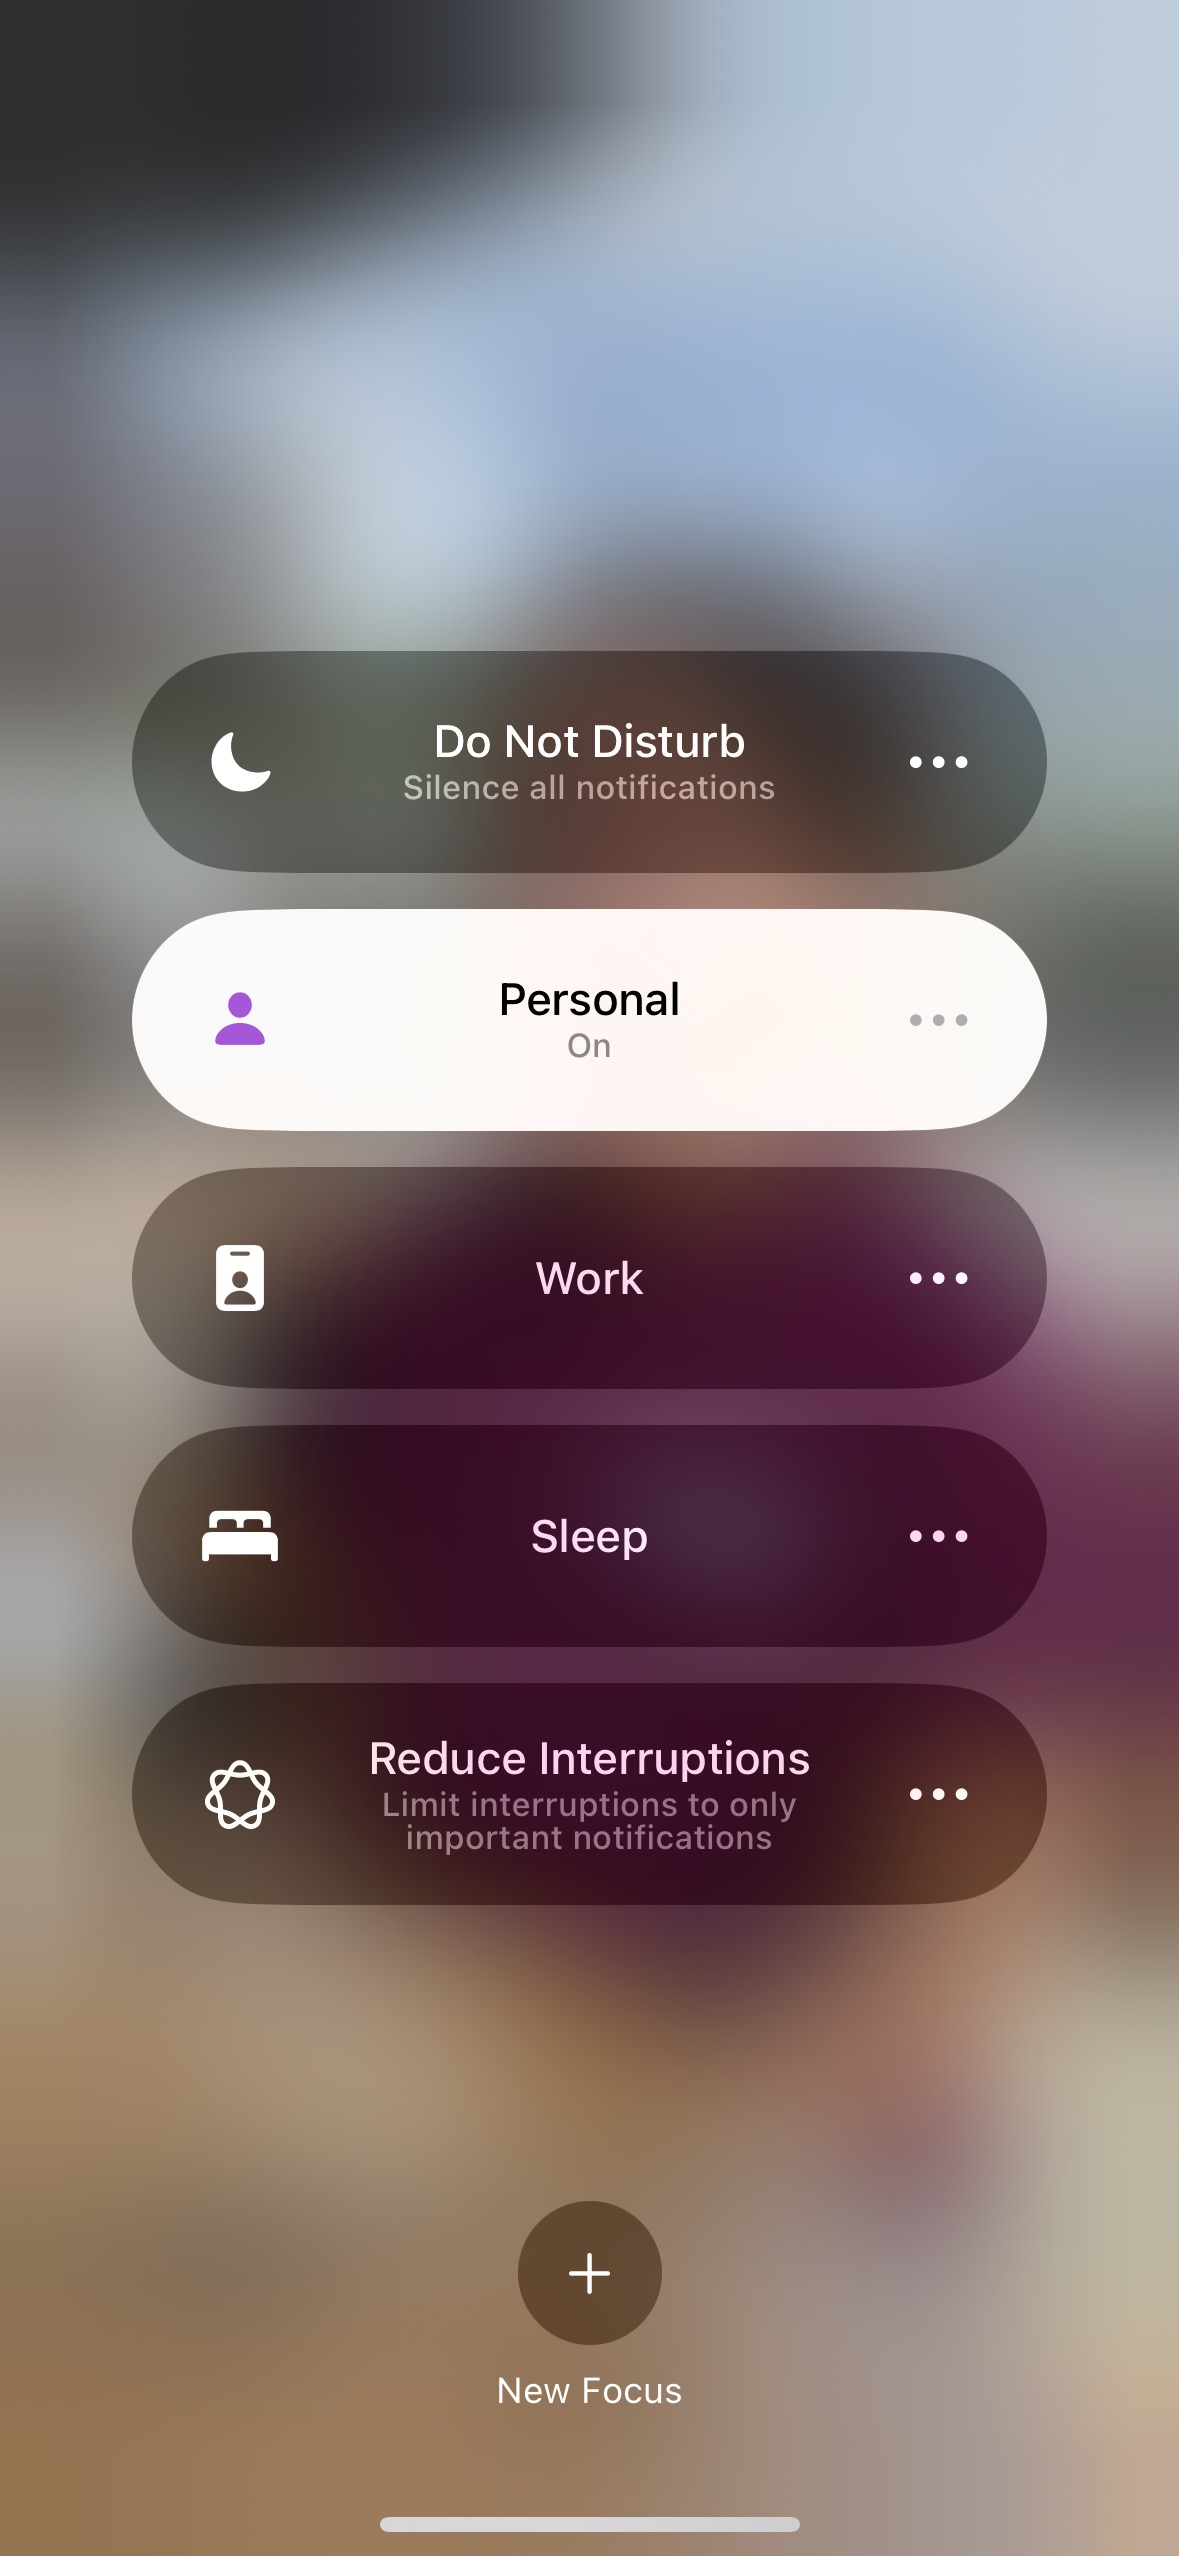
Focus Mode and Push Notifications on iOS: iOS includes a Focus feature that can limit or suppress push notifications based on user preferences. If push notifications are not being received, check if Focus Mode (such as Do Not Disturb, Work, or Sleep) is enabled. To verify and adjust Focus settings:
- To open iOS Control Center, swipe down from the top-right corner of your screen.
- Tap the Focus button and check if any mode is active.
- If active, tap on the active mode to disable it.
- When the Focus is disabled, re-test push notifications again (Step#2)
If you still have trouble with push notifications, feel free to chat with us.
Be sure to include your relevant code snippets, HelpCrunch SDK version, steps to reproduce the bug, and all other details and screenshots of the trouble you’re experiencing. Our team is always happy to help! 🙂