Table of contents:
General information
Installing HelpCrunch on your WordPress website allows you to:
- Engage with visitors and customers in real time via live chat
- Connect messaging apps, such as Facebook, Instagram, Telegram, and Viber, to HelpCrunch widget for efficient conversation management in a unified shared inbox
- Provide self-service support with an integrated knowledge base
- Generate leads and increase customer engagement with popups, chatbots, and other automations
- Leverage HelpCrunch's email marketing tools to further engage leads and customers
Below we provide the most popular ways to install HelpCrunch depending on whether you use wordpress.com or wordpress.org for your website.
Installing HelpCrunch on WordPress.com
To set up HelpCrunch on your WordPress.com website, you need to install and activate the HelpCrunch WordPress plugin.
So, how do you integrate HelpCrunch with your WordPress-powered website?
STEP 1. Log in to your WordPress account.
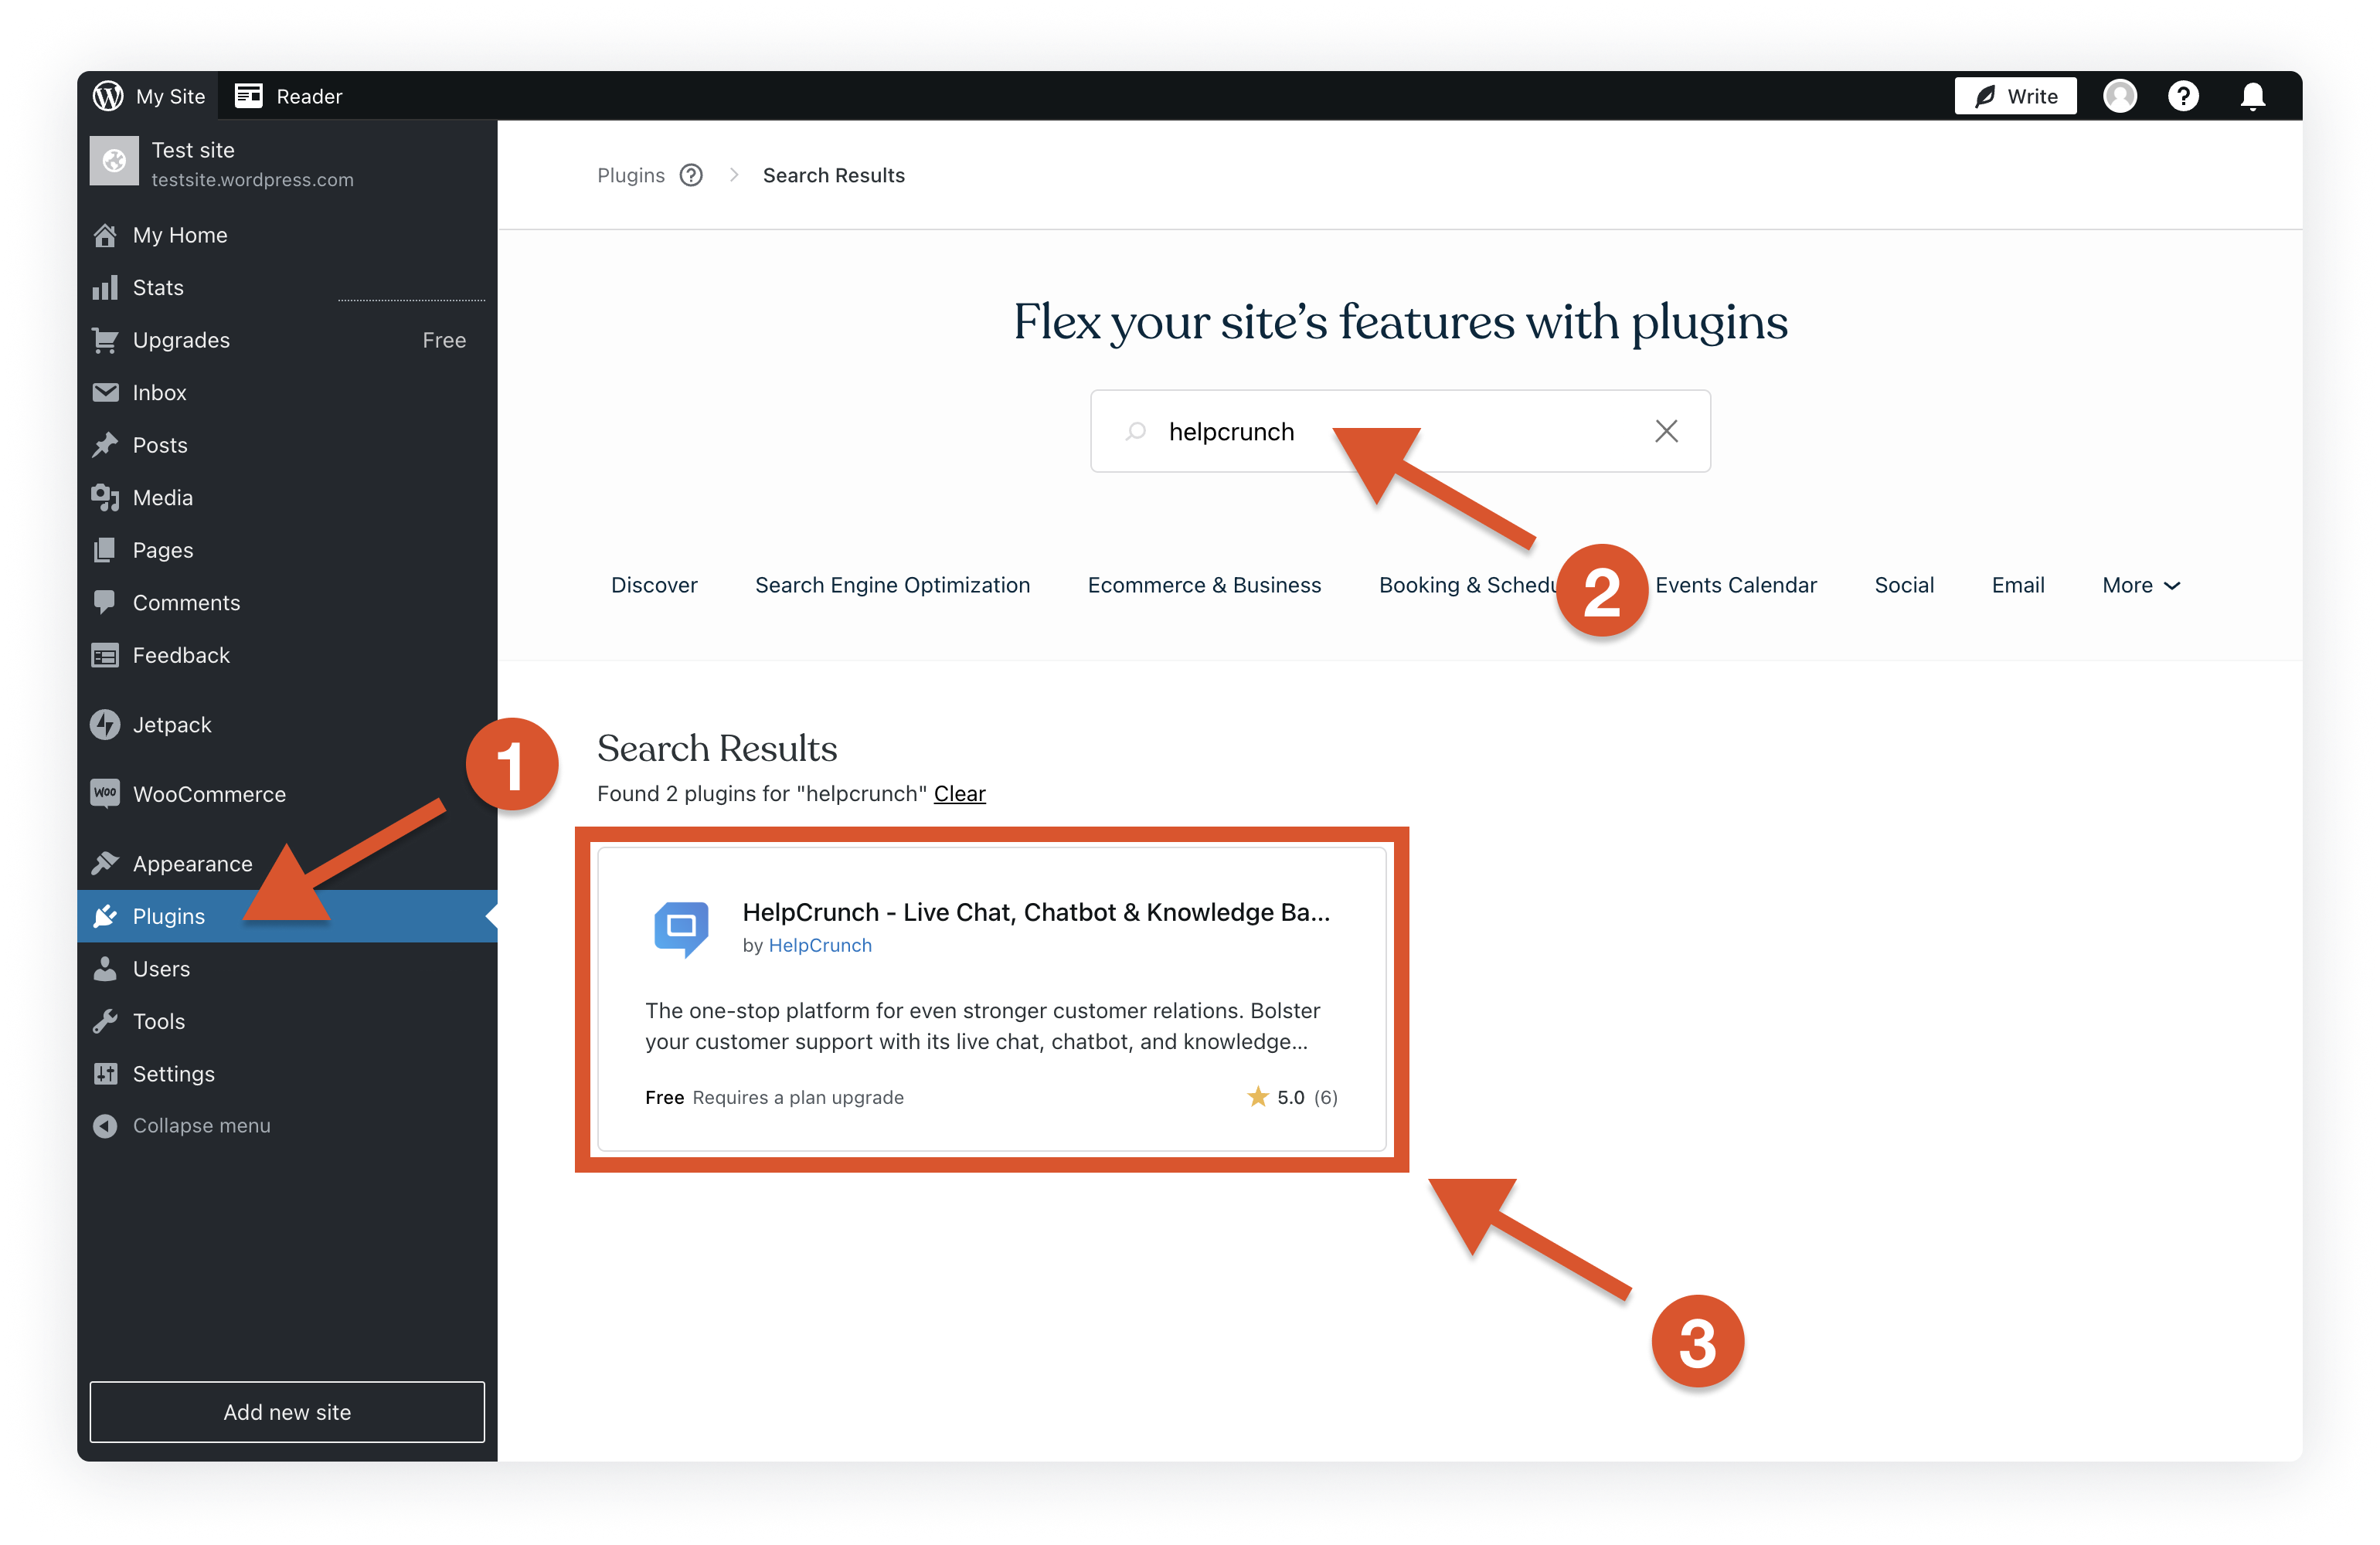
STEP 2. Go to Plugins, type 'helpcrunch' in the search bar, and choose the HelpCrunch plugin from the search results.
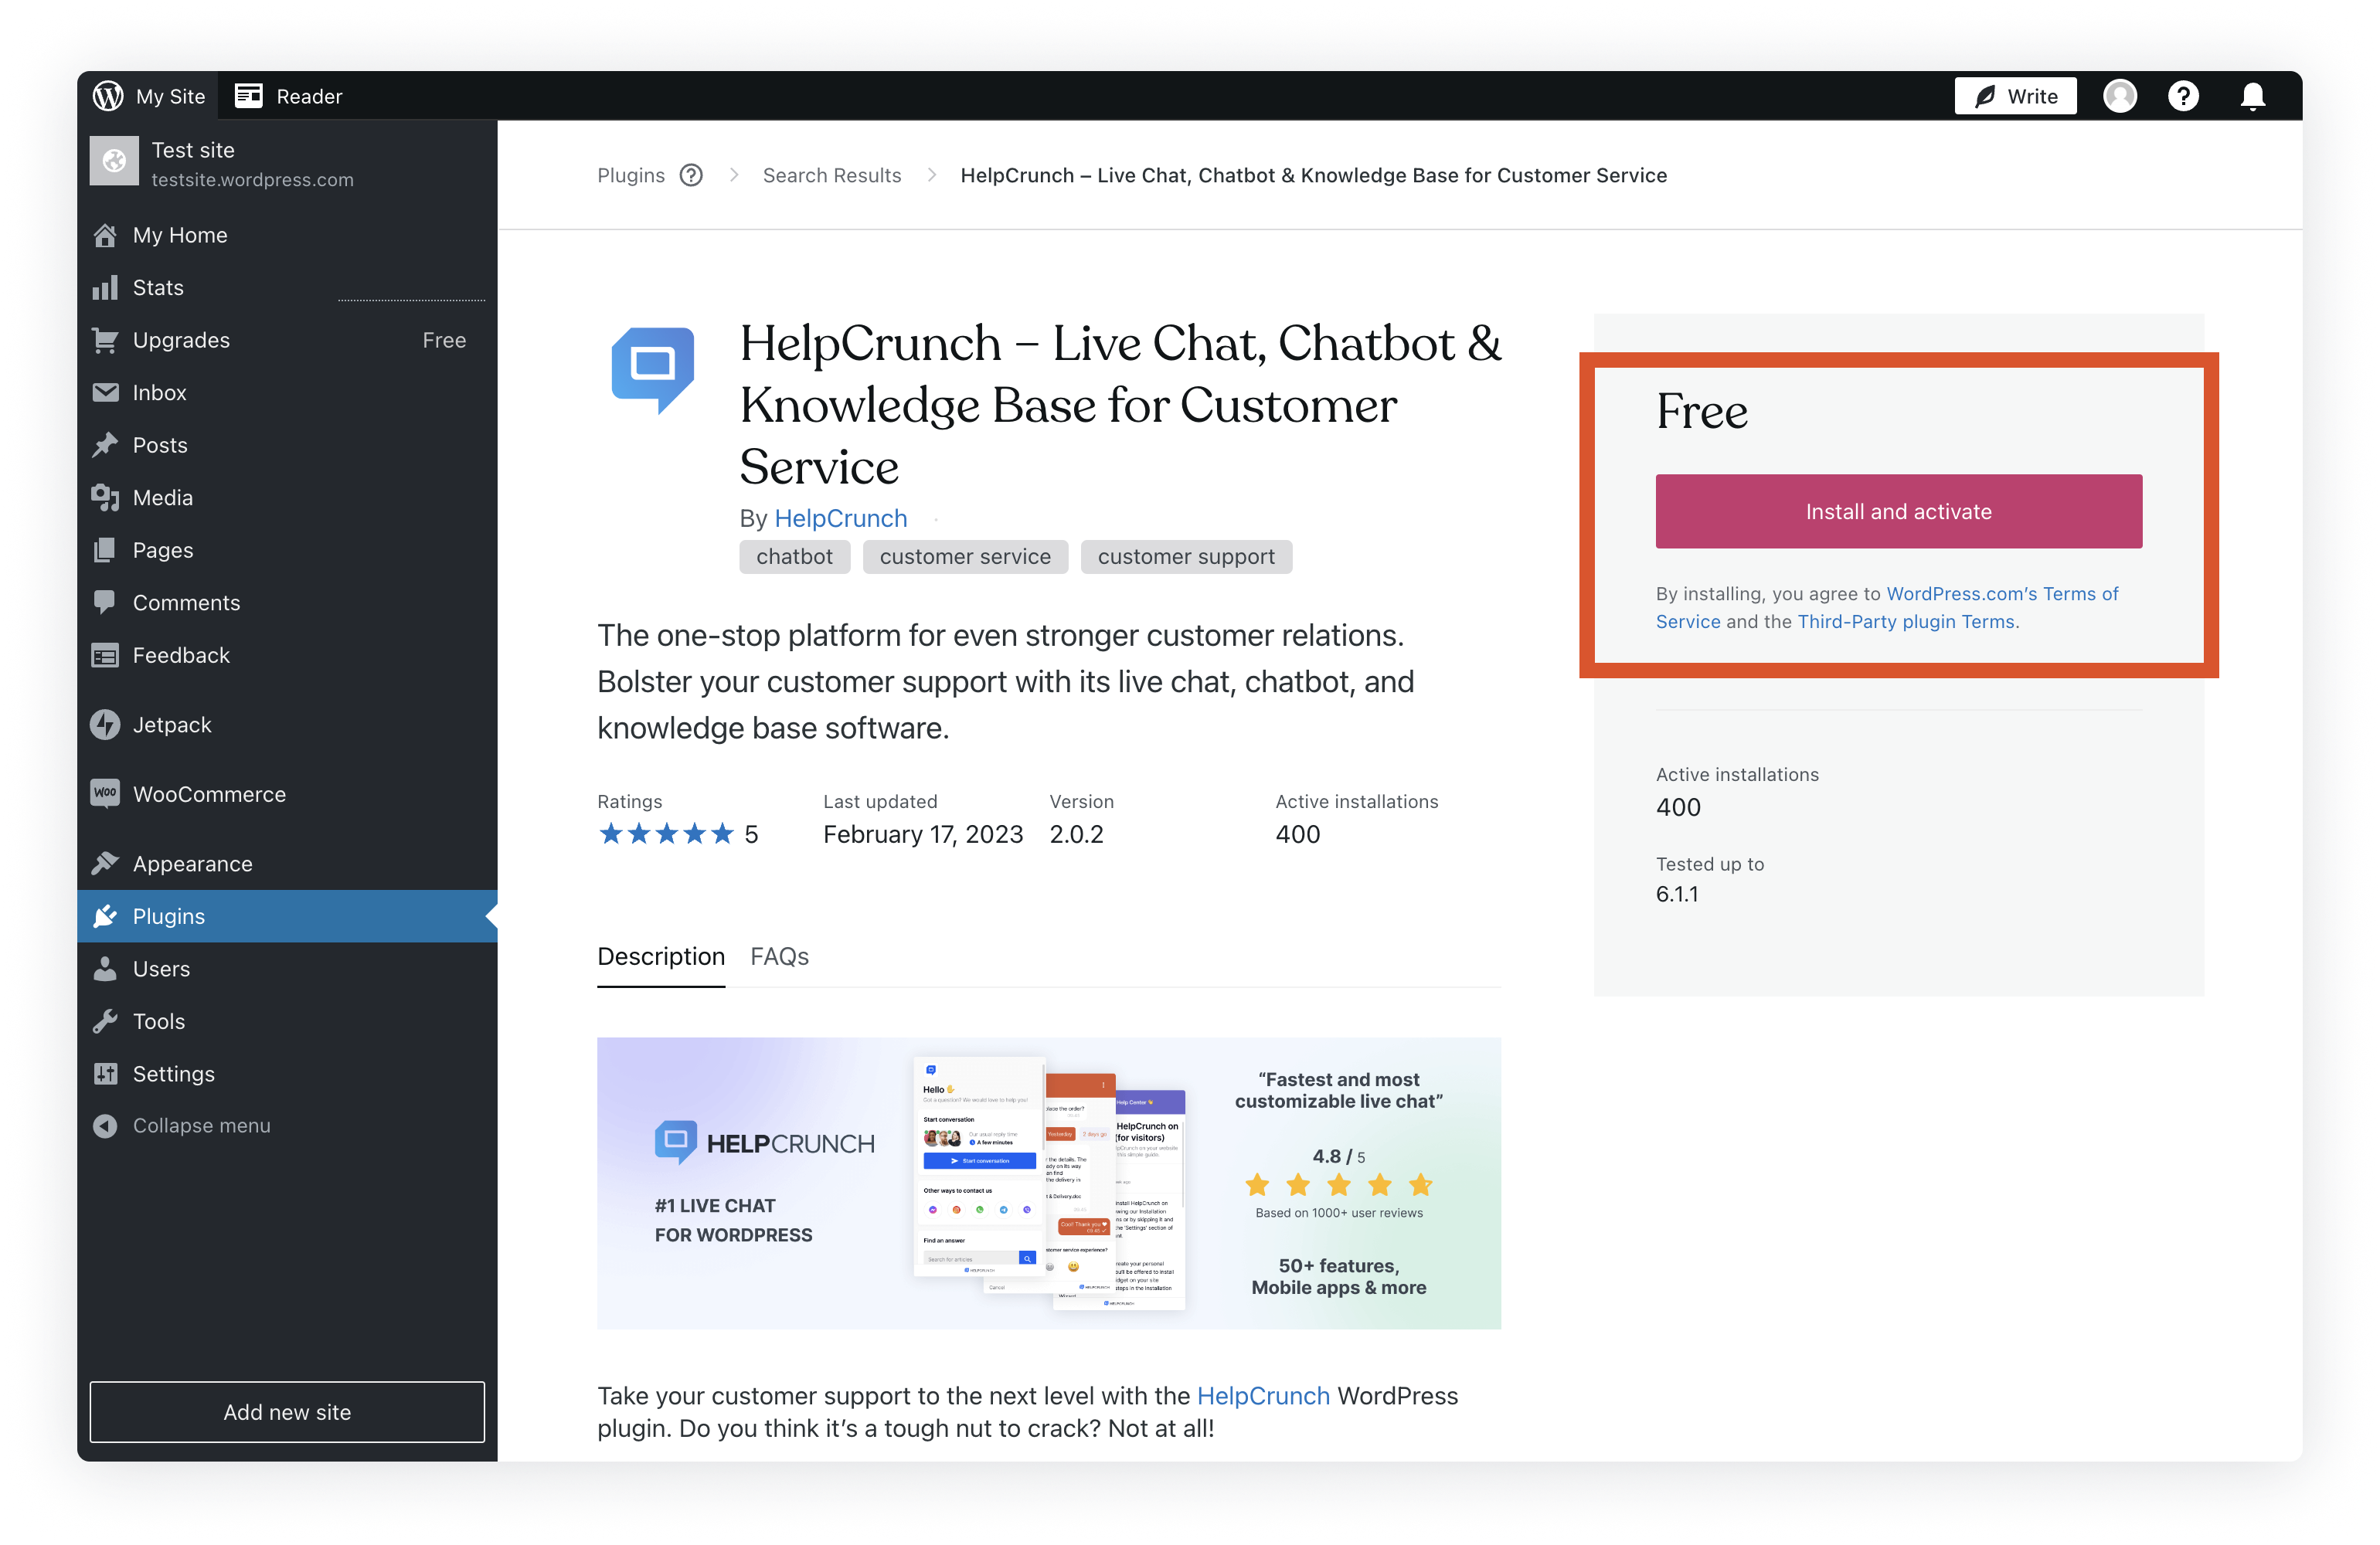
STEP 3. Install and activate HelpCrunch plugin.
STEP 4. Go to Plugins → Installed Plugins and find HelpCrunch plugin there. Click on Settings and follow the instructions in the Setup section.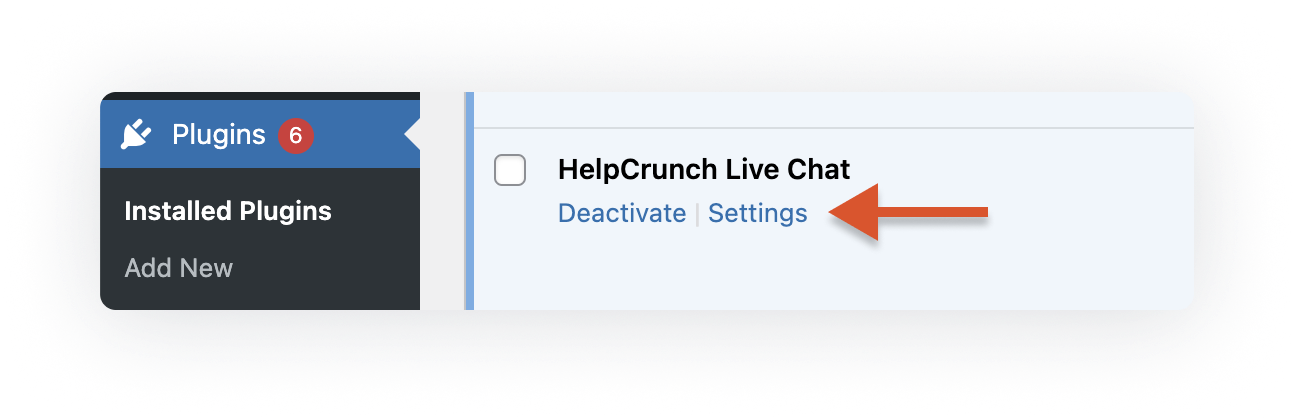
STEP 5. Now you can go and visit your website.
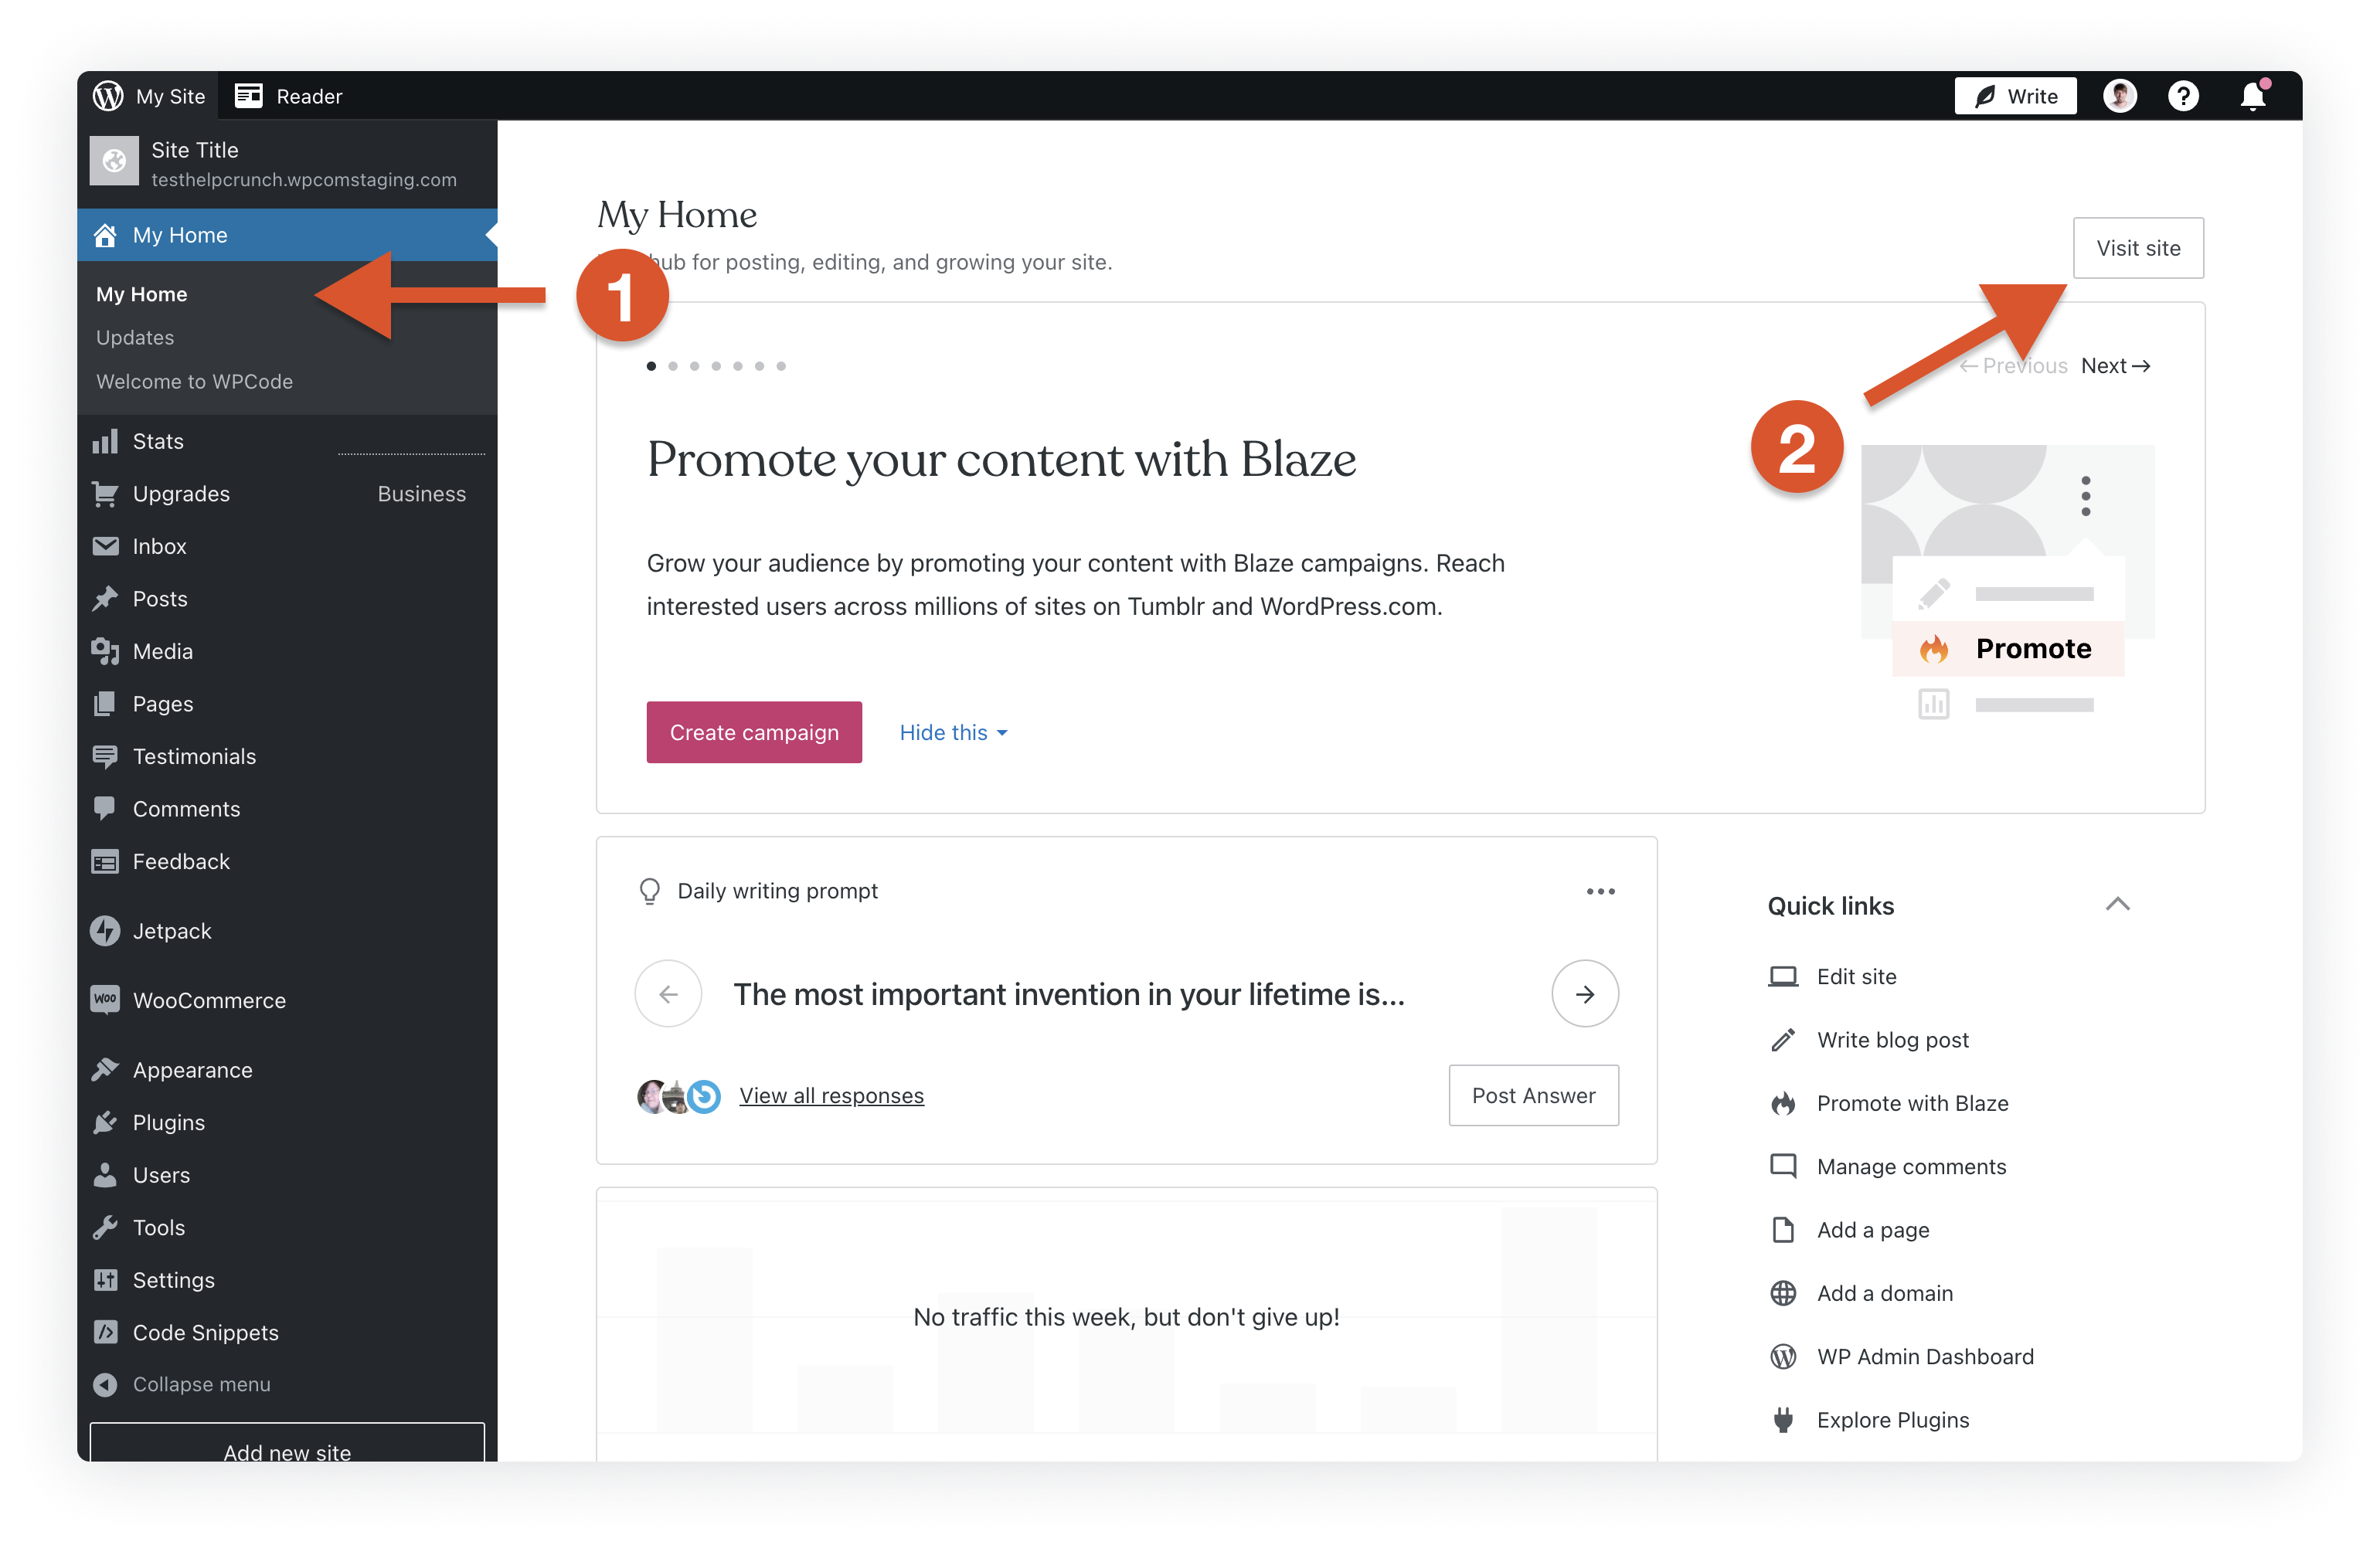
STEP 6. Make sure HelpCrunch widget appeared on your WordPress website.
If you are using WordPress caching plugins, like 'WP Super Cache', 'WP Rocket', 'Hyper Cache', or similar, you may need to clear your website cache after installing HelpCrunch.
Installing HelpCrunch on WordPress.org
HelpCrunch WordPress plugin
For most people, the simplest option to install HelpCrunch on WordPress.org is to use HelpCrunch WordPress plugin. The process for WordPress.org and WordPress.com websites is pretty similar. Refer to the instructions above.
Manual installation via WordPress Theme Editor
Another option is to paste the HelpCrunch JavaScript code snippet into the footer.php file using the built-in WordPress Theme Editor.
STEP 1. Log in to your HelpCrunch account.
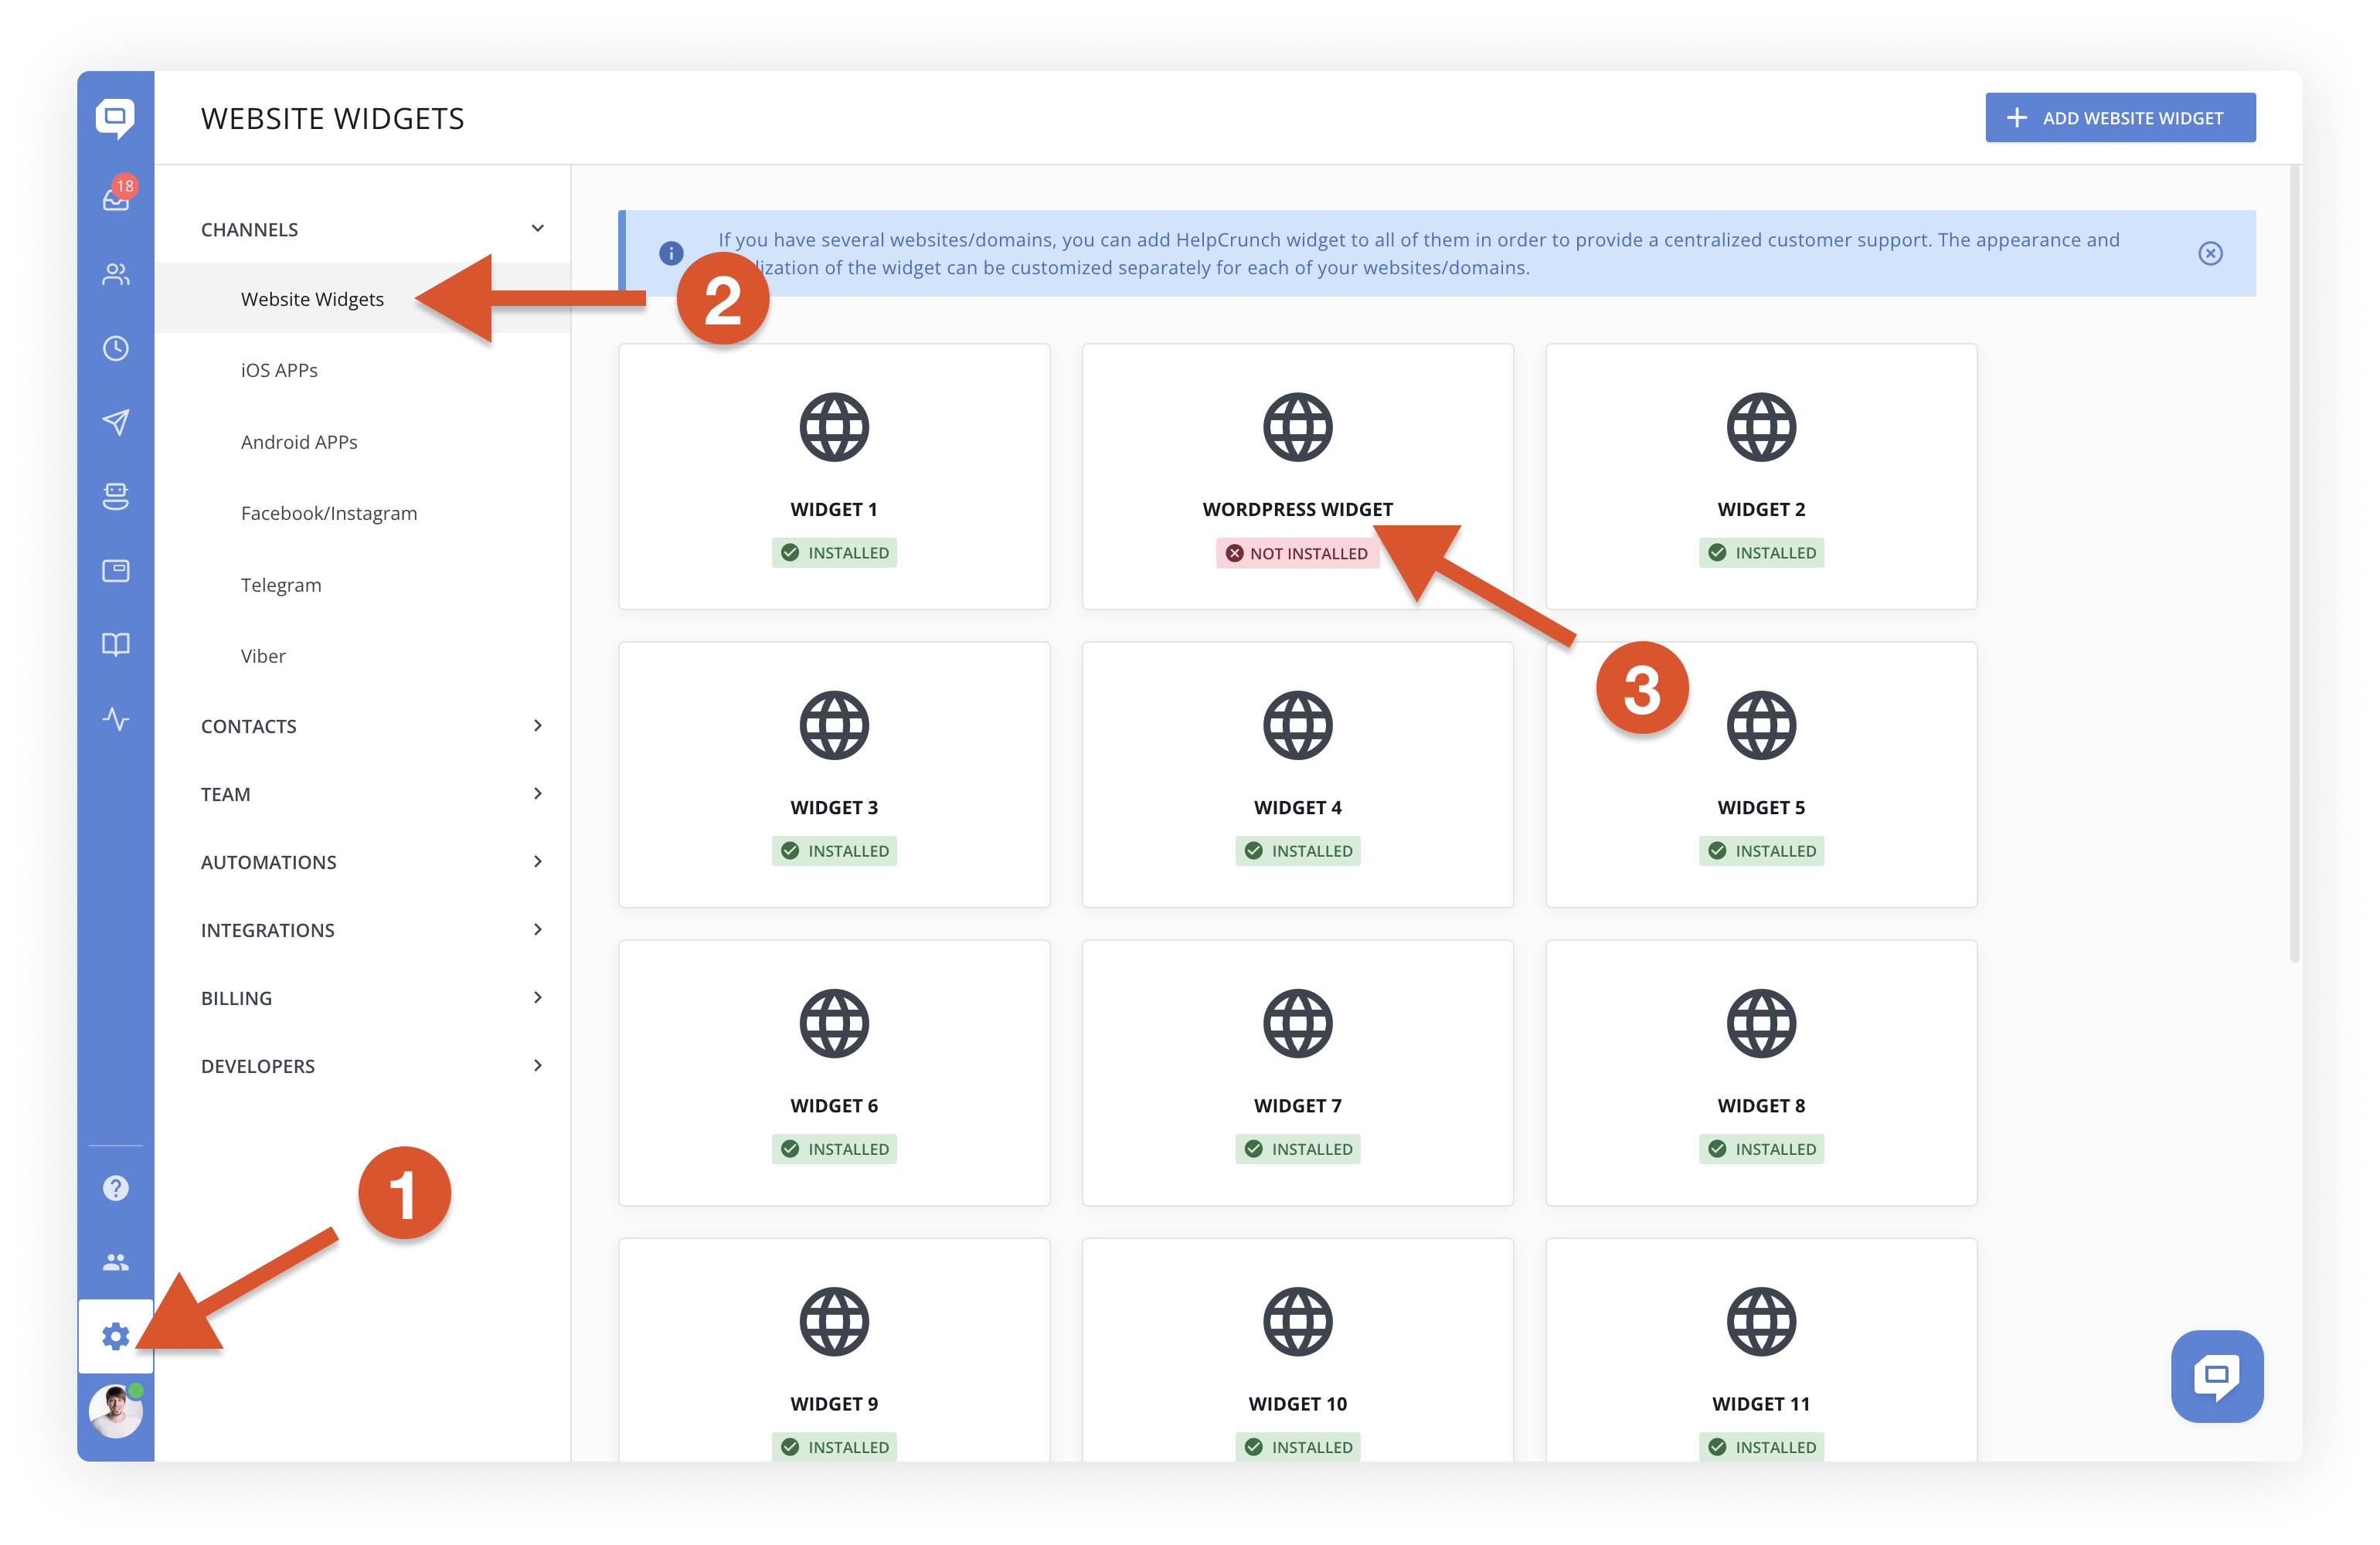
STEP 2. Go to Settings → Channels → Website Widgets and choose the widget you'd like to install on your WordPress website.
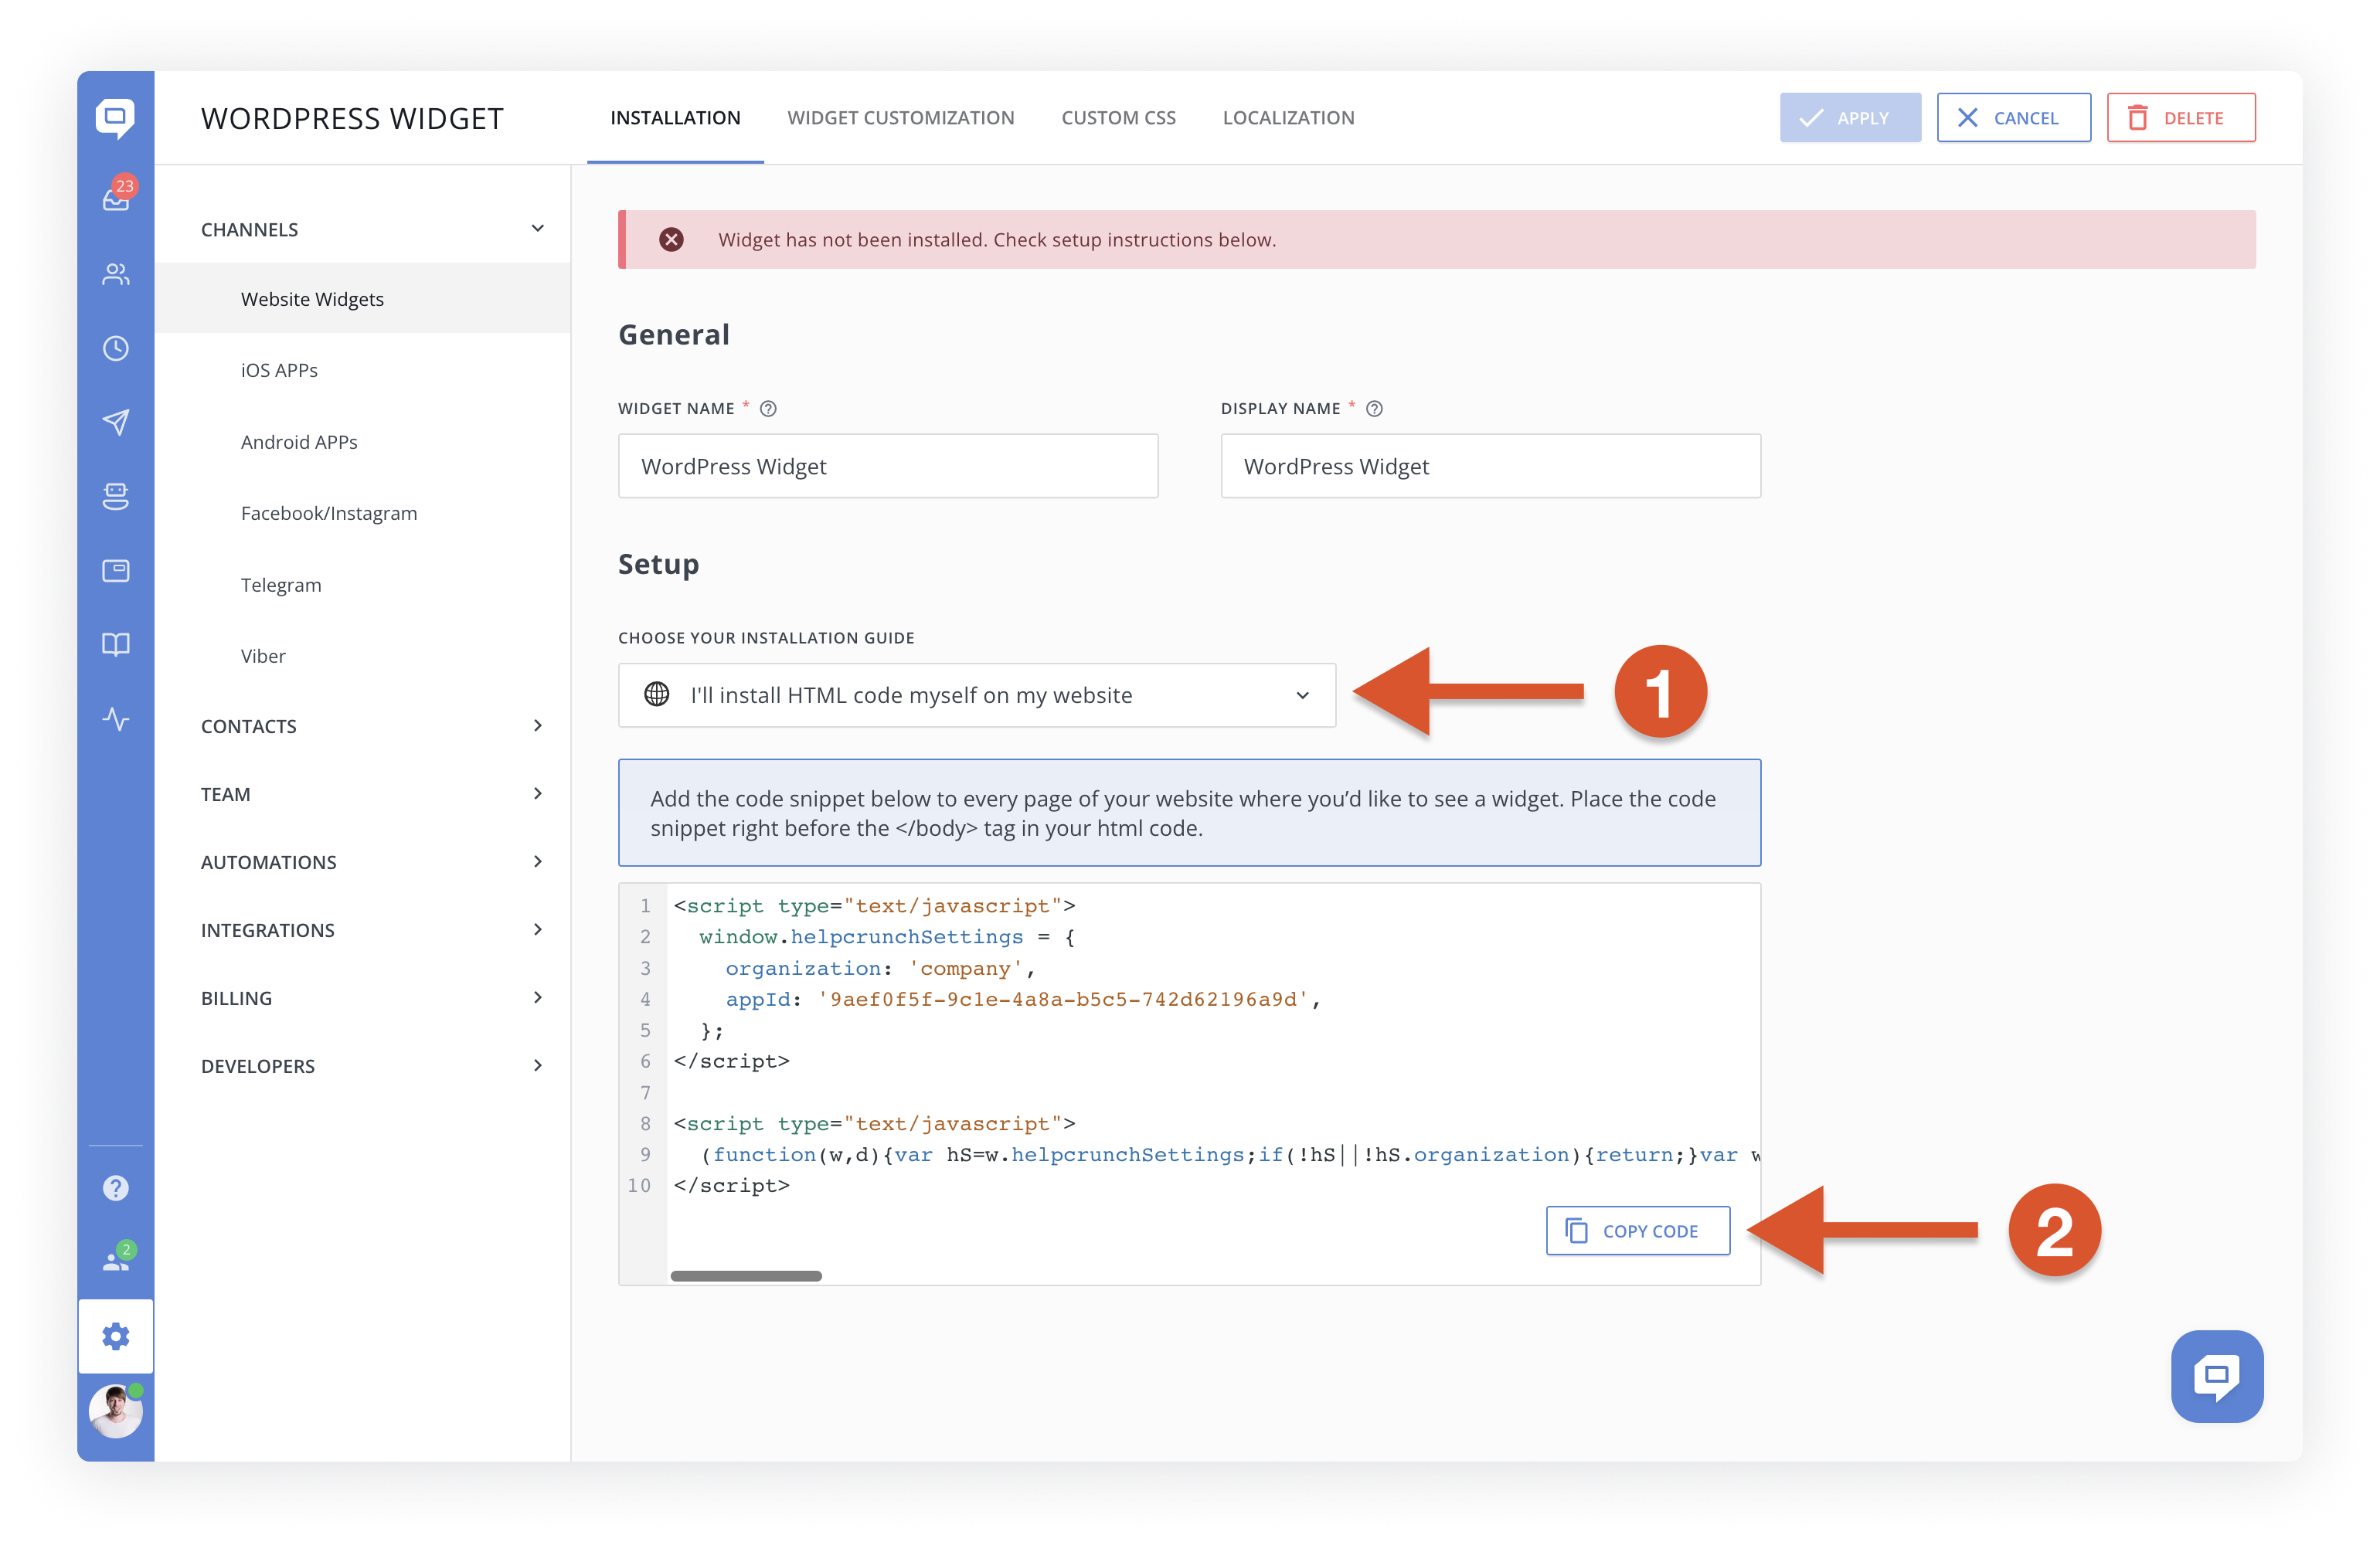
STEP 3. You will be redirected to the Installation page. Select I'll install HTML code myself on my website installation guide and copy the code snippet from the HTML box.
STEP 4. Log in to your WordPress account.
STEP 5. Go to Appearance → Theme Editor, then find and open Theme Footer (footer.php) file in the right Theme Files panel. Paste the copied HelpCrunch code snippet right before the closing </body> tag. Click on Update File button.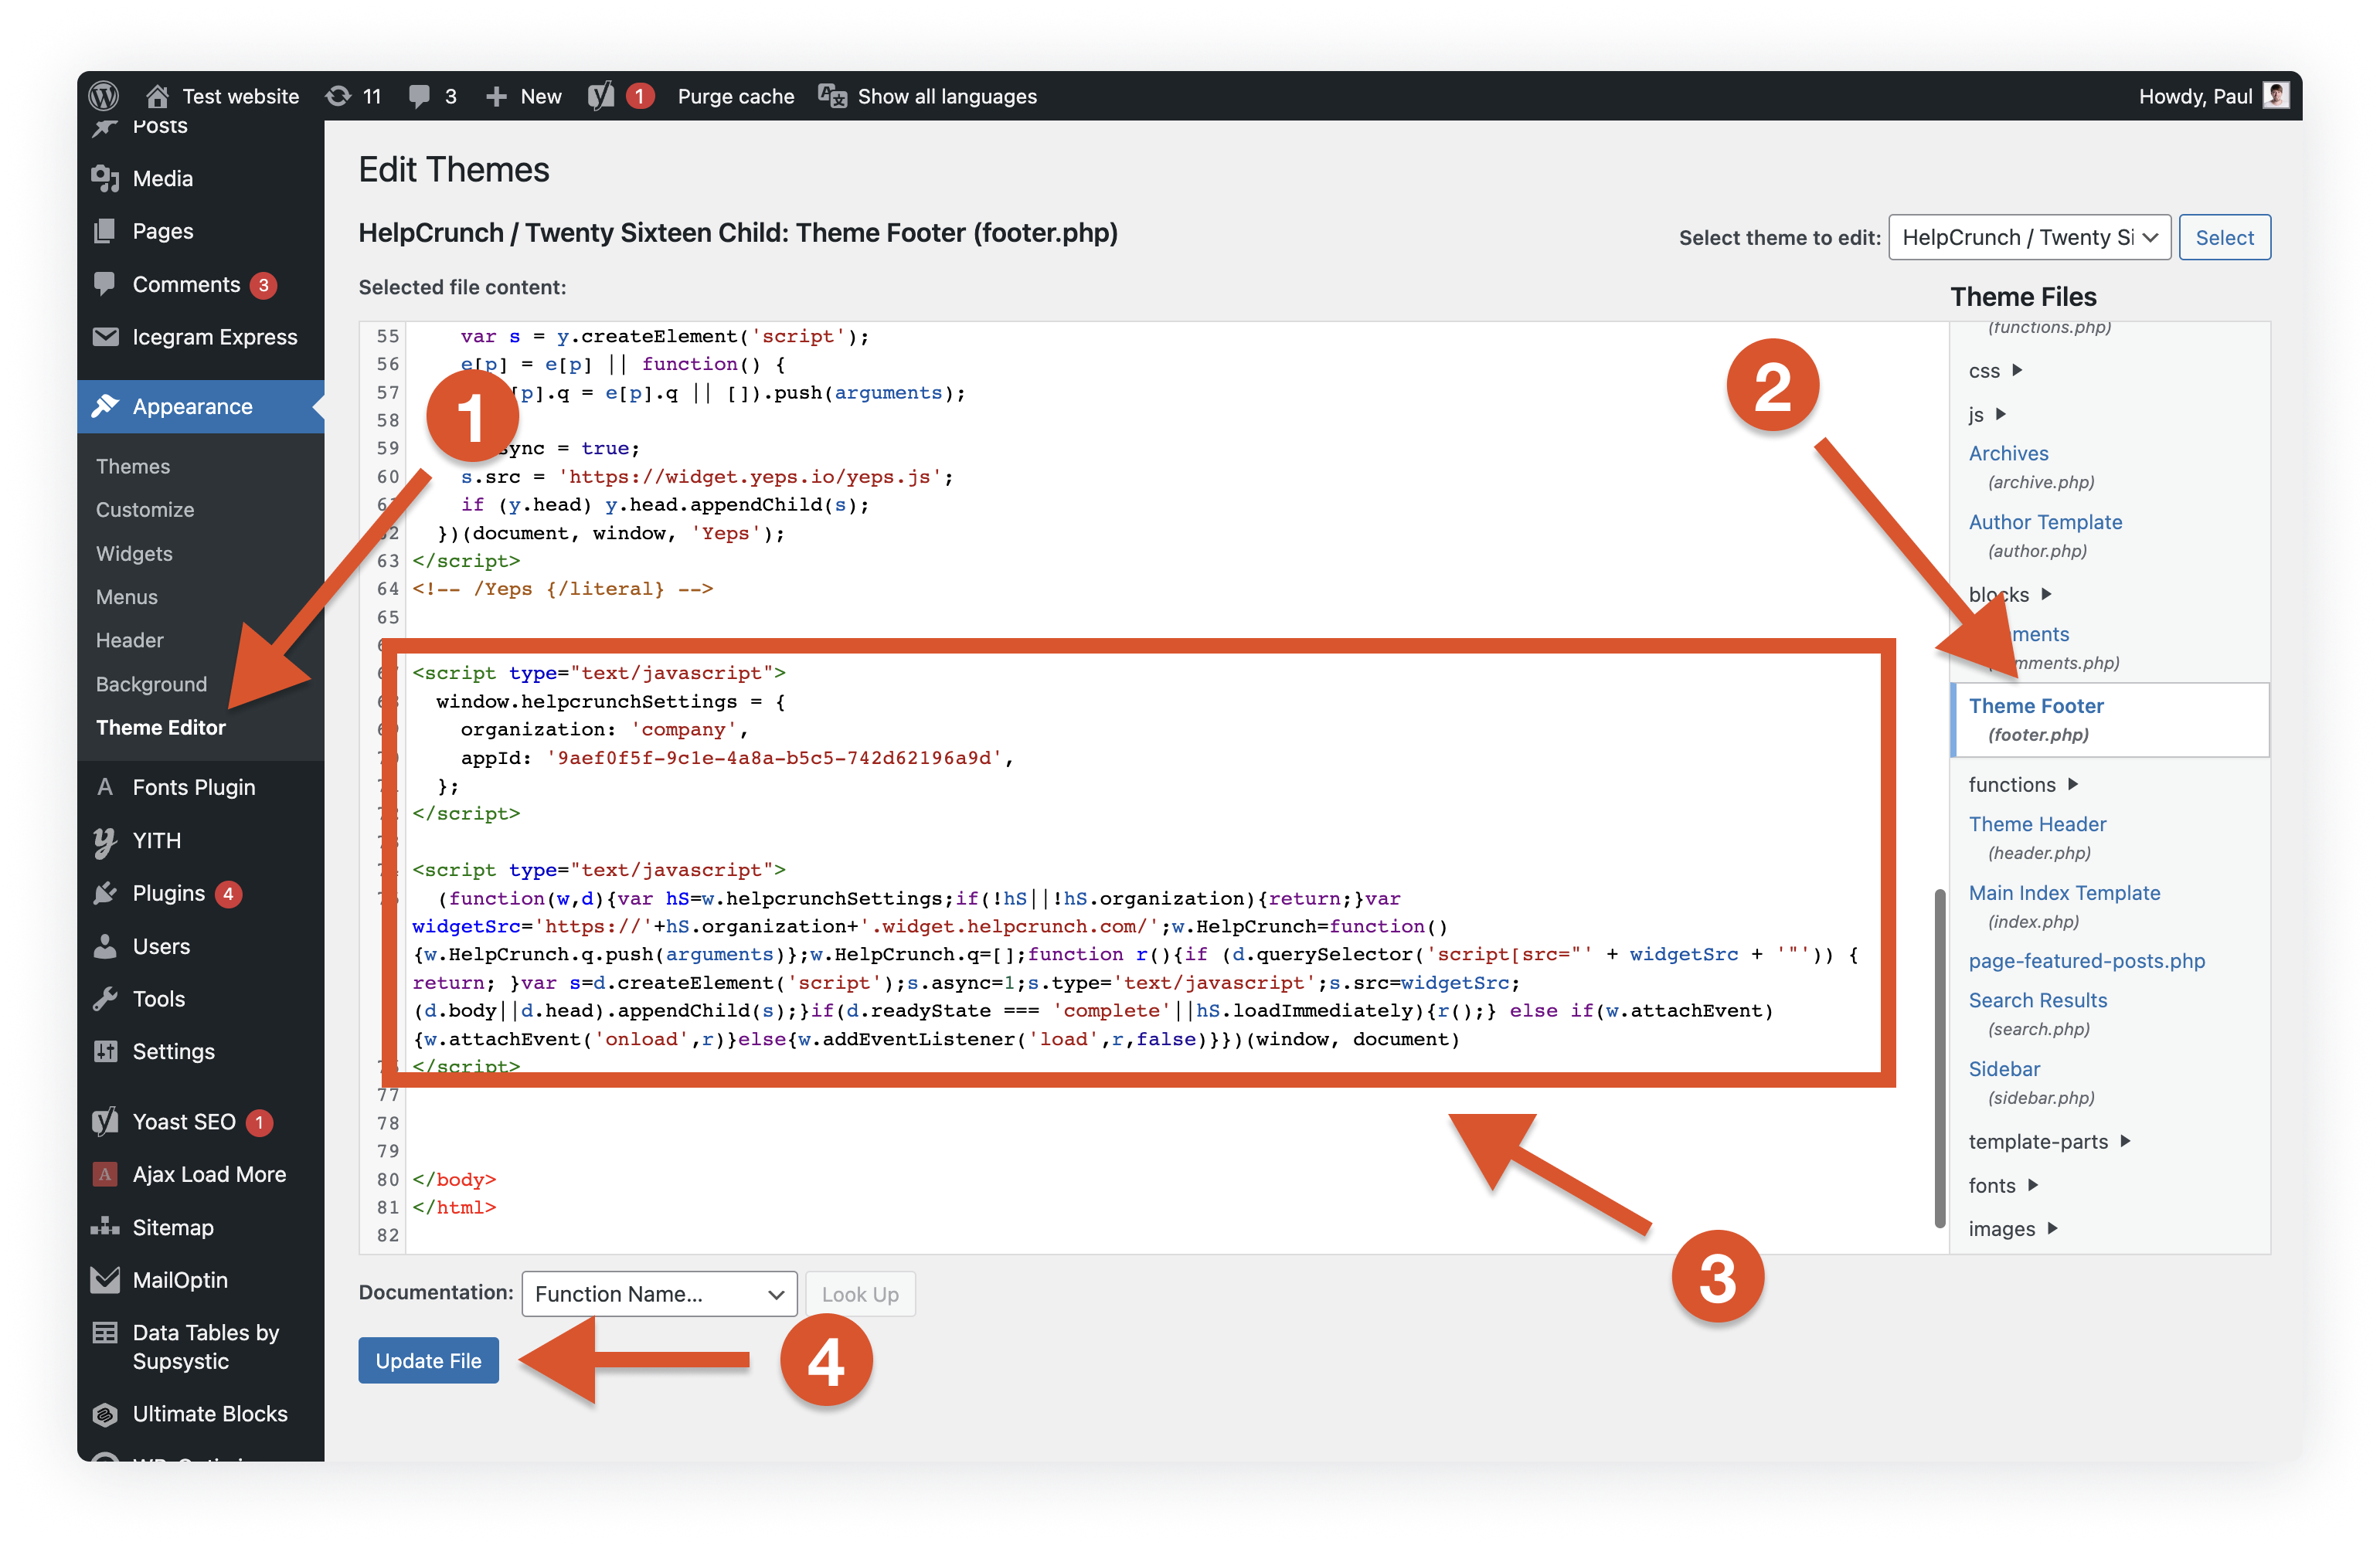
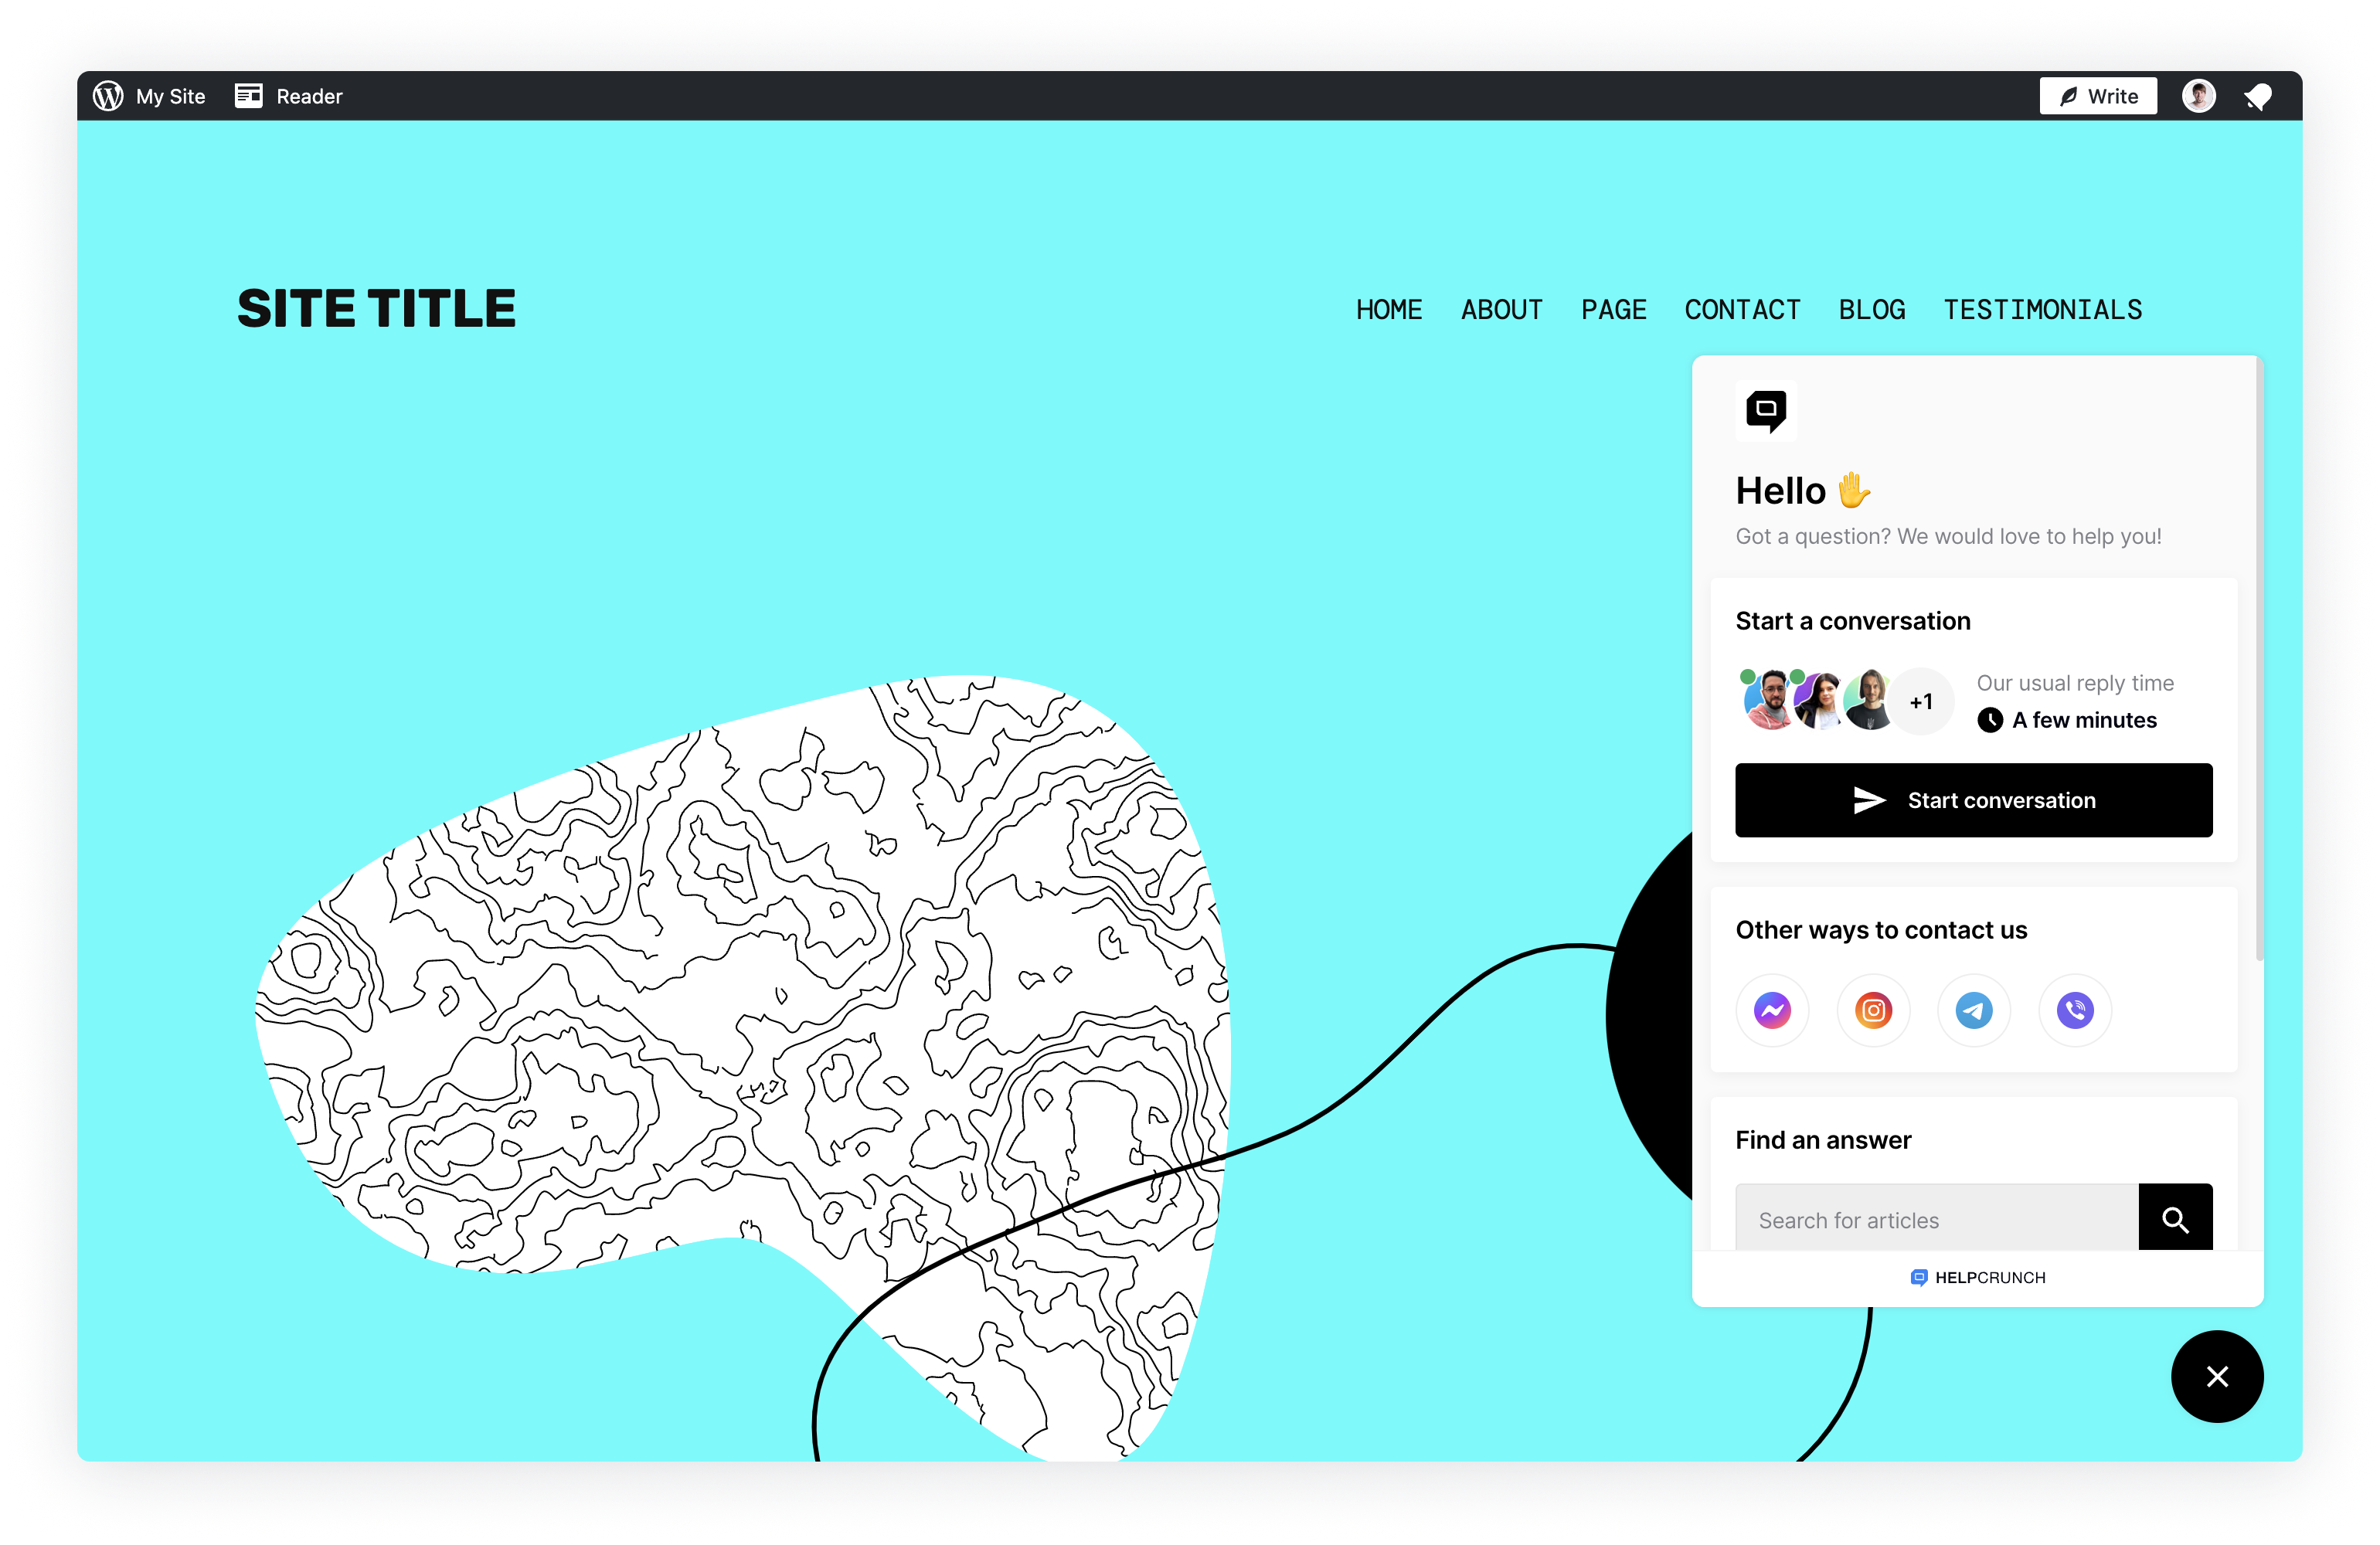
Now you can go and check your HelpCrunch widget in the bottom right corner of your website.
Any modifications you make to files using WordPress editors, including Theme Editor, are instant. The changes occur online and in real time. You and your website visitors will see the changes immediately right after the file is updated.
If you have any questions just hit us a message in chat and we’ll help you out.