Once you've set up your Data Sources (Knowledge Base and Custom Answers), you're ready to create your first AI Agent — a smart assistant that will chat with your customers, find answers instantly, and transfer to a human when needed.
This article will walk you through creating an AI Agent, assigning data sources, and preparing it for action.
🤖 Step 1: Create a new AI Agent
-
Navigate to Chatbot → AI Agents
-
Click + Add new AI Agent
-
Enter a name for your AI Agent
(Tip: Name it based on its purpose, e.g., “SupportBot”, “Sales Assistant”, or “Legal Helper”)
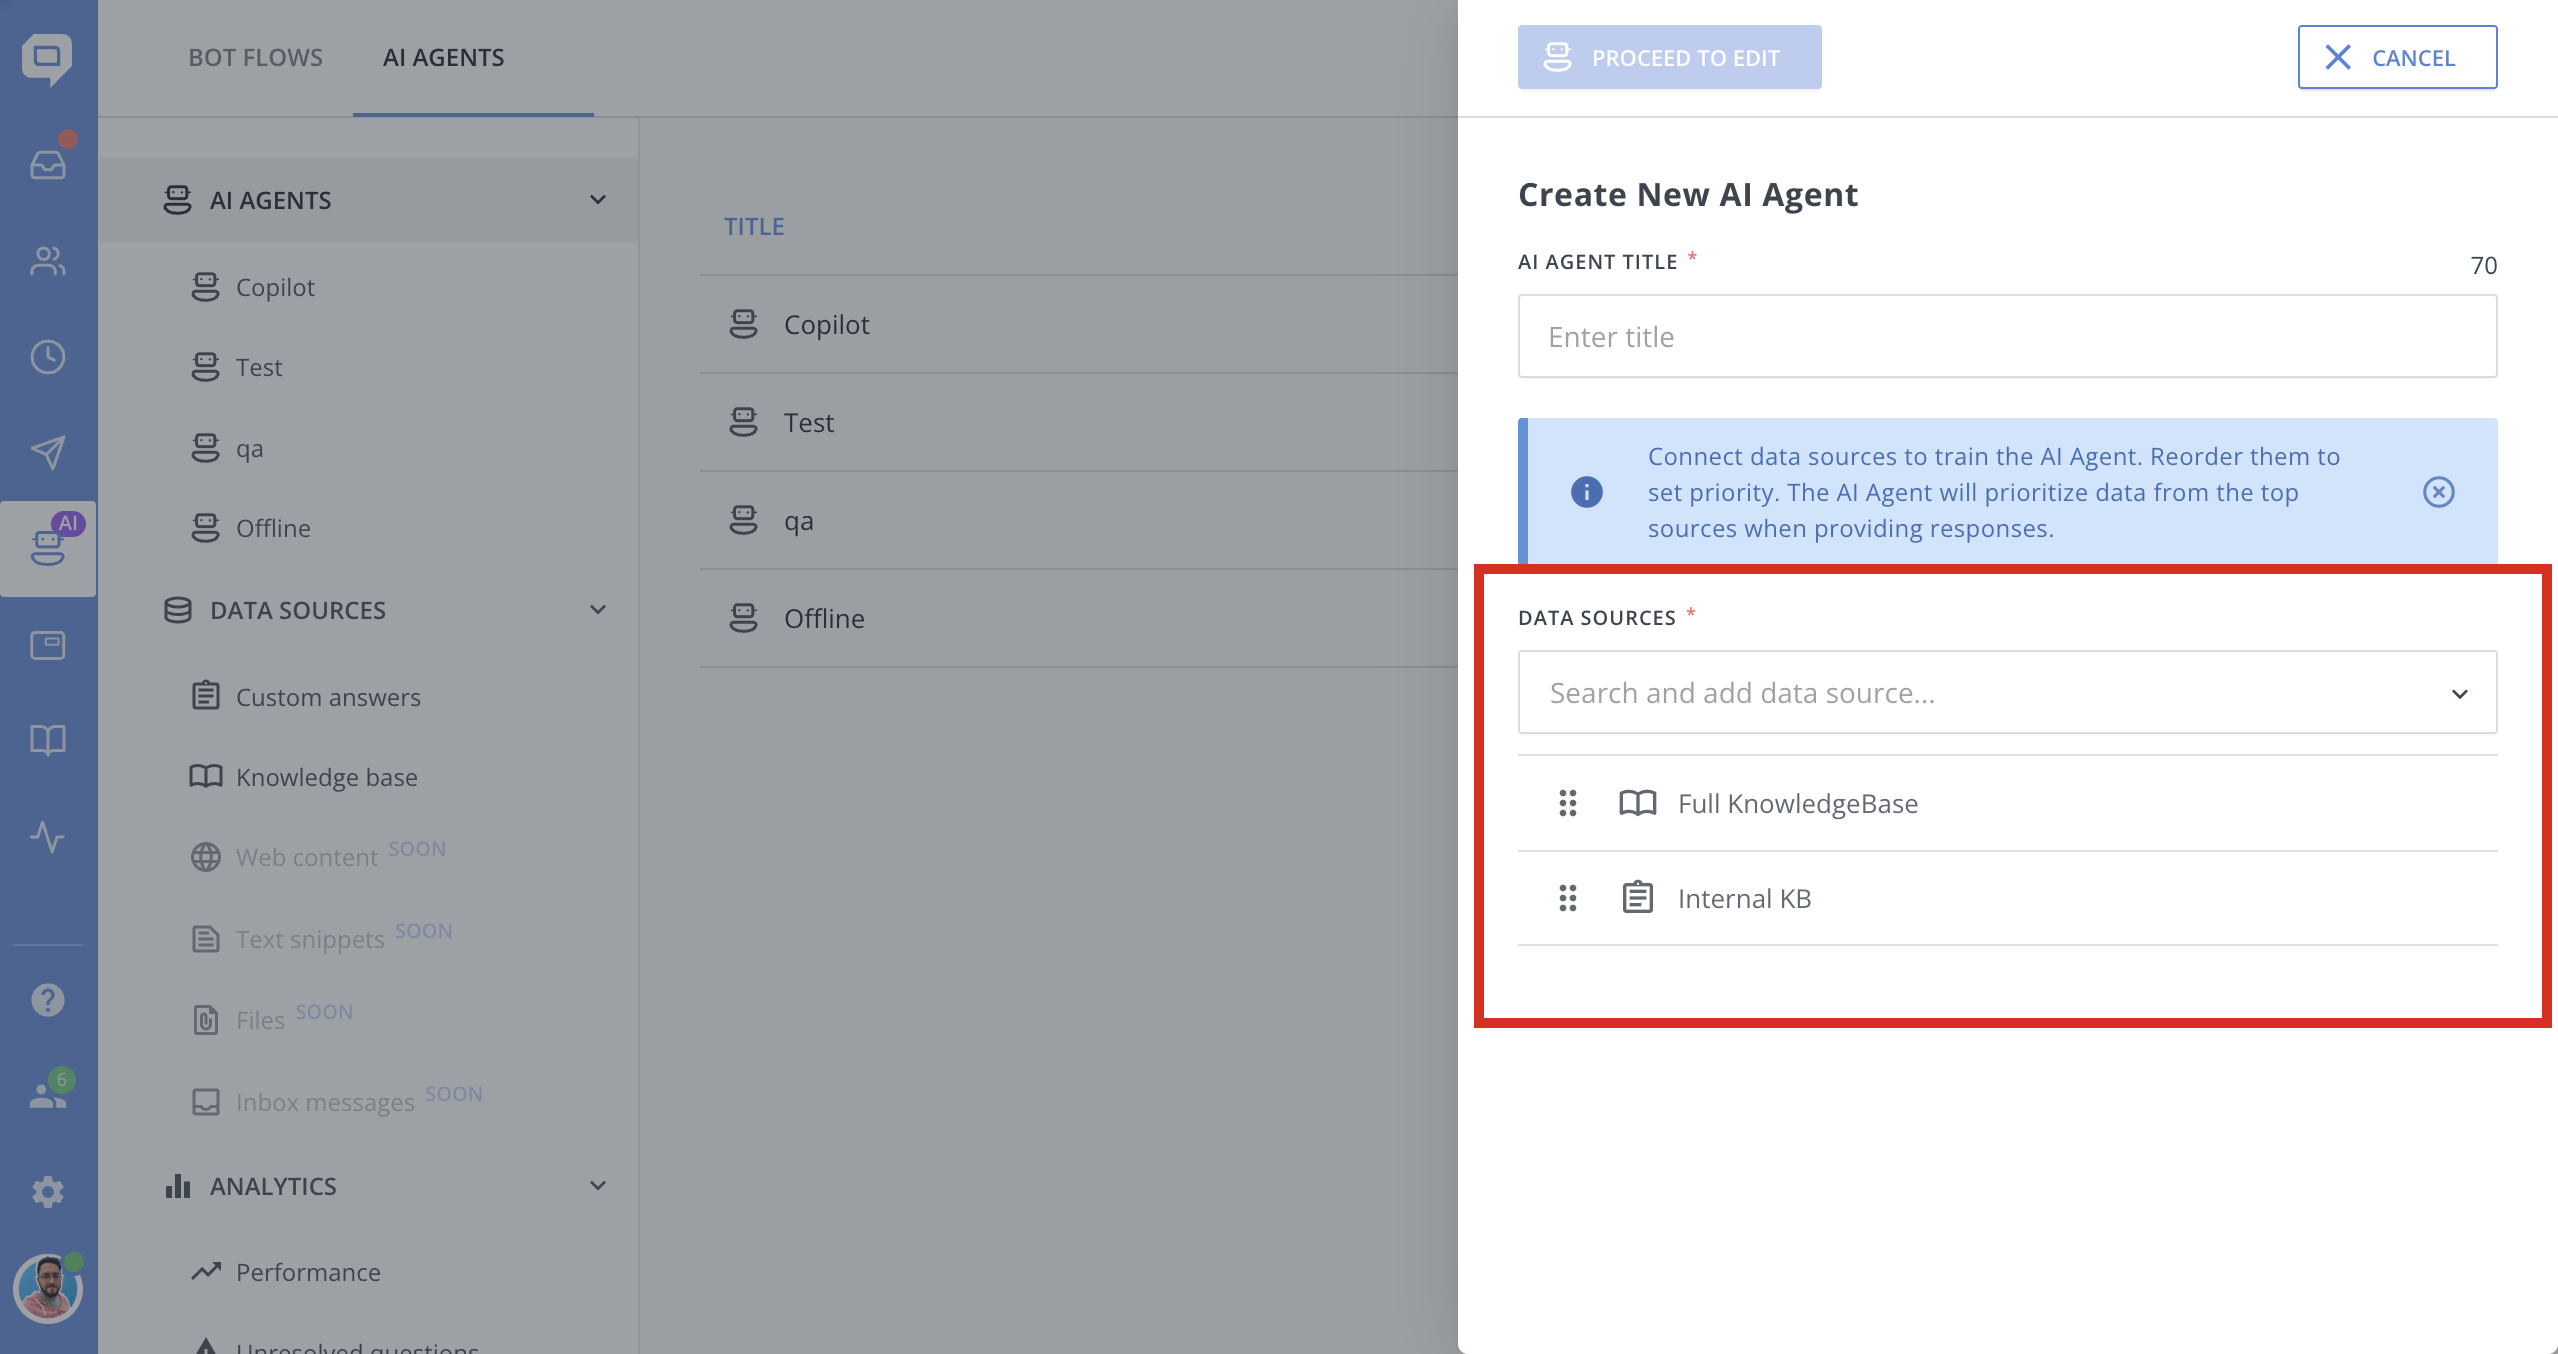
📚 Step 2: Assign Data Sources
You’ll now choose what data sources the AI Agent will use to generate answers.
-
Select one or more data sources from:
-
Knowledge Base articles
-
-
Drag and drop data sources to set priority:
-
The AI will check sources in order, e.g., check the KB first, then Custom Answers
-
If no result is found, the AI will notify the customer and offer to connect them with a human
-
- Click Proceed to Edit
For example:
SupportBot → KB: "Troubleshooting" + Custom Answers: "Technical Q&A"
SalesBot → KB: "Features & Pricing" + Custom Answers: "Objection handling"
LegalBot → KB: "Terms & Policies"
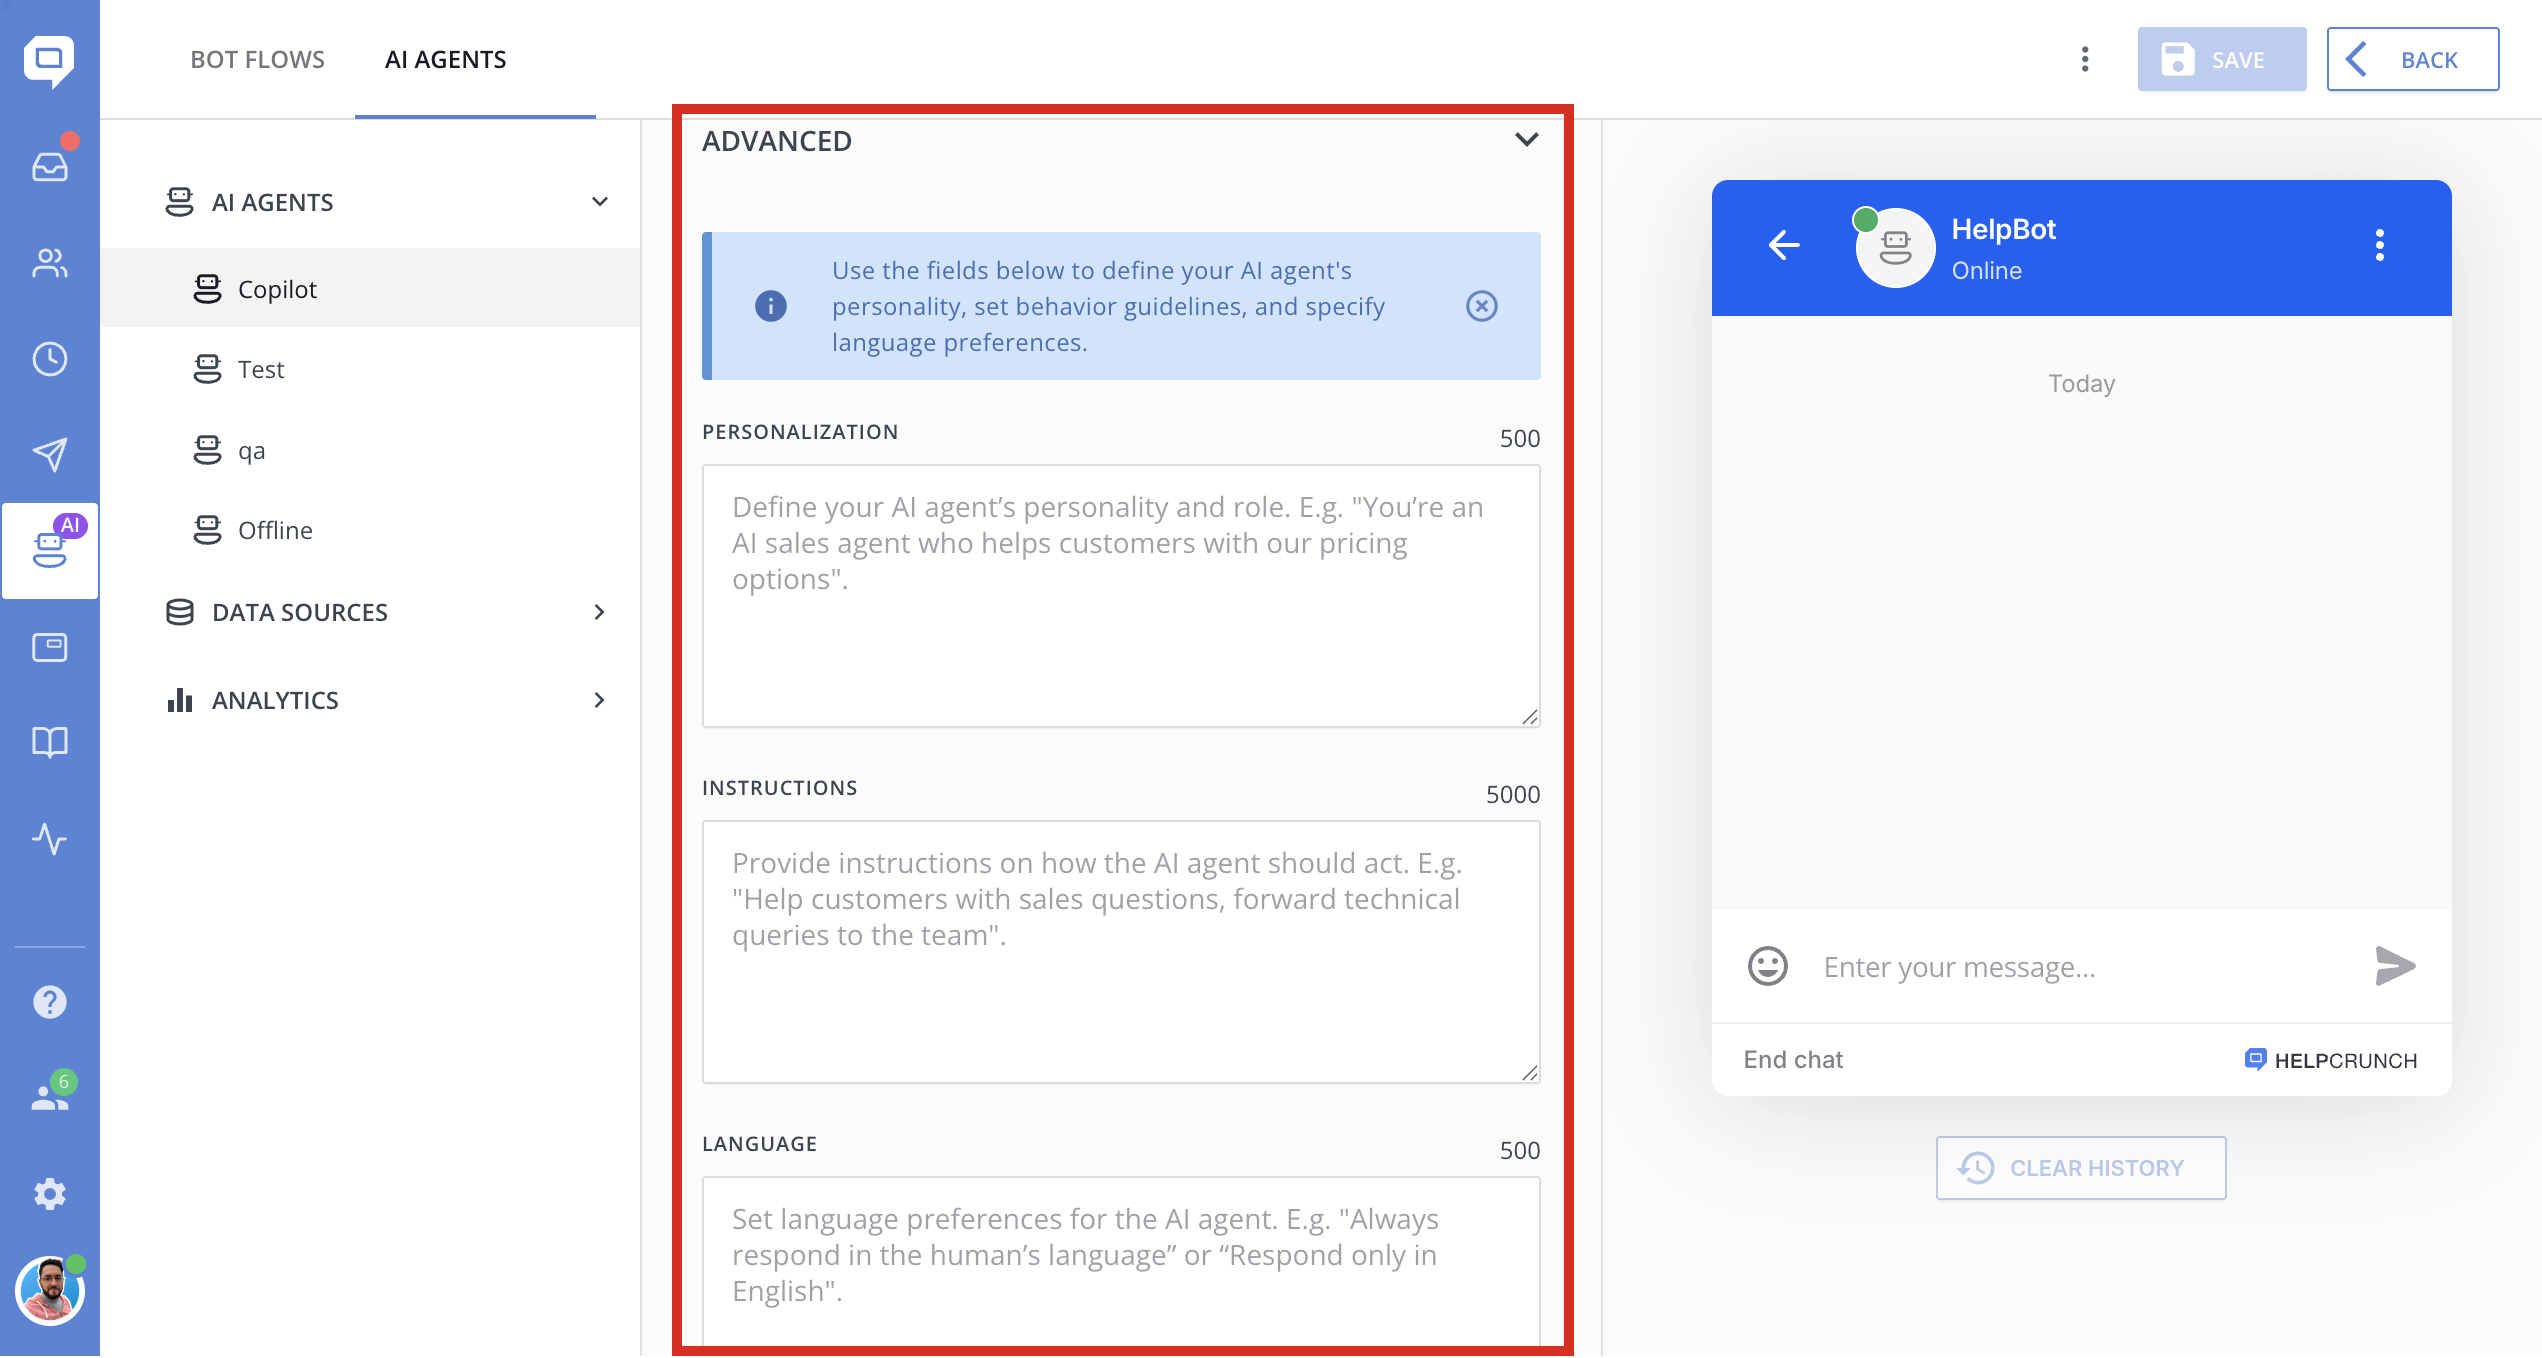
⚙️ Step 3: Configure AI Agent's advanced settings (optional)
The Advanced section allows you to shape how your AI Agent sounds, acts, and responds across different languages.
We recommend adding custom instructions only when necessary.
Please write them in English, as it has shown the best results so far. Use prompt engineering best practices.
You'll find ready-to-use templates in AI agents cookbook.
✨ Personalization
Define the AI's personality.
Example:
Or:
This helps the AI adopt the right tone when chatting with customers.
🧭 Instructions
Guide the AI's behavior with more detailed instructions.
Example:
- Answer using only information found in `searchKnowledgeBase` results. Do not guess.
This field is useful for defining the agent’s role, fallback behavior, escalation rules, and more.
🌐 Language
Set your AI Agent’s language preference.
Examples:
-
Always respond in the customer’s language
-
Respond only in English
-
If user writes in Spanish, reply in Spanish, otherwise use English
These instructions help prevent unwanted language switching and ensure consistency across multilingual chats.
🚀 Step 4: Add your AI Agent to a Bot Flow
-
Go to Chatbot → Bot Flows
-
Create a new flow or edit an existing one
-
Use the AI Conversation block to drop in your new agent

You'll find more examples of multi-agent bot flows in AI agents cookbook section
✅ Done! Your Agent is Ready
Once live, your AI Agent will instantly answer customer questions using your selected data sources - no guesswork. And when it’s time to hand off to a human, it does so seamlessly.
➡️ Next up: Analyze AI agent's performance