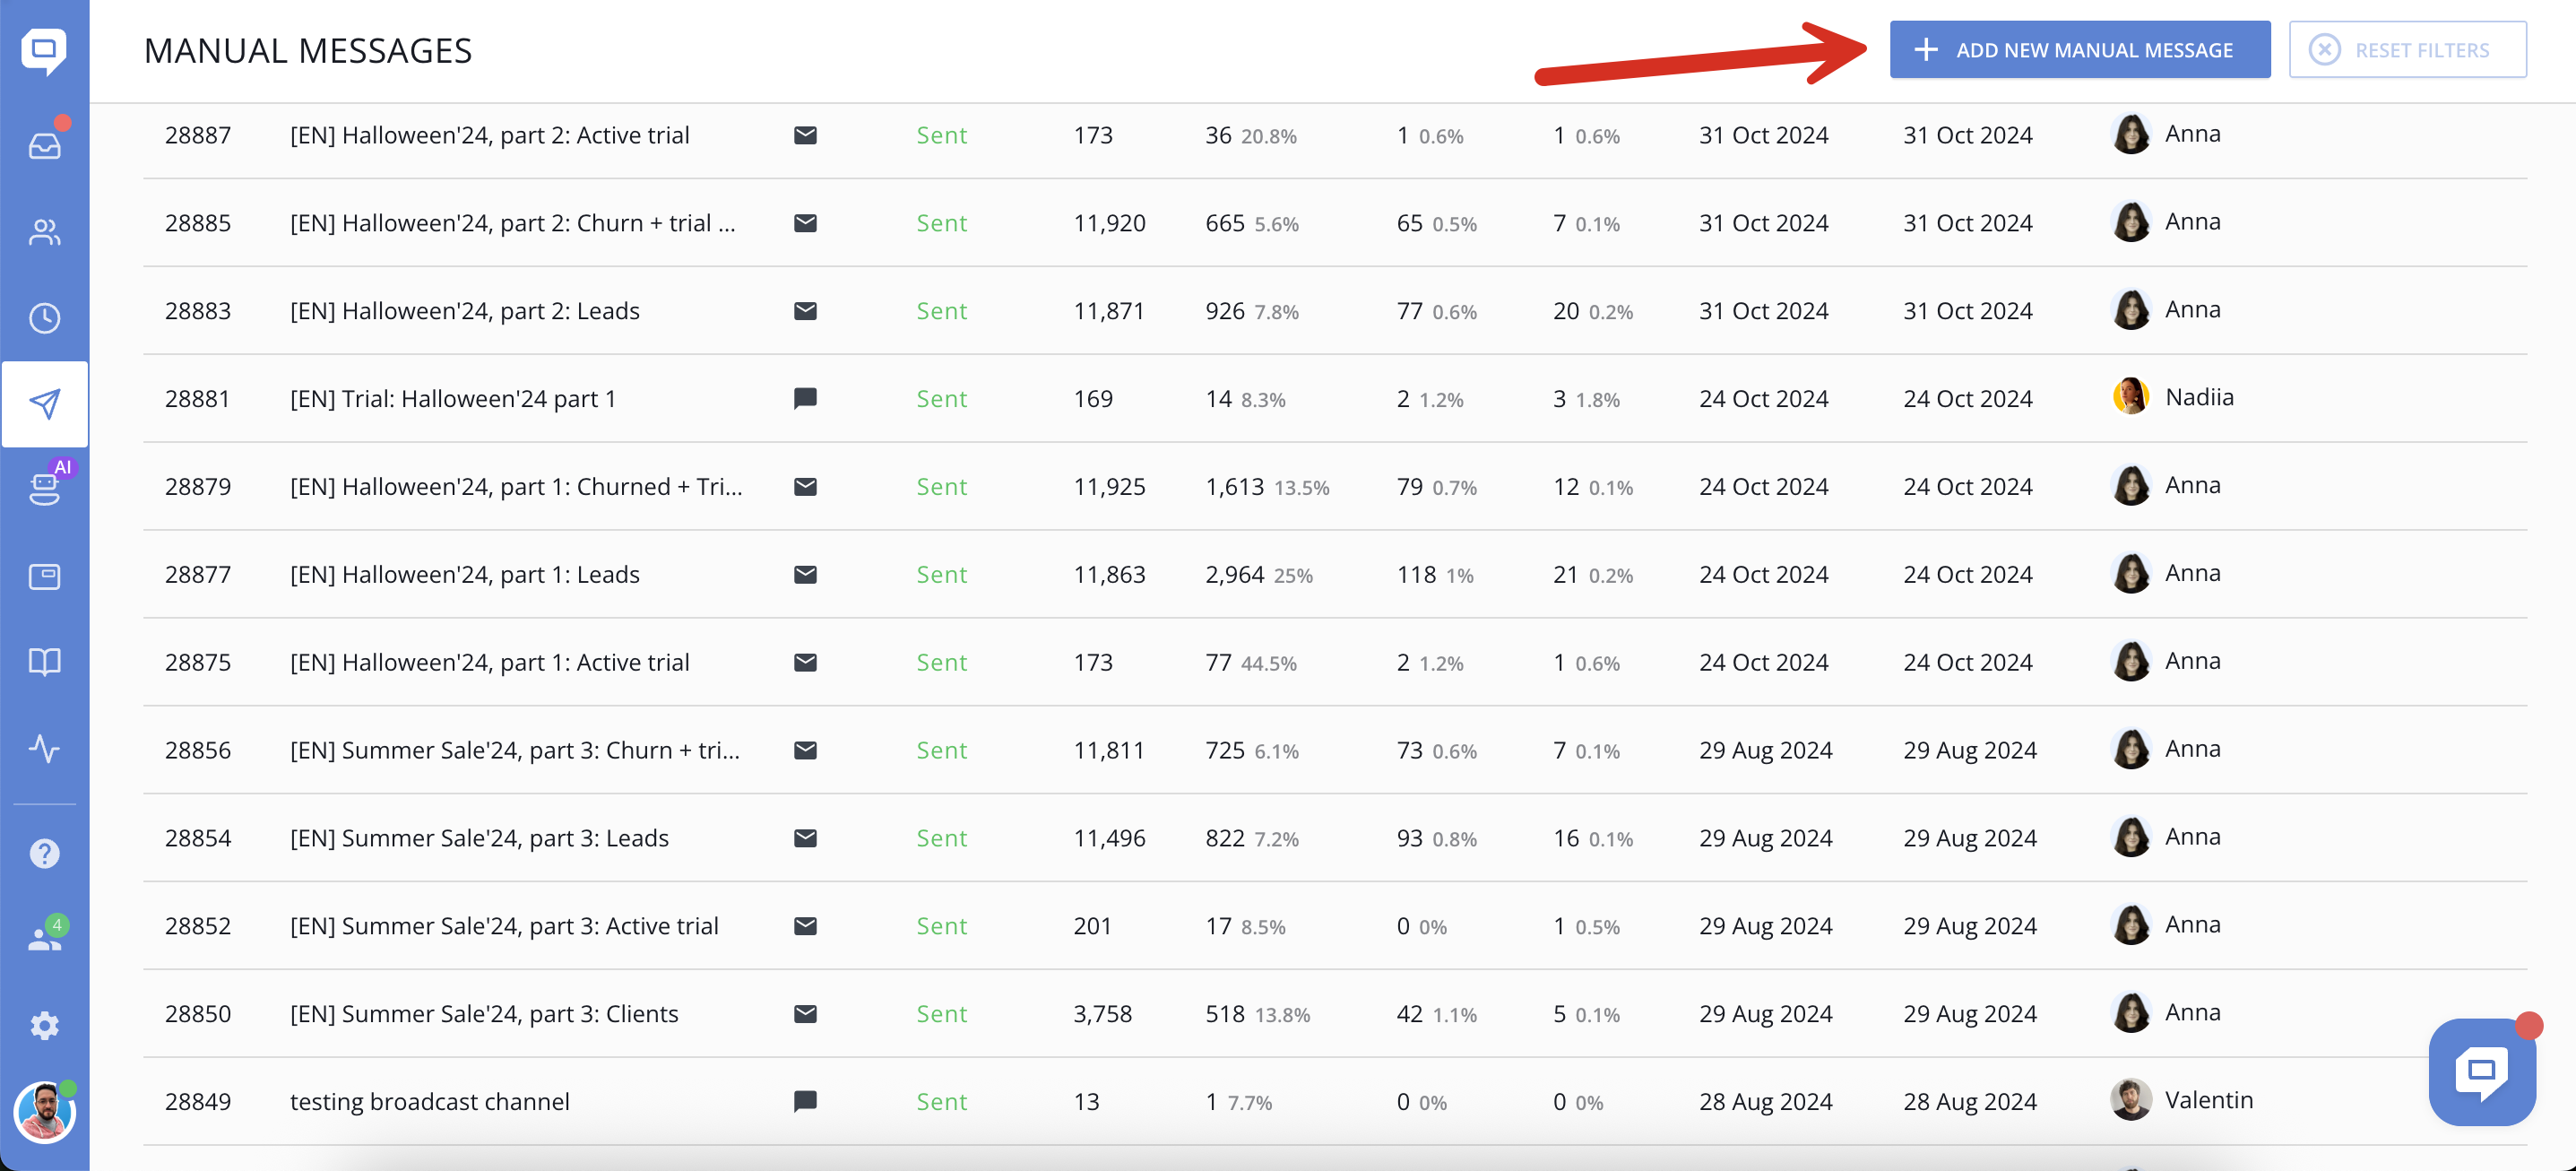
What Are Manual Messages?
Manual messages are one-off campaigns that you design, schedule, and send on demand via chat or email. They let you proactively reach out to segmented audiences, such as customers, leads, or website visitors
When to Use Manual Messages
-
Announcing new product features or company news
-
Promoting seasonal discounts, sales, or events
-
Sharing important updates or reminders with select user groups
-
Sending newsletters or educational content
-
Nurturing leads and re-engaging inactive users
Think of manual messages as “one-off” campaigns that you initiate yourself to engage your audience in a targeted and timely manner.
How to Create and Send Manual Messages
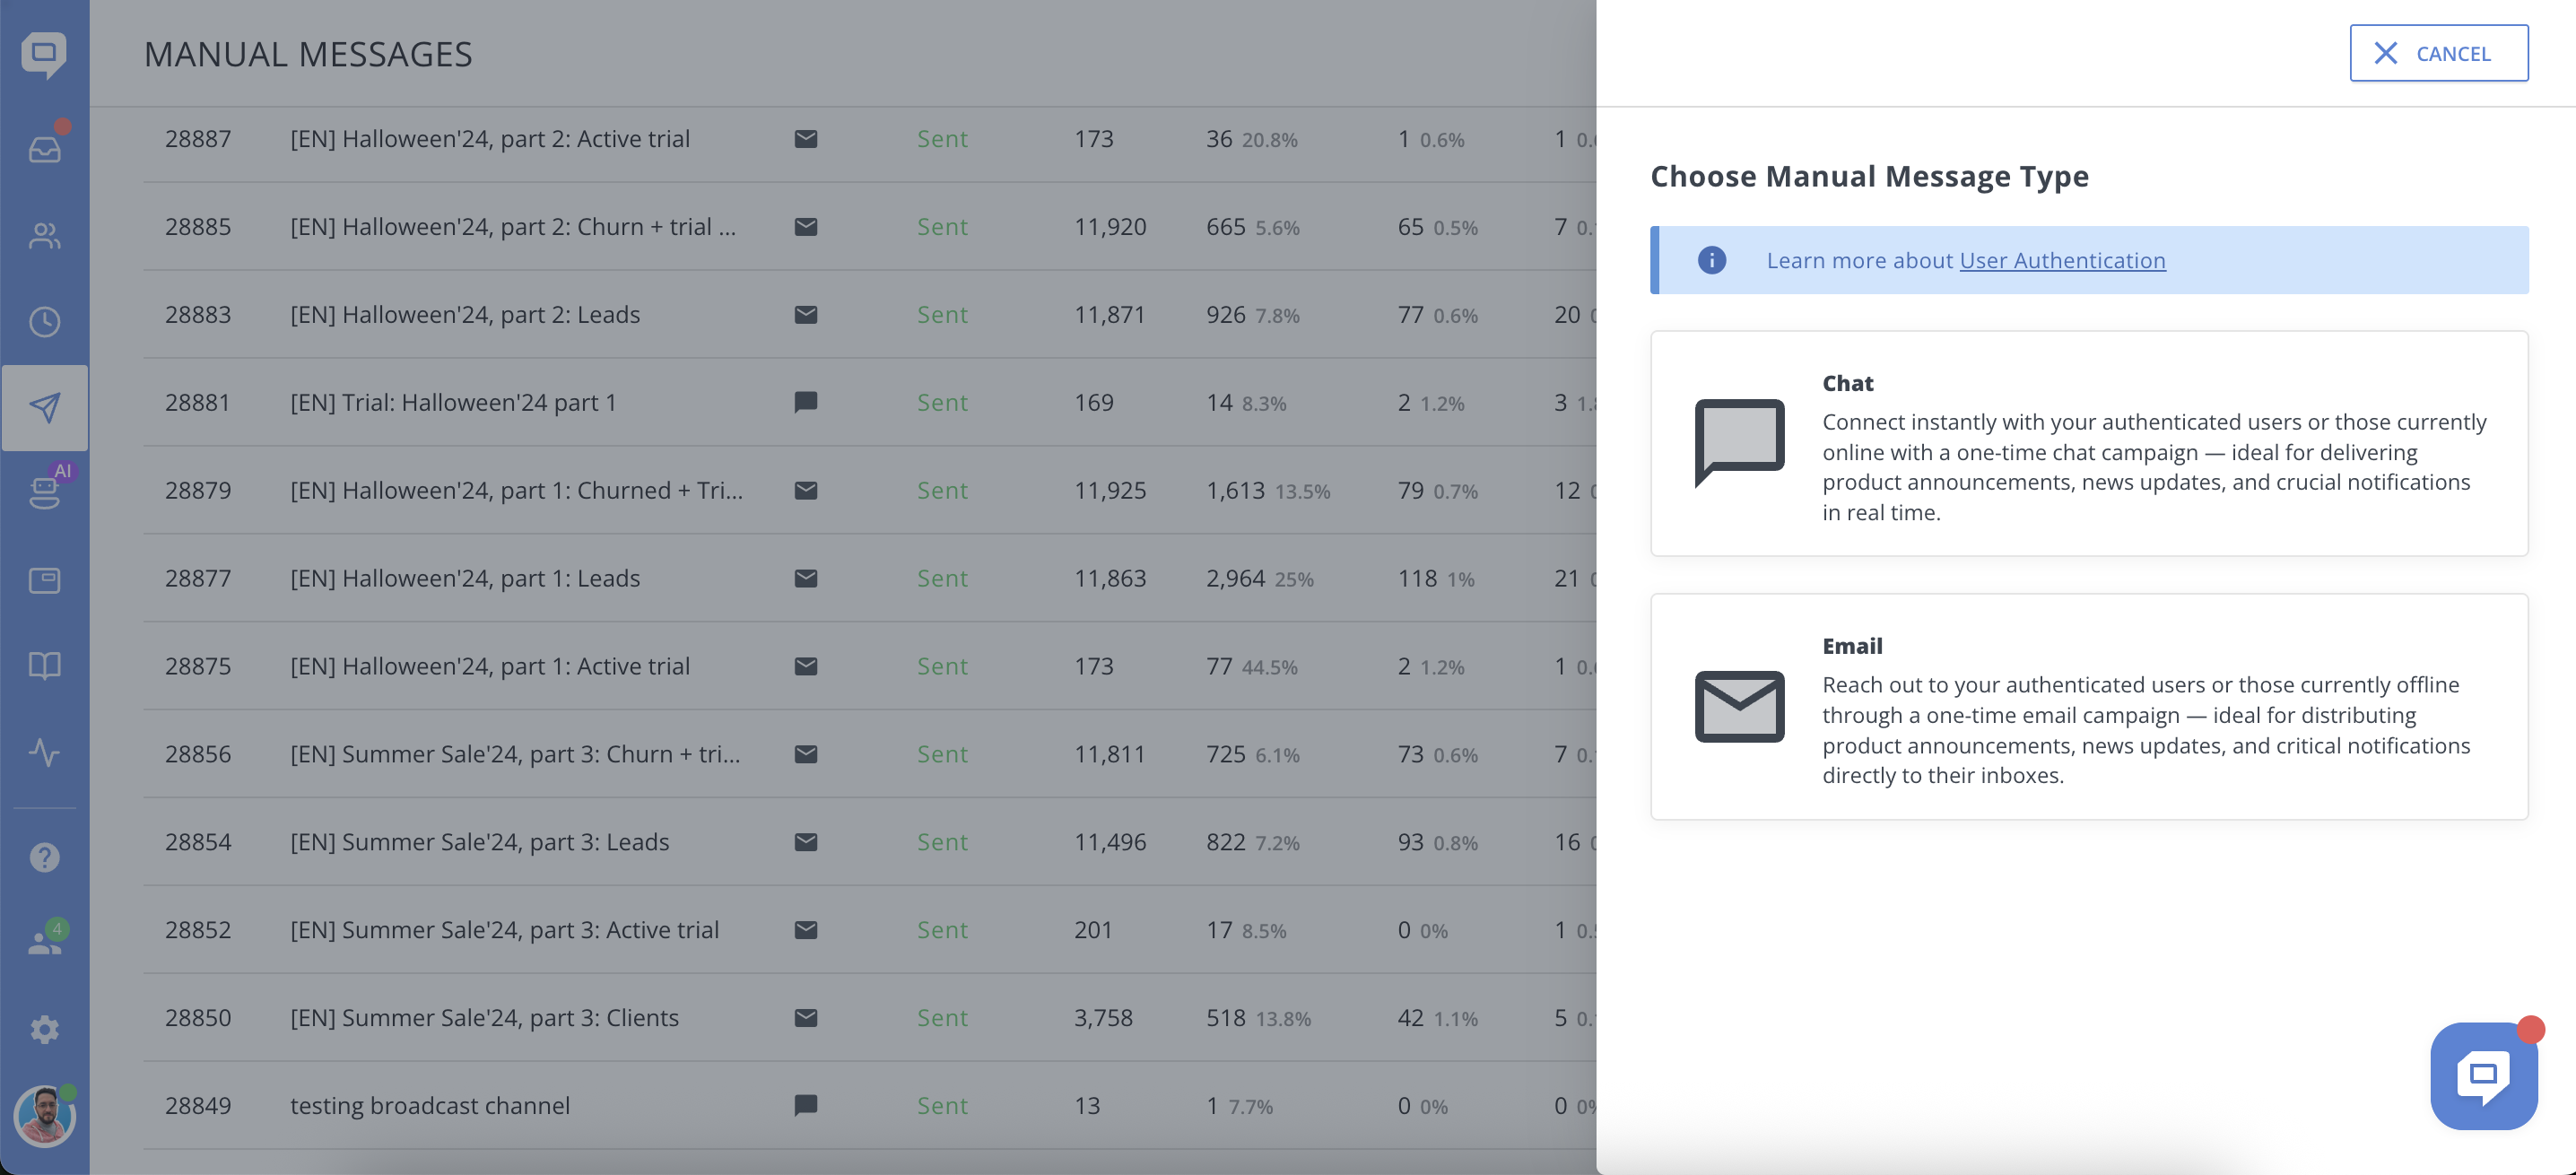
Step 1: Start a New Manual Message and Choose Type
-
In the Manual Messages section, click the “Add New Manual Message” button at the top right.
-
A popup will appear asking you to choose the type of manual message you want to create:
-
Chat: Send a one-time chat campaign to authenticated users or currently online visitors. It's also delivered in Mobile SDK. Ideal for real-time announcements, news updates, and urgent notifications.
-
Email: Send a one-time email campaign to authenticated users or offline contacts. Perfect for distributing product news, updates, and important notifications directly to inboxes.
-
-
Select the desired type to proceed with creating either a chat or email campaign.
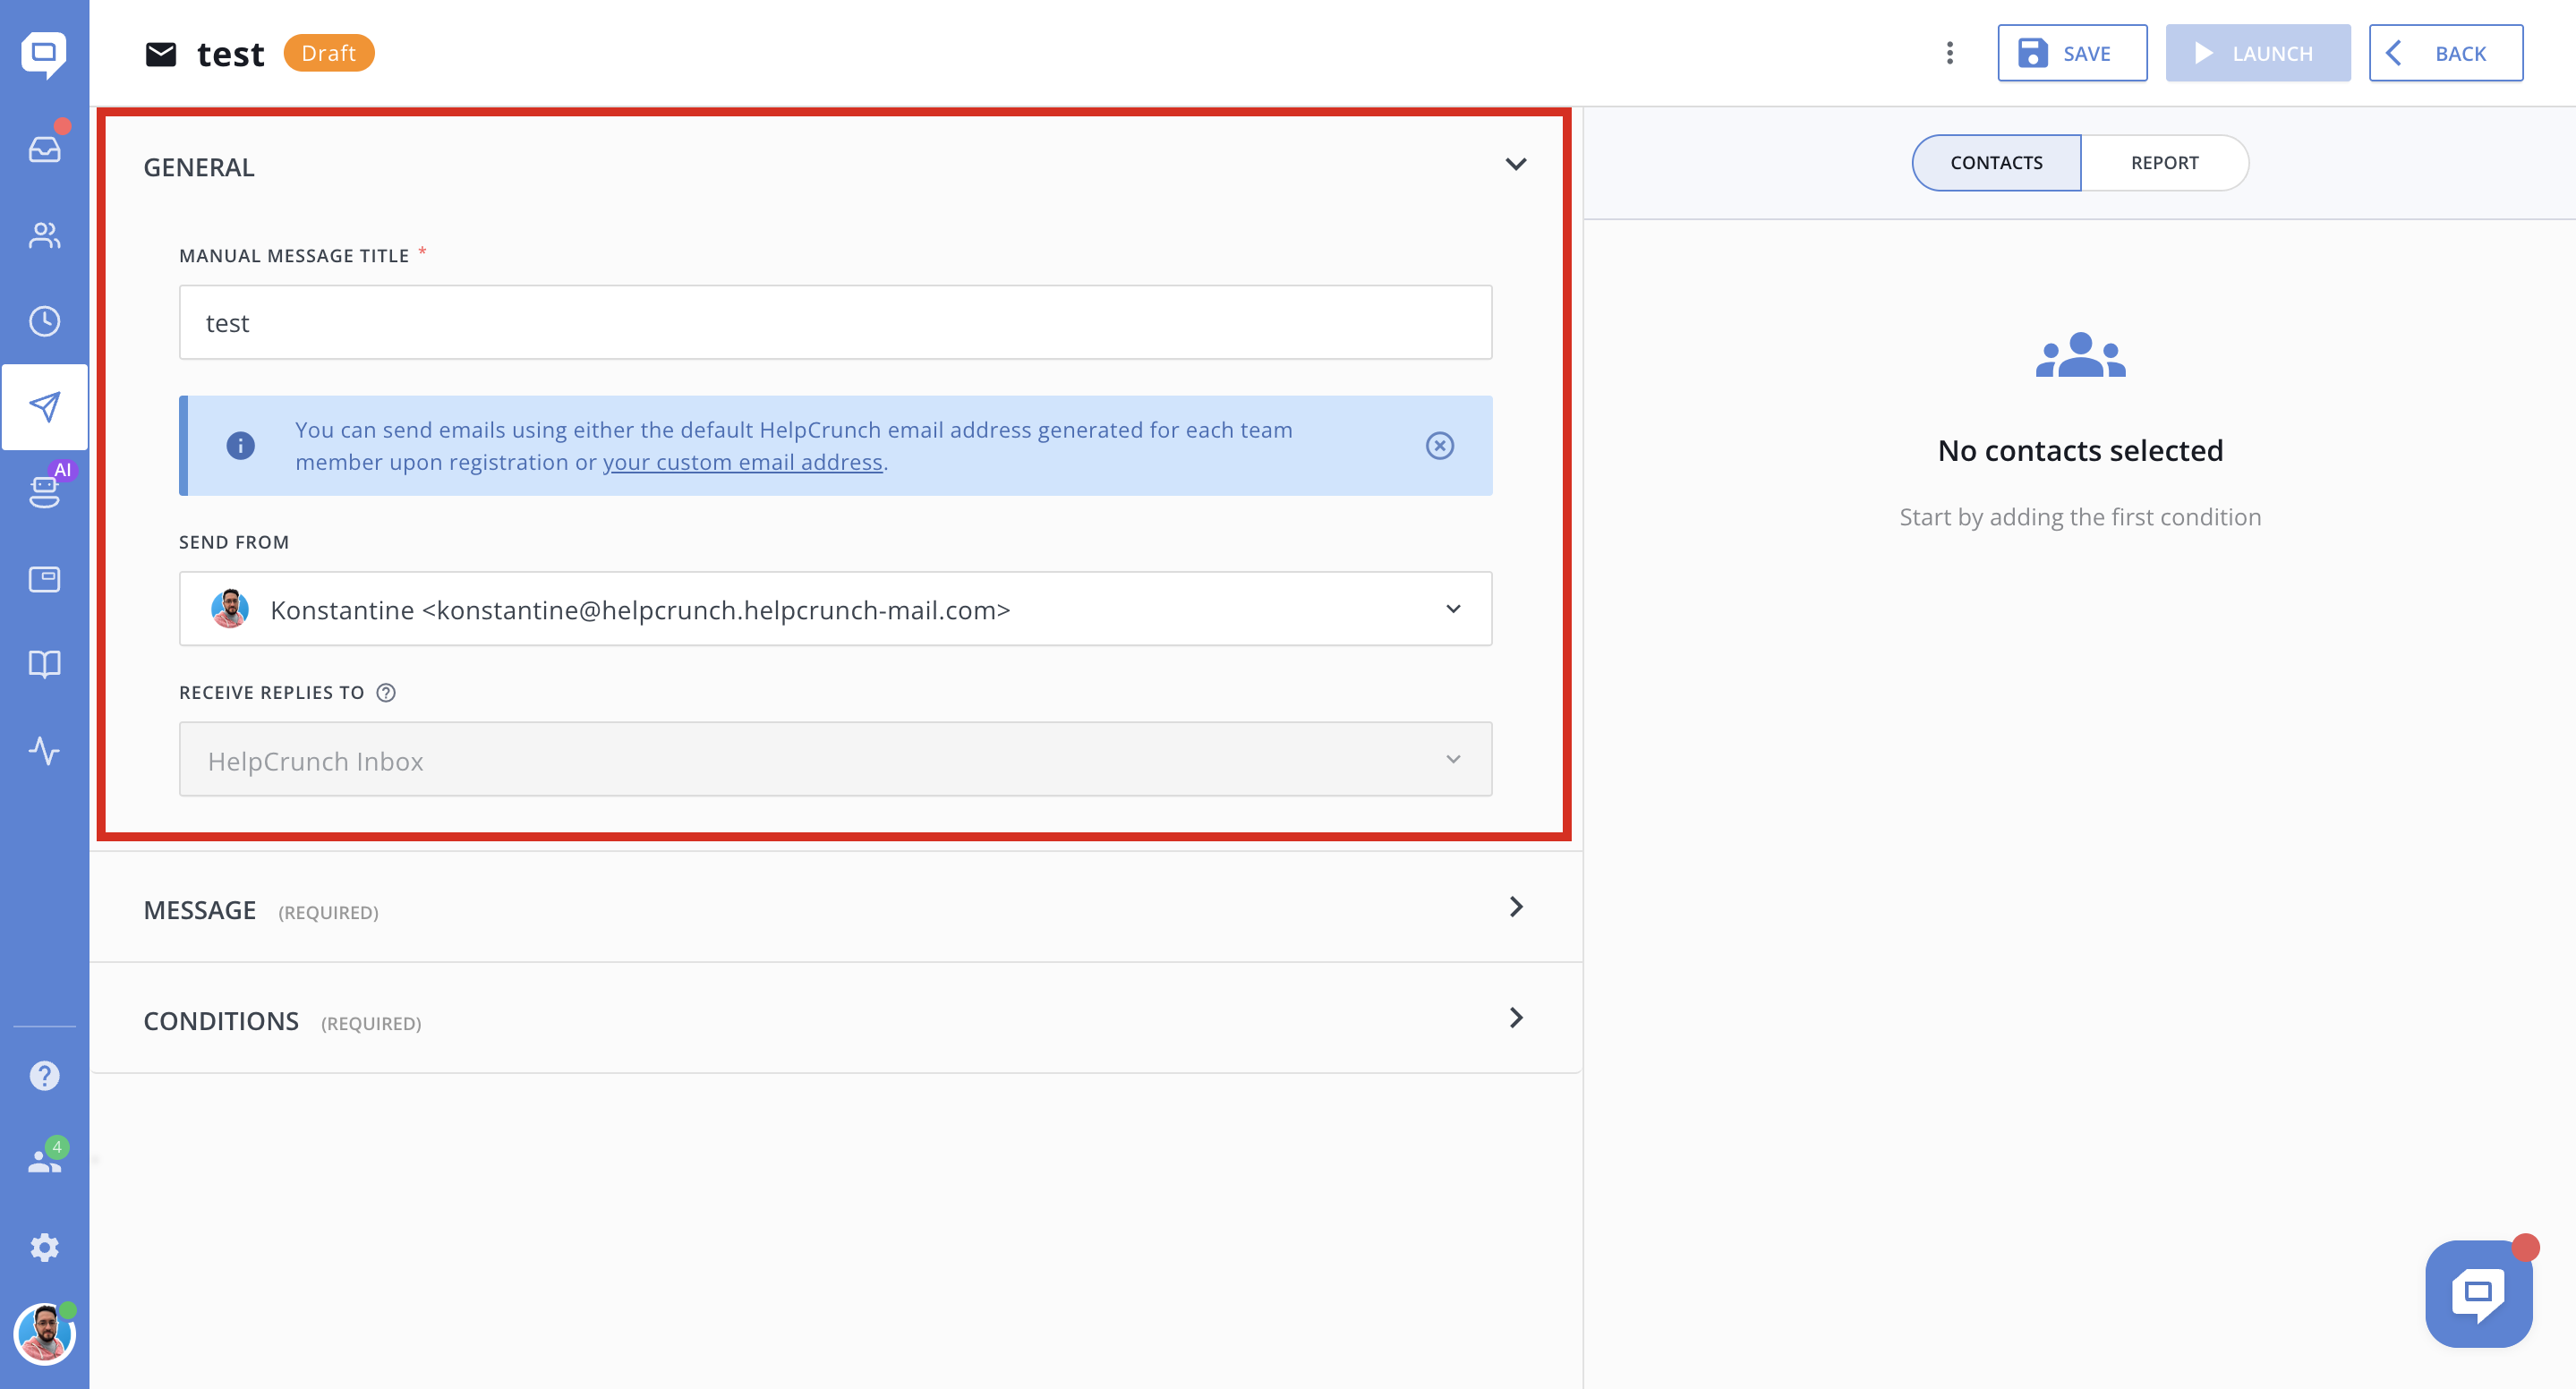
Step 2: General Settings
-
Manual Message Title: Enter a clear, descriptive name for your email campaign (e.g., "test"). This helps you identify the campaign later.
-
Send From: Select the sender's email address. You can choose between the default HelpCrunch-generated email for each team member or a custom email address you’ve set up.
-
Receive Replies To: This field shows where replies from recipients will be sent (e.g., HelpCrunch Inbox). In case of using custom email domains, reply can be delivered either to HelpCrunch Inbox or your custom email.
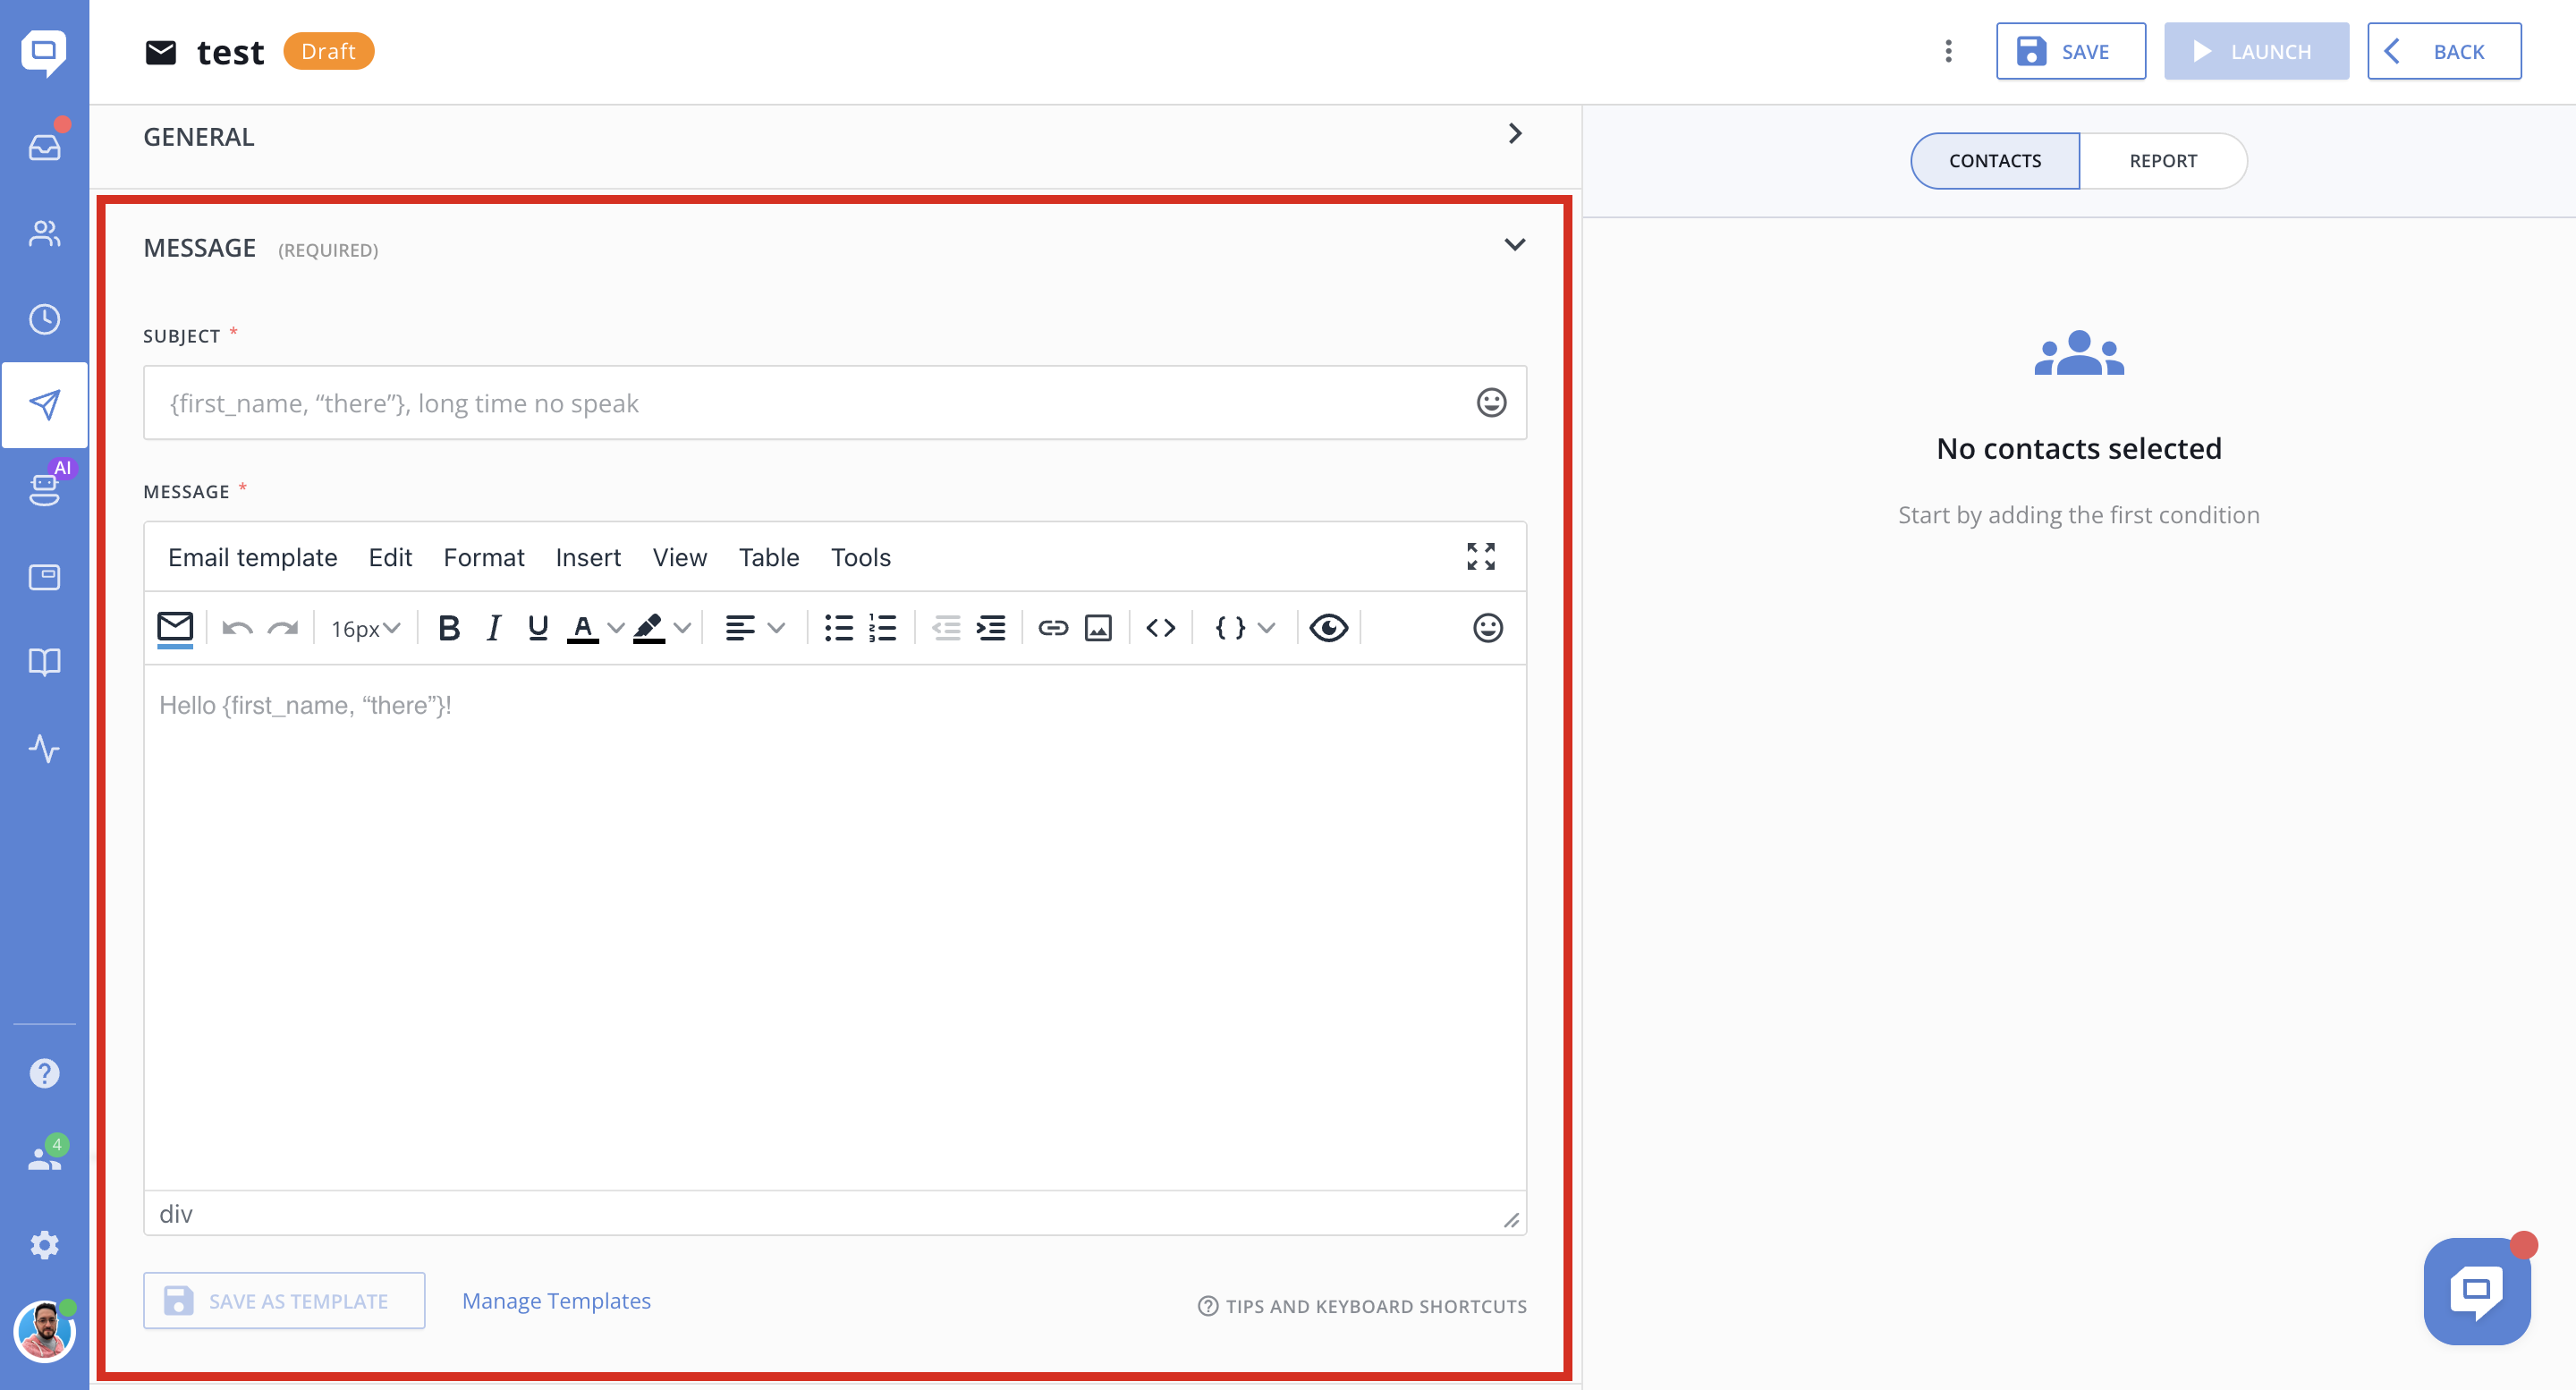
Step 3: Compose Your Message
-
Subject: Write the subject line for your email. You can use dynamic placeholders to personalize the subject, such as {first_name, "there"}, which inserts the recipient’s first name or defaults to "there" if the name is not available.
Example:
Hey {first_name, "there"}, long time no speak -
Message Body: You can choose one of our pre-made message templates or create and save your own templates.
Use the rich text editor to create your email content. You can:-
Format text (bold, italic, underline, colors)
-
Insert lists, links, images, and tables
-
Use dynamic placeholders to personalize the message body
-
Preview the email layout
-
Insert emojis for a friendlier tone
-
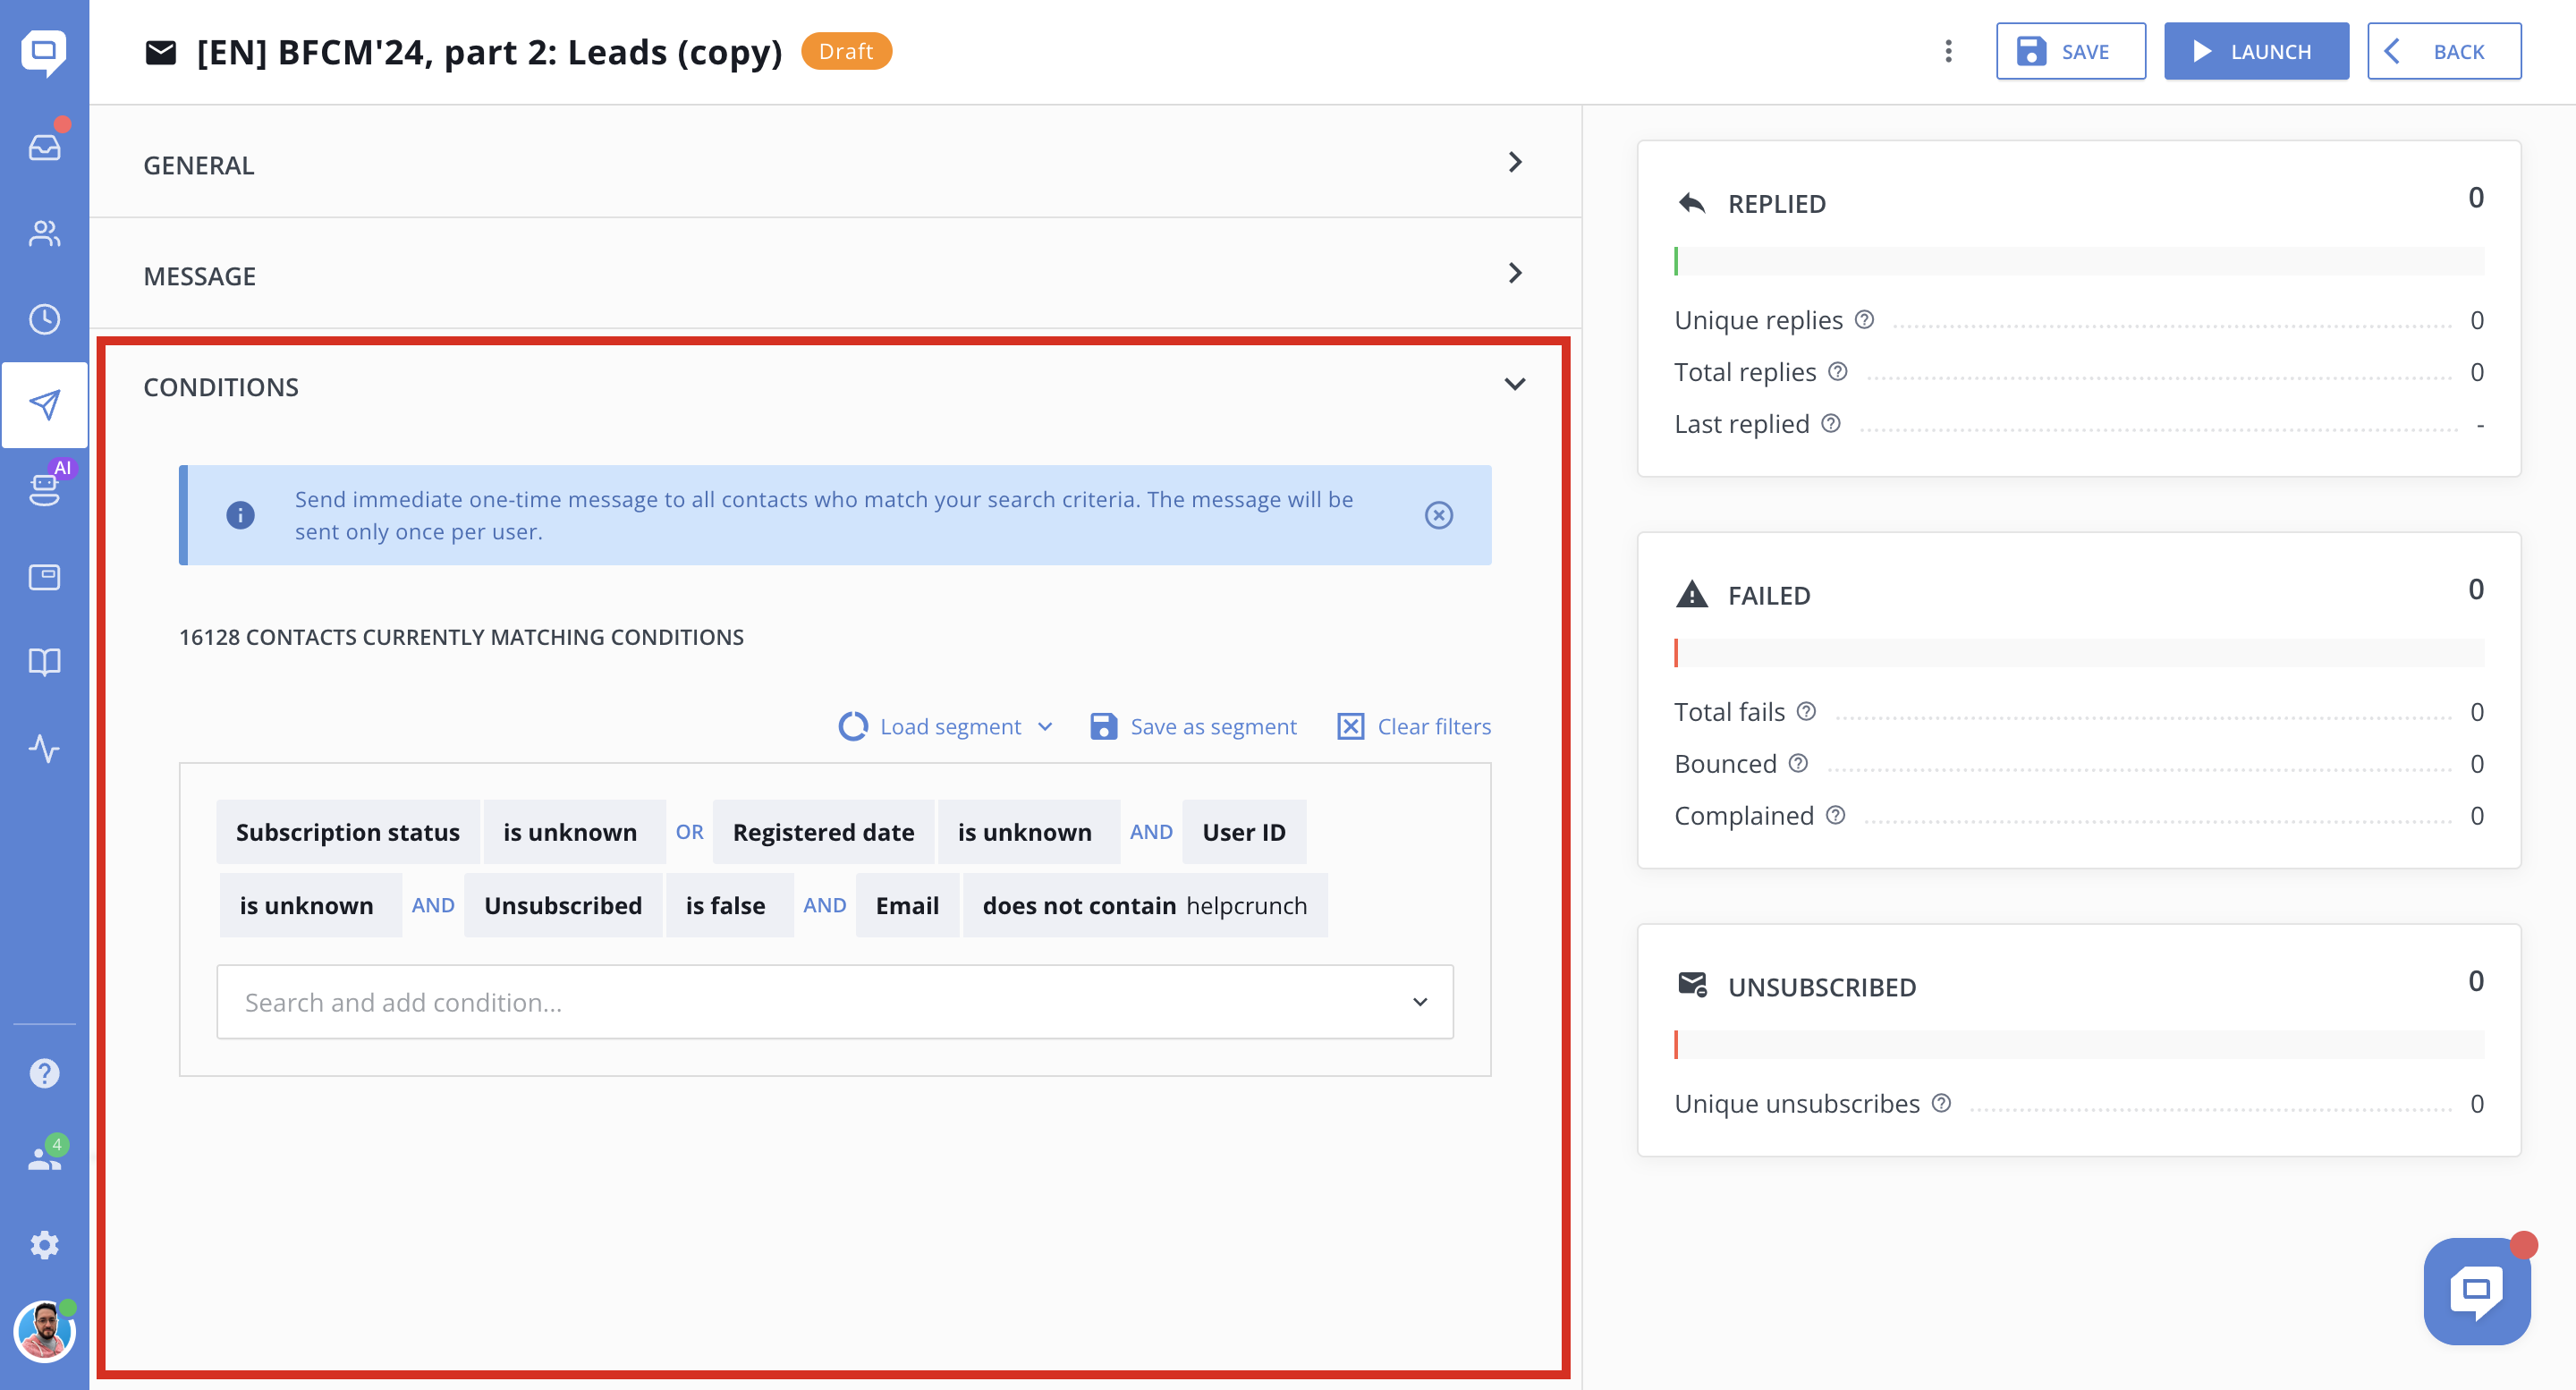
Step 4: Define Conditions (Audience Segmentation)
-
Use the conditions panel to select your target recipients. This is a required step to specify who will receive the email campaign.
-
You can add multiple filtering conditions based on User Information, such as:
-
User ID
-
Name
-
Email
-
-
The interface displays how many contacts currently match the selected criteria.
-
You can save and load segments to reuse audience definitions in the future.
-
The message will be sent immediately as a one-time campaign to all users who meet these conditions.
-
The campaign is sent only once per user, preventing duplicate sends to the same recipient.
With this enabled, you can also send custom attributes from your website or app to HelpCrunch. This lets you easily filter contacts and send highly targeted messages to users based on the specific criteria you define for your business.
Step 5: Save Manual Message, Send Test Email, and Launch
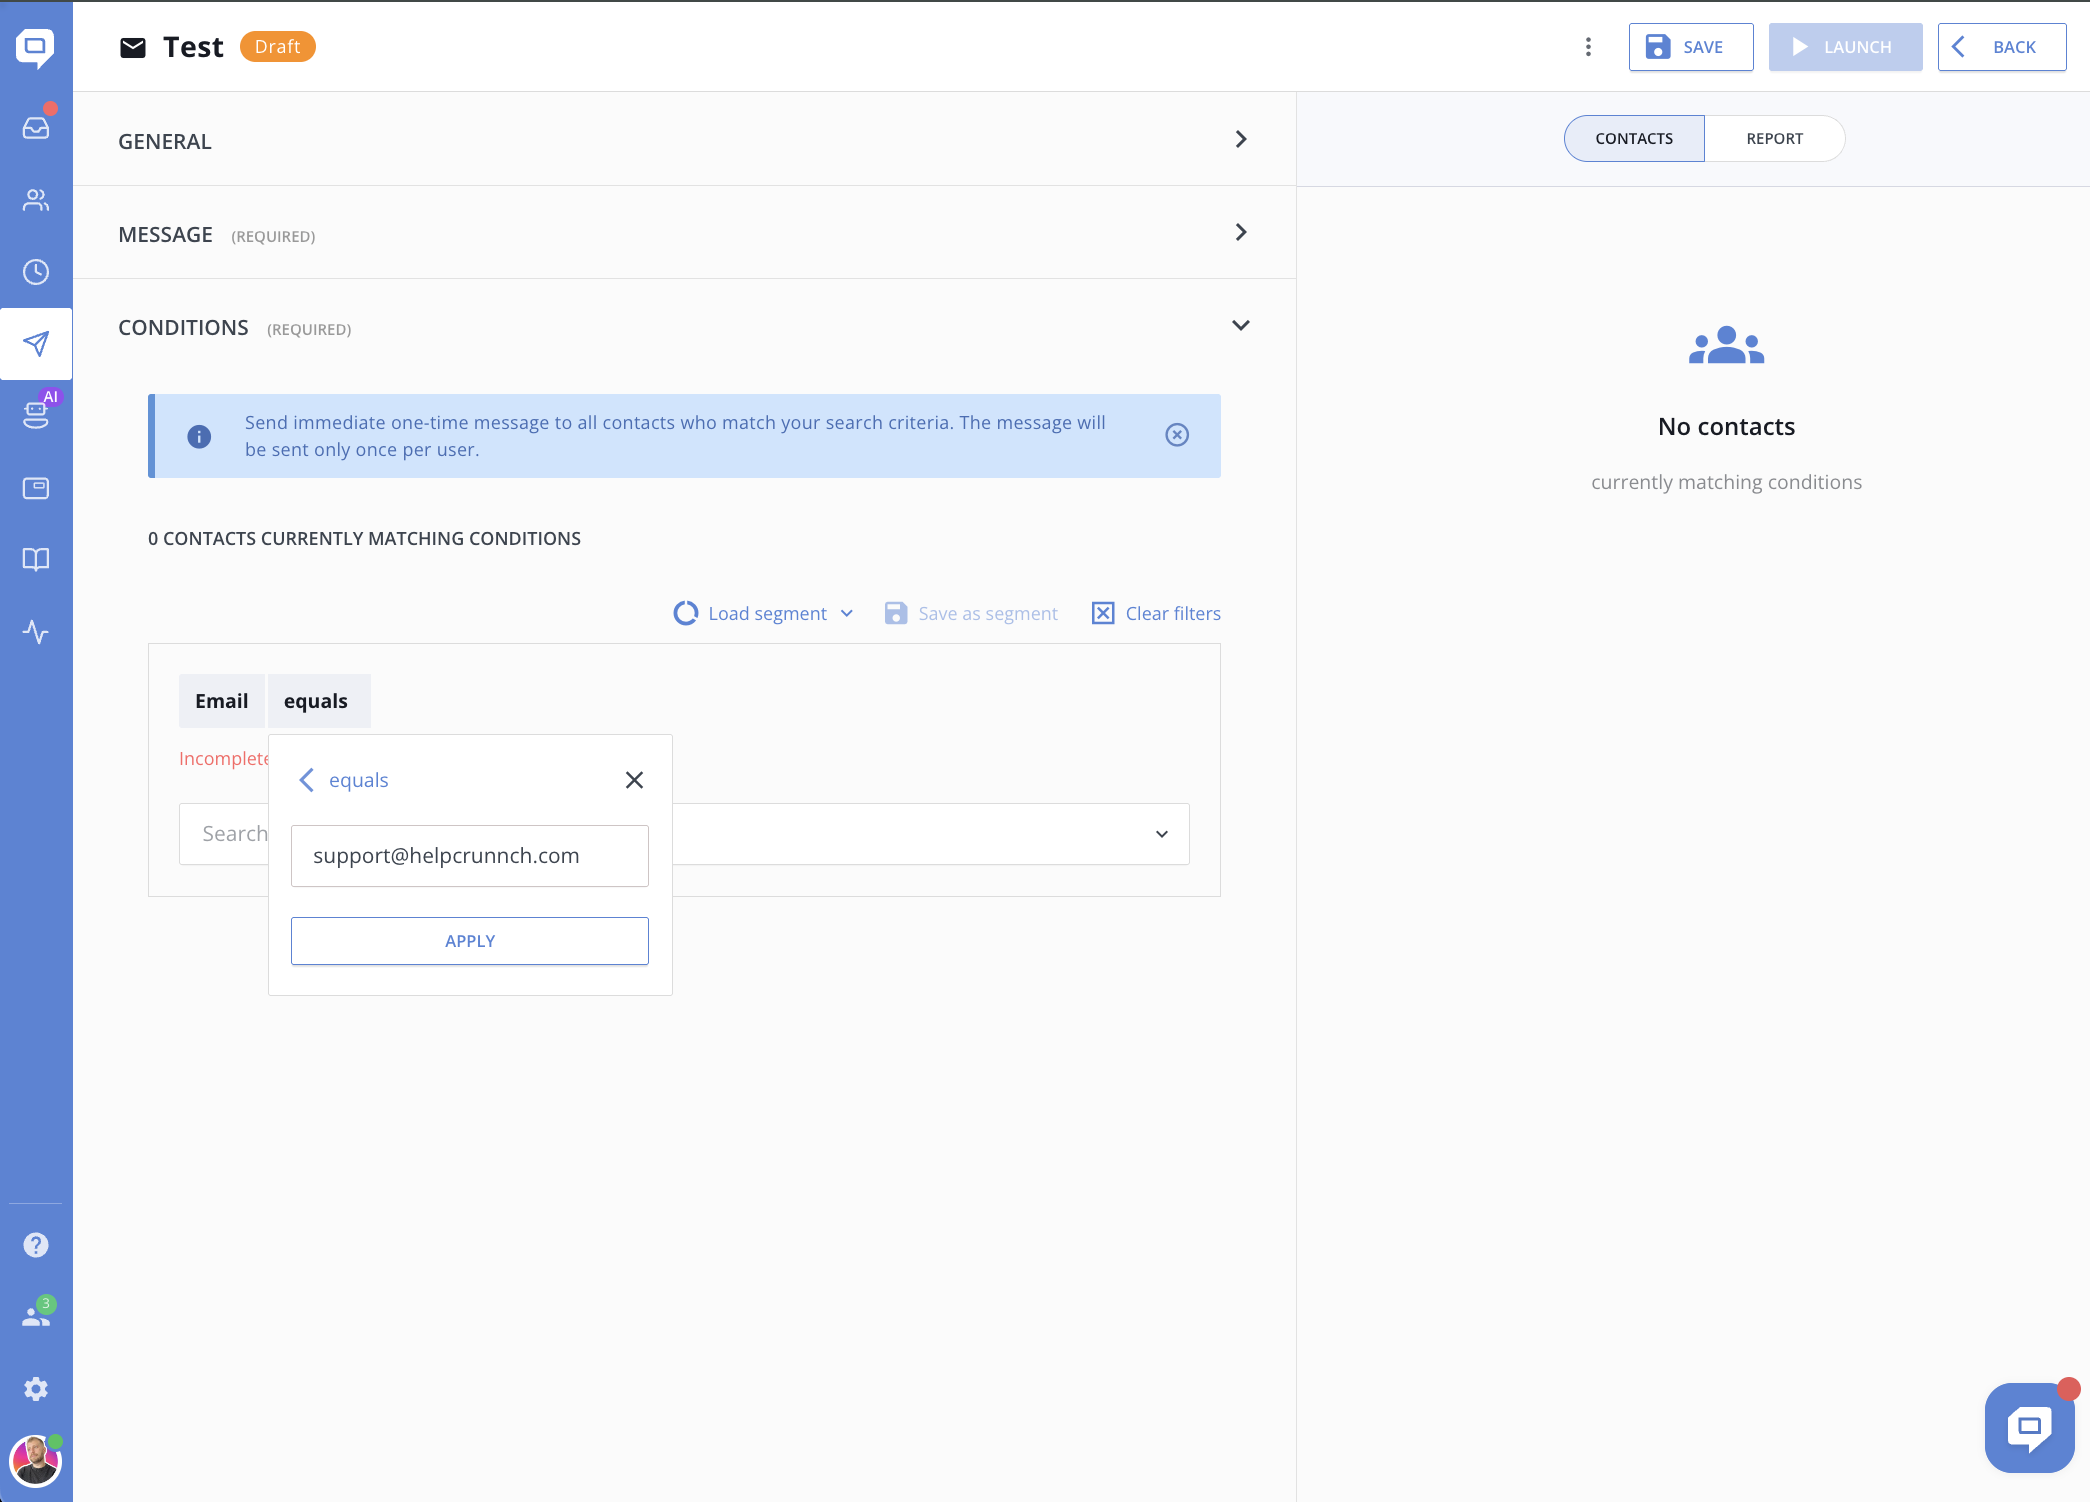
Before launching to your full audience, it’s a good practice to send a test email (for email campaigns) to verify formatting, links, and personalization.
To send a test to yourself, go to the conditions tab and add the rule:
Email - Equals - Your_email_address
Important: After you launch a manual email campaign, it may be submitted for a spam compliance review (manual message status – "in review"). The review can take up to 24 hours. Once the campaign is approved, the emails will be sent automatically – no further action is required.
Step 6: Monitor Campaign Performance with Report Metrics
After launching your manual message campaign, use the Report tab to track how your audience interacts with your message. Key metrics include:
-
Audience (Sent): The total number of contacts who received your message based on your selected conditions.
-
Opened: The number and percentage of recipients who opened your email or viewed your chat message, showing initial engagement.
-
Clicked: How many recipients clicked on links or buttons inside your message, indicating active interest.
-
Replied: The count and rate of recipients who replied to your message, useful for measuring direct engagement and conversations started.
-
Failed: The number of messages that failed to deliver due to invalid emails, soft bounces, hard bounces, or other delivery issues.
-
Unsubscribed: How many recipients chose to unsubscribe after receiving your message, helping you gauge audience sentiment and maintain list health.
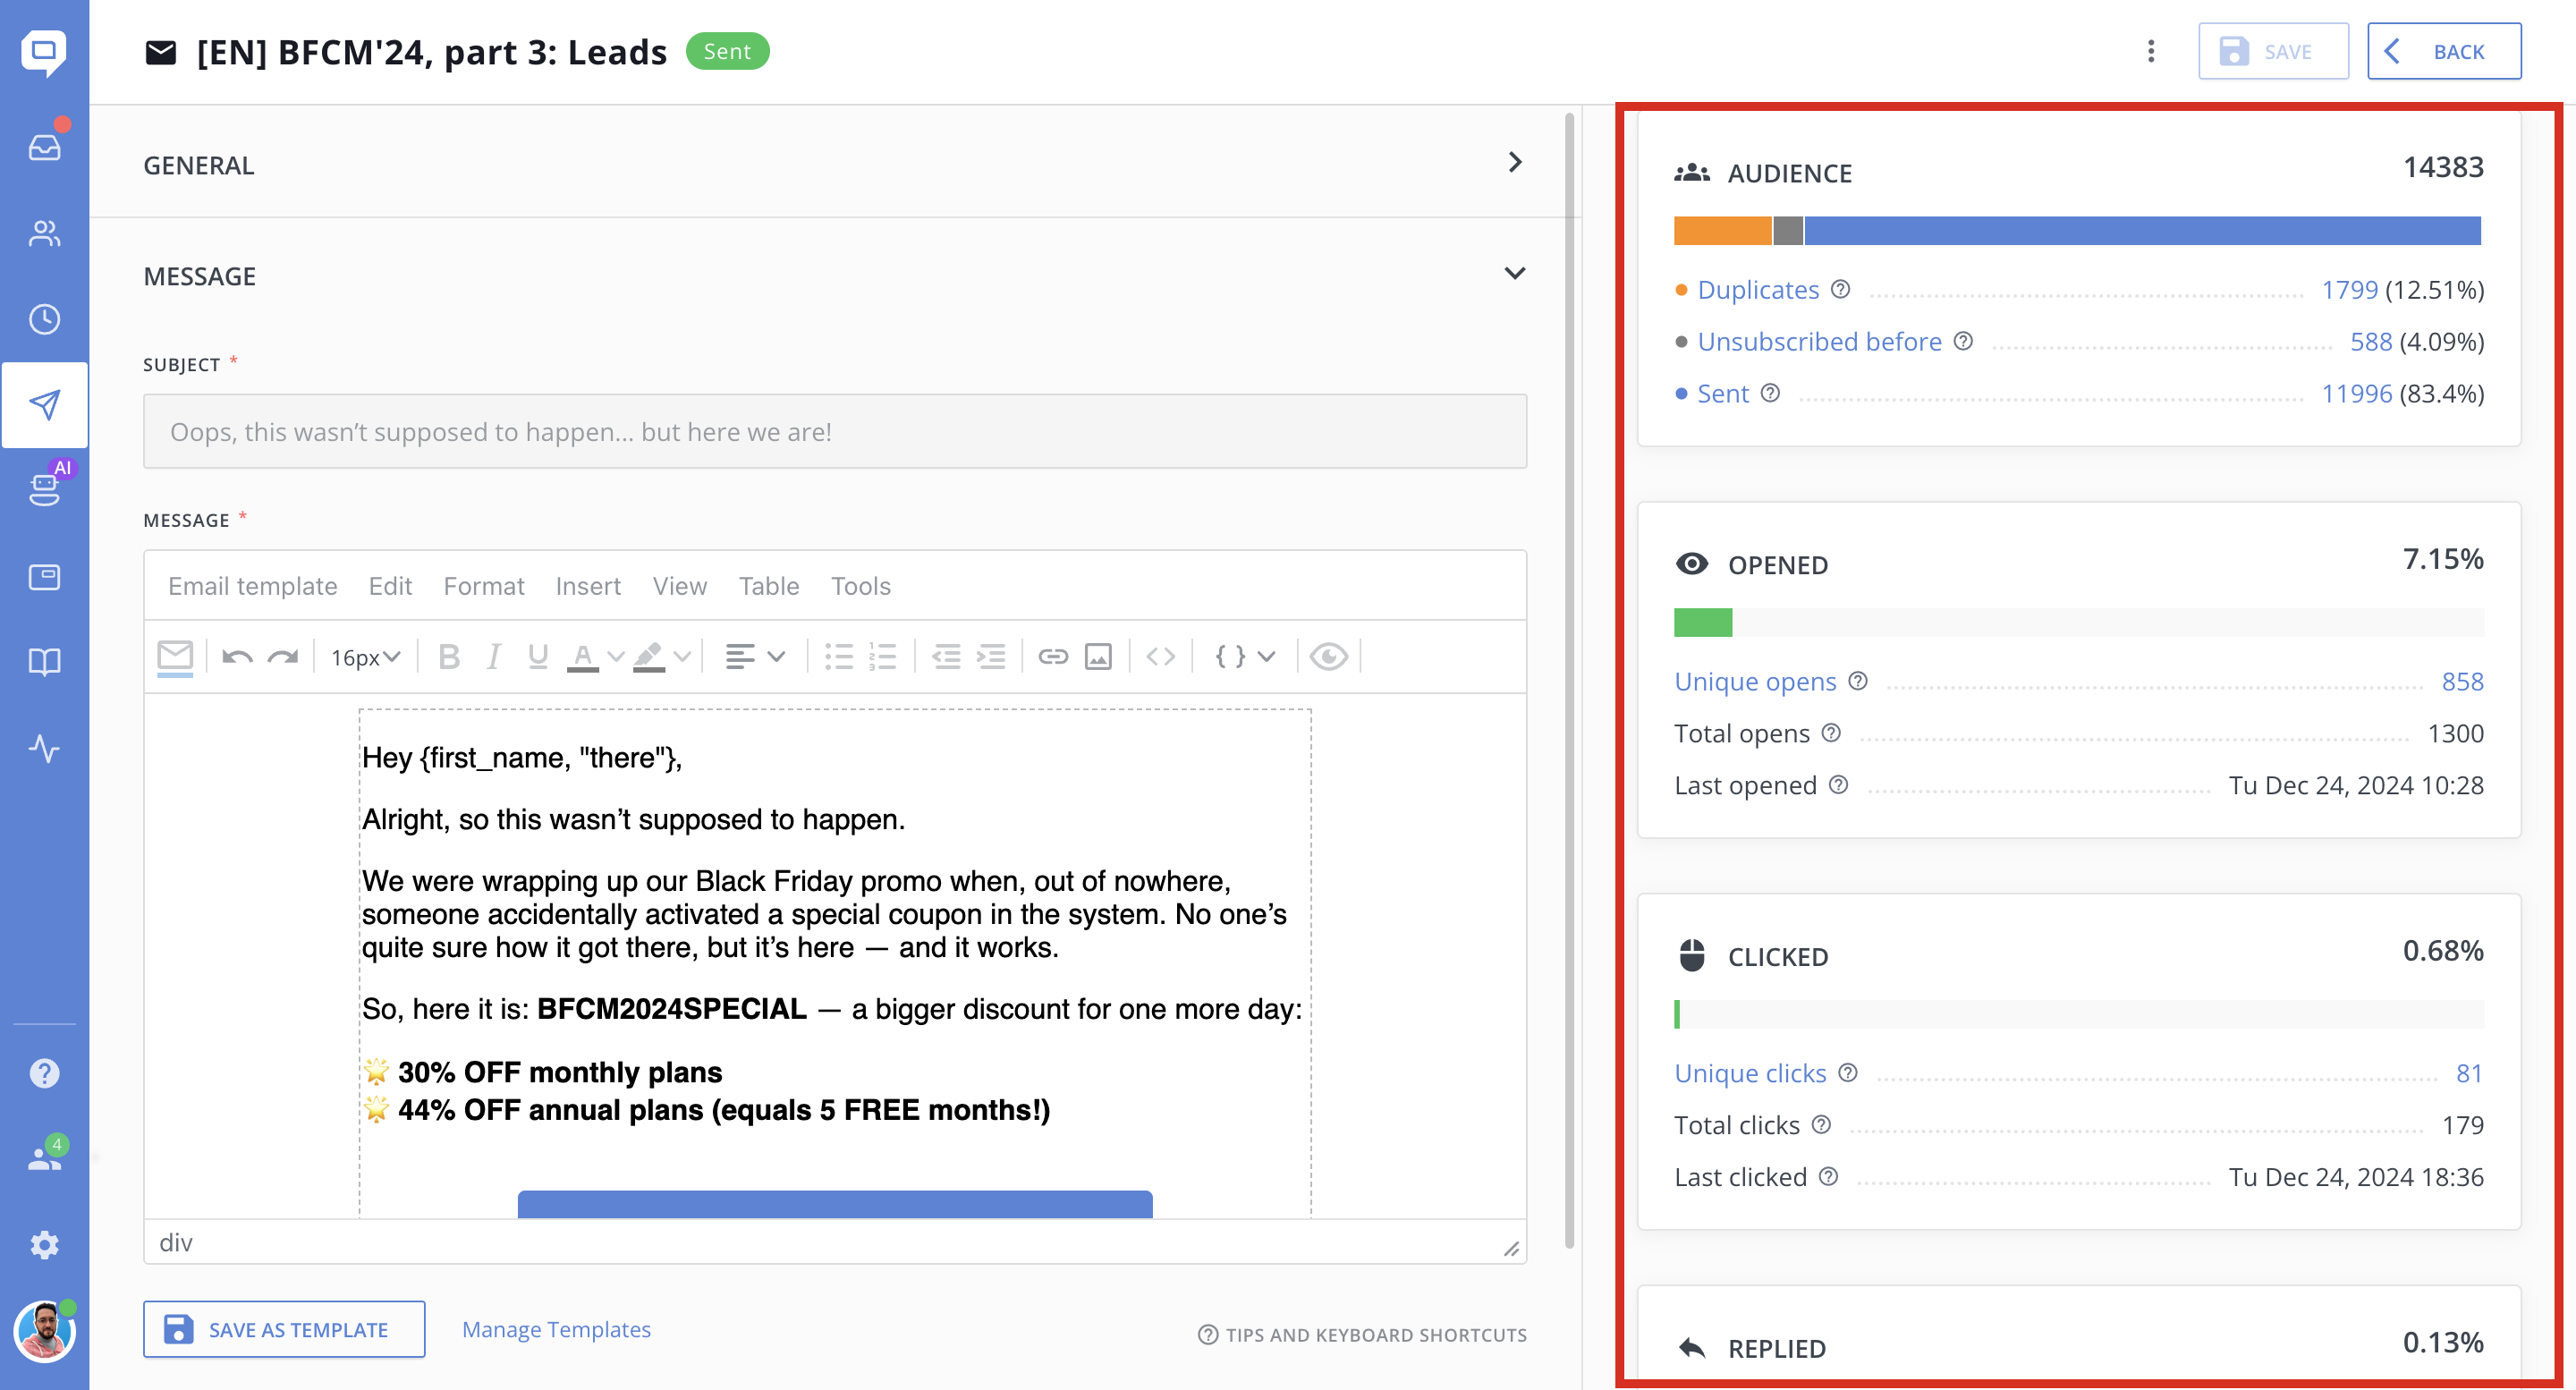
Reviewing these metrics regularly helps you optimize future campaigns for better targeting, content, and results.
Tips for Successful Manual Campaigns
-
Segment your audience carefully for maximum relevance.
-
Keep messages concise and focused on a clear goal.
-
Use compelling call-to-action buttons to drive engagement.
-
Avoid spamming users by limiting frequency and respecting preferences.
-
Monitor campaign results to refine your targeting and messaging.
Manual messages empower your team to launch timely, relevant campaigns that strengthen customer engagement and drive results - all without complicated automation setups.