Your custom email domain can be used to send such emails from HelpCrunch:
- Direct emails from Inbox
- Email manual messages
- Email auto messages
- Getting started
- Add domain in your HelpCrunch account
- Add DNS records to your domain
- Verify your domain
- Add more domains or email addresses
- Use custom email address for Inbox
- Use custom email address for Auto/Manual Messages
- Troubleshooting
Getting started
Without observing email hygiene your domain might get into spam databases or be blacklisted.
We strongly recommend starting with a domain warm-up if you haven’t sent emails from your domain before. Send a low volume - a maximum of 1,000 subscribers per day. Then double the sending volume every three to four days until you reach your maximum daily volume.
Add domain in your HelpCrunch account
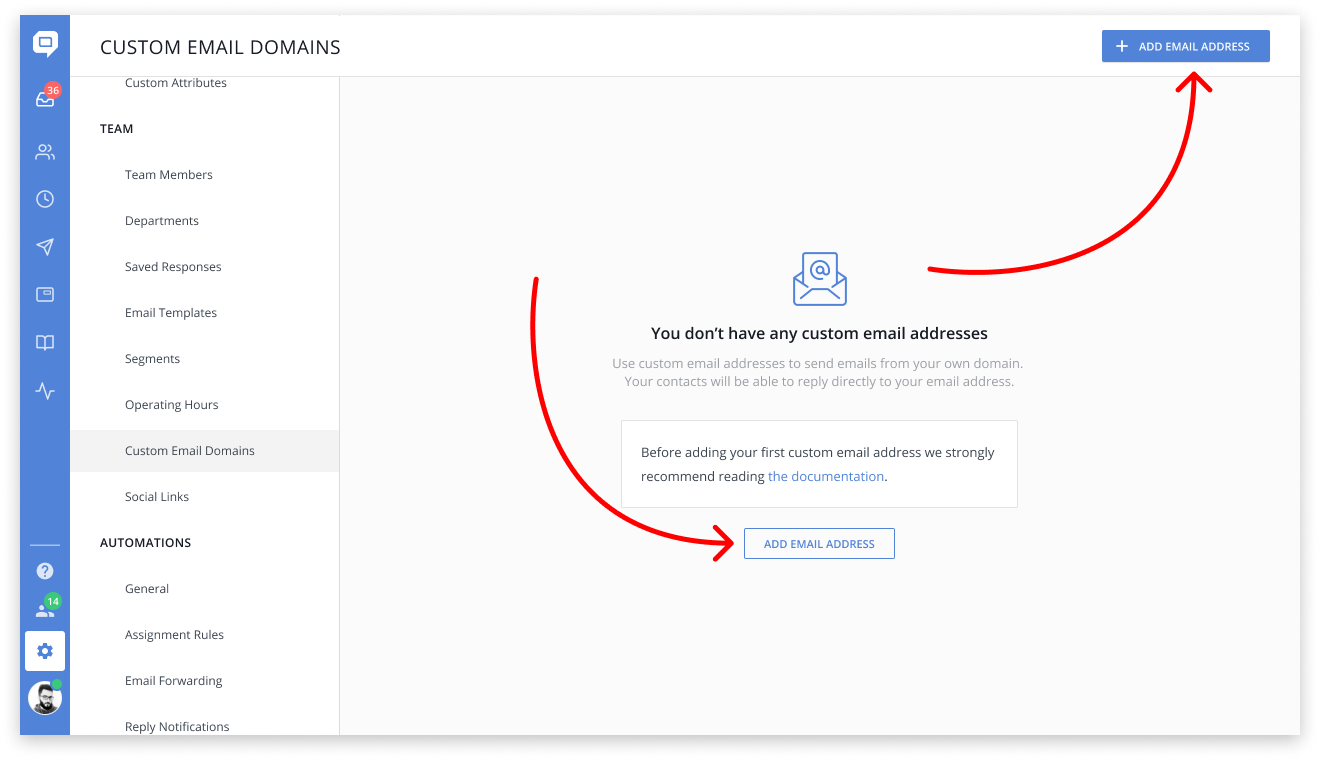
1. In your HelpCrunch account navigate to Settings → Team → Custom Email Domains and click 'Add email address':
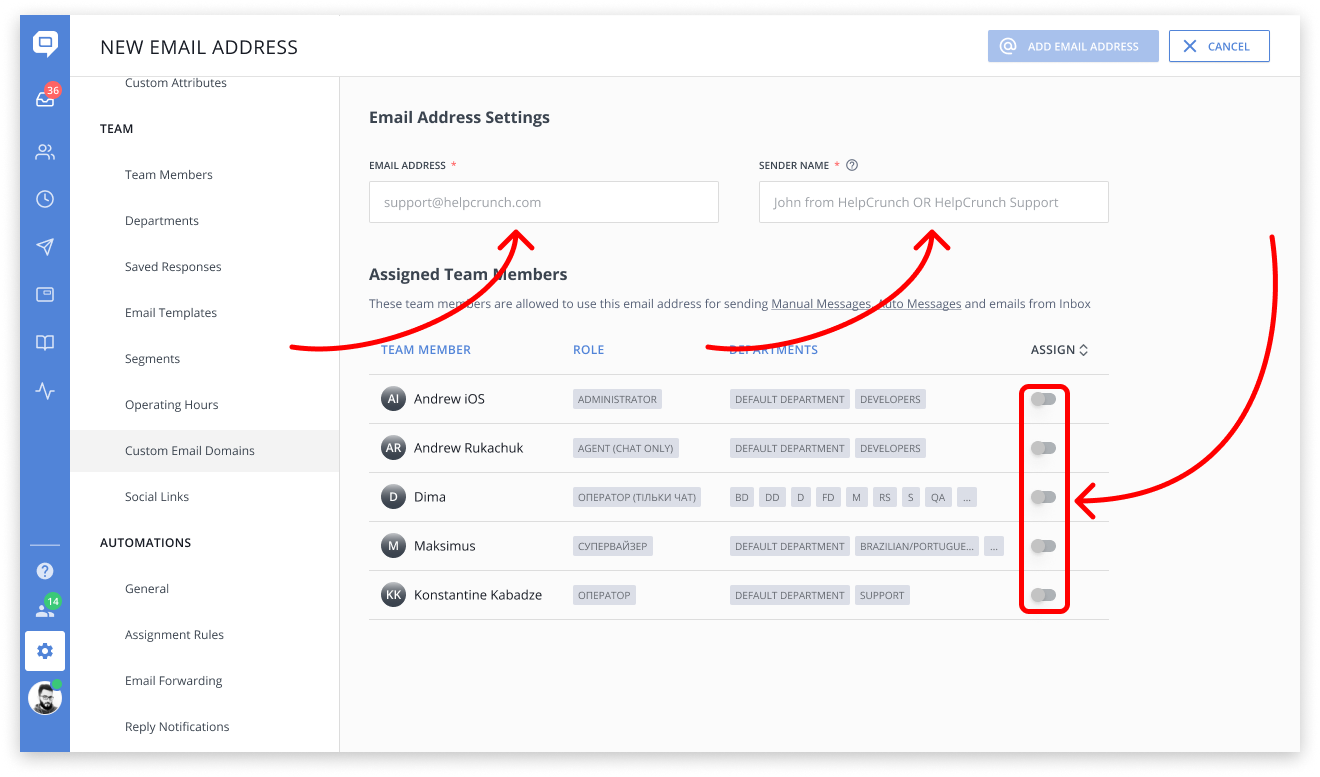
2. Enter an email address and a sender name you want to use. Then, assign team members to this address. Only the assigned team members will be able to use the email address:
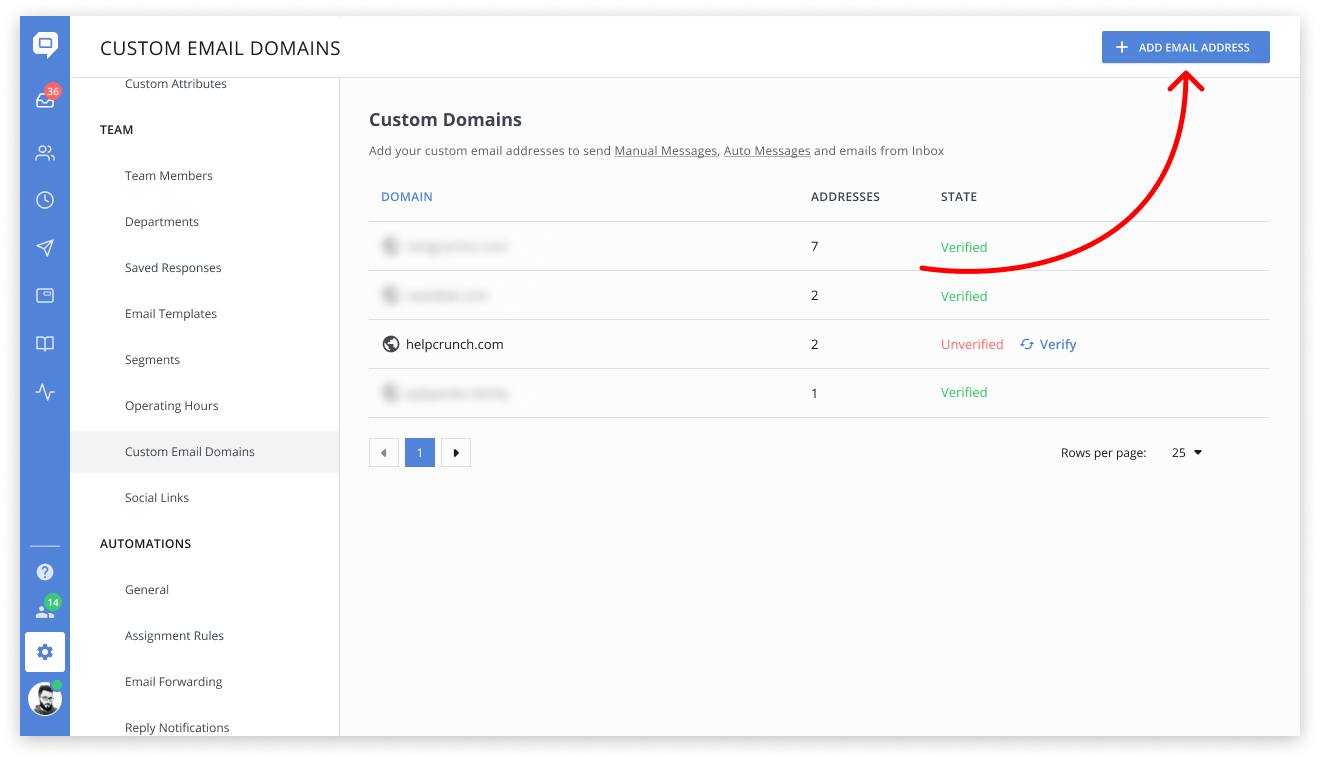
3. The email address and the domain are added. Now it’s important to verify your domain by adding DNS records. This will authenticate HelpCrunch as the permitted sender. To start authentication click ‘Verify’ for the domain:

Add DNS records to your domain
Go to your DNS provider’s account and add DNS records by using this documentation:
- GoDaddy
- Namecheap
- Cloudflare: make sure the proxy status mode is switched to DNS only (grey cloud) for all added records
- Need help or your provider not on the list? Please write us a message
Verify your domain
When all the DNS records are already added for your domain, click ‘Verify’ on the panel on the top:

When all DNS records are found for your domains, you can start using your email address for sending auto and manual messages or for sending emails from Inbox.
If some DNS records are not found, recheck them in your DNS provider’s account.
Add more domains or email addresses
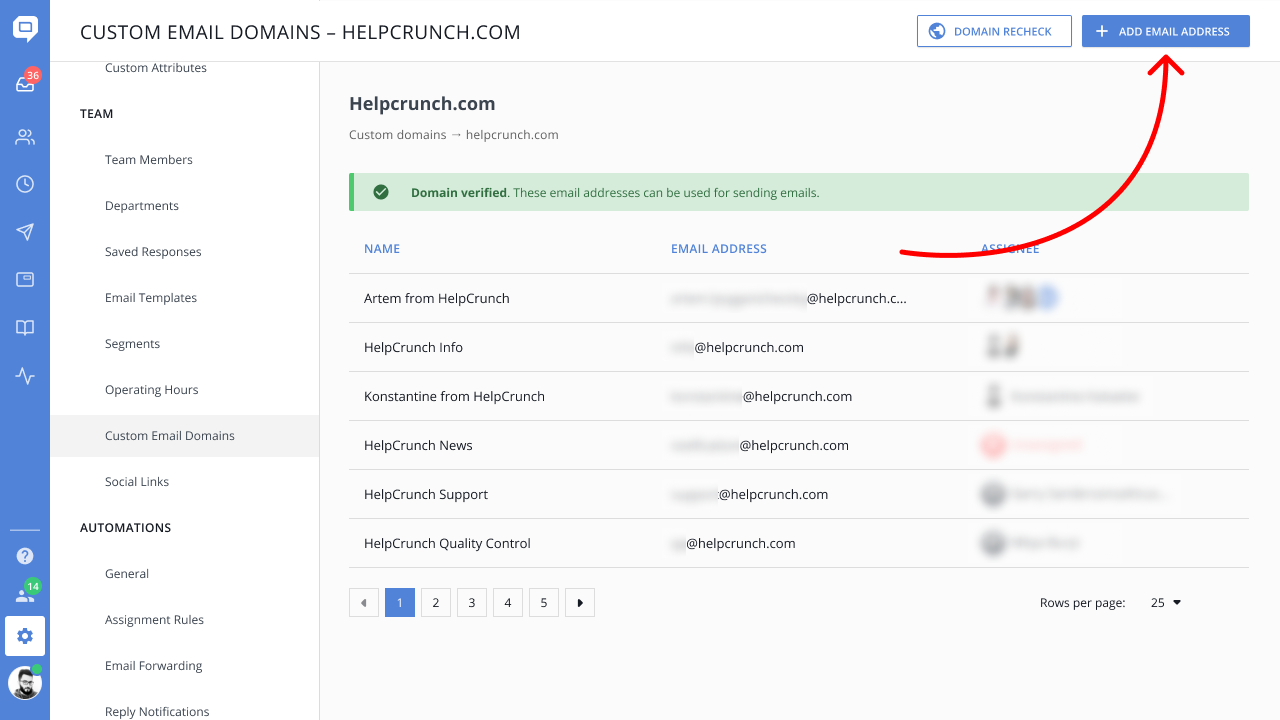
To add more email domains, just click 'Add email address' on the pages of domains or email addresses list. If such a domain doesn't exist in your account it will be created together with a new email address.
Use custom email address for Inbox
You can send emails in chat from the added email address. Replies will land back in the chat.

It looks like
[email protected].Use custom email address for Auto/Manual Messages
You can send Auto / Manual Message from the added email address. Choose the email address in the ‘Send From’. You can also choose where to receive replies:
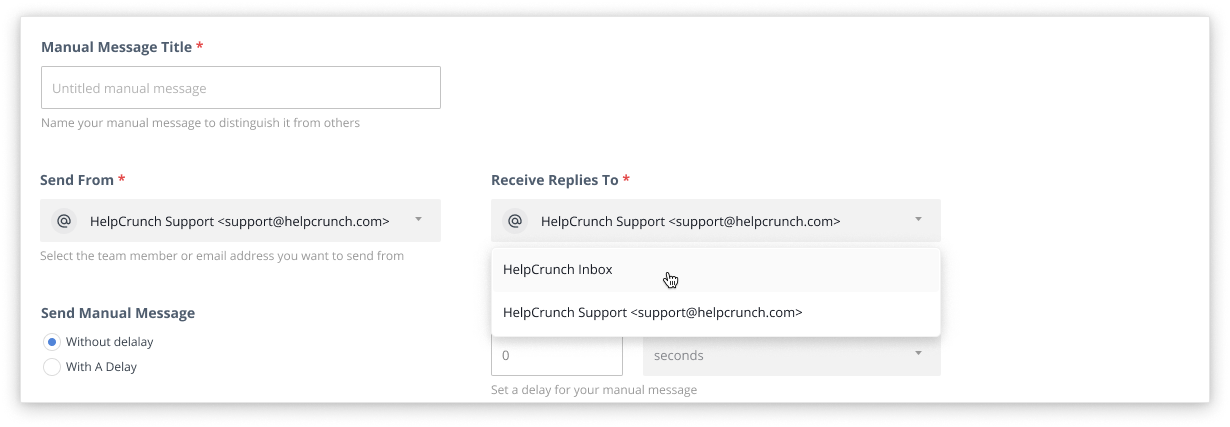
- HelpCrunch Inbox - you will receive replies to the HelpCrunch Inbox
- Your custom email address - the replies will be sent to your custom email address
It looks like
[email protected].Troubleshooting
Email marked with the warning ‘Be careful with this message’ in Gmail

You have chosen ‘Receive Replies To’ = ‘HelpCrunch Inbox’ for this auto or manual message. In this case, the FROM address and REPLY-TO address are different. Your email should not have landed in spam, but sometimes Gmail warns a recipient.
Links in email opening with error
Recheck your DNS records. You can do this by navigating to Settings → Team → Custom Email Domains:
1. Click on the email domain where the problem appeared
2. Click ‘Domain recheck’, then click ‘Verify’ on the top of the panel with DNS records:


3. If everything is ok the panel would close itself and the domain state would be ‘Verified’. If some DNS records are missed you would see the error. Navigate to your DNS provider and add records that are ‘Not found’.