What are targeted auto messages?
Targeted auto messages are personalized chat or email messages triggered by specific user attributes or behaviors. They help you reach the right audience at the right moment - automatically.
These messages improve engagement, drive conversions, and reduce manual follow-up work.
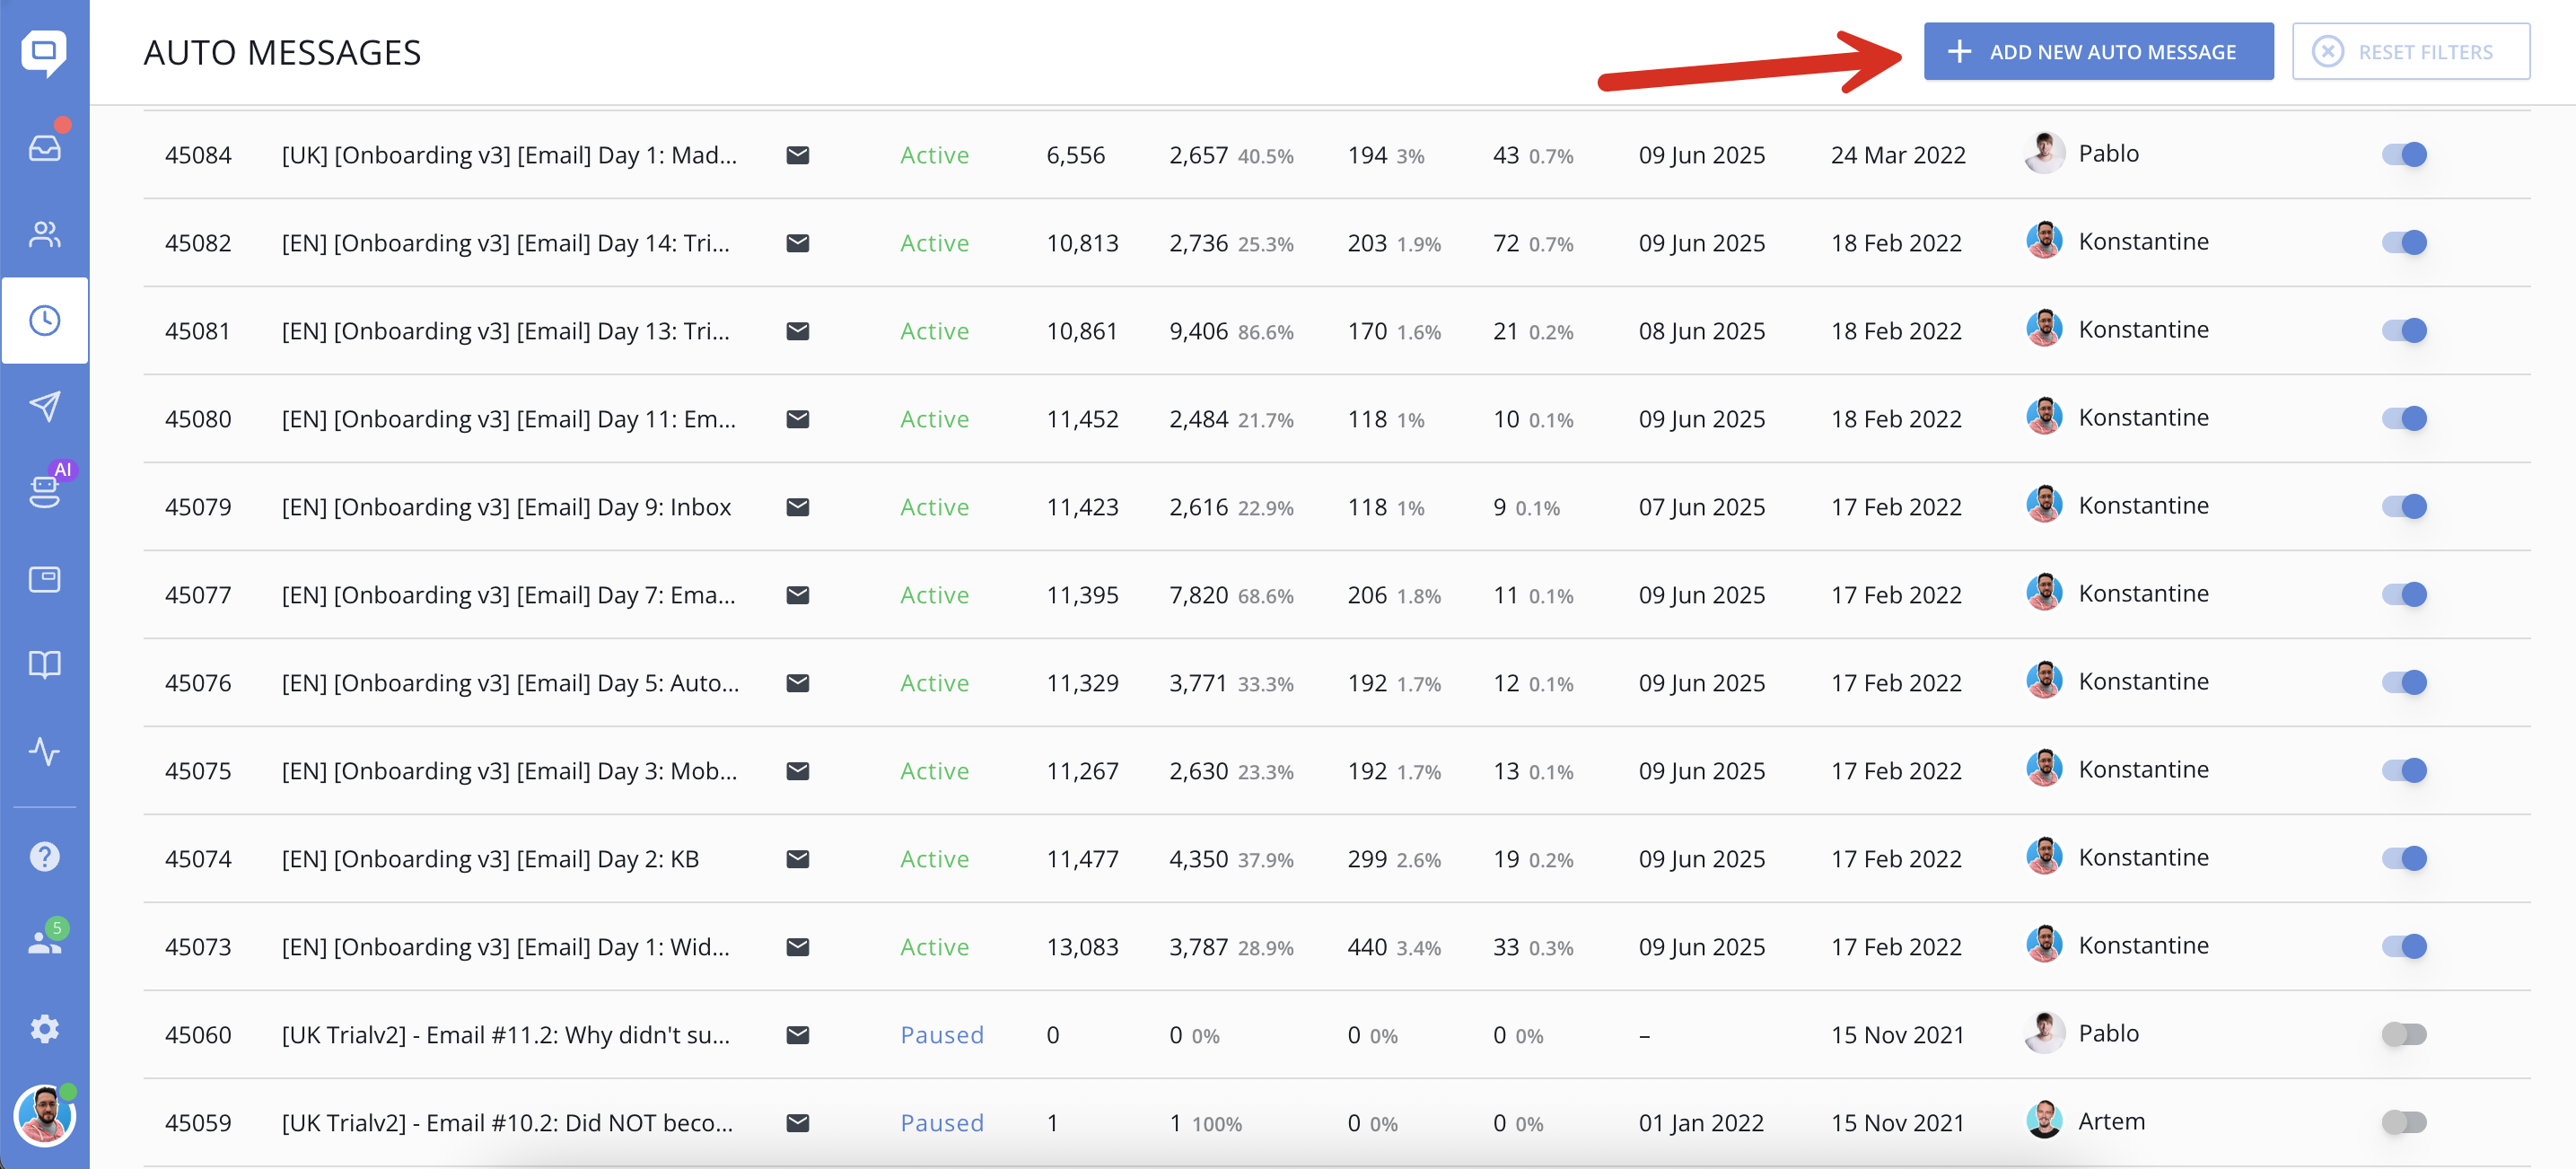
Step 1: Create a New Targeted Auto Message
Go to the Auto Messages section in the main menu and click Add new auto message.
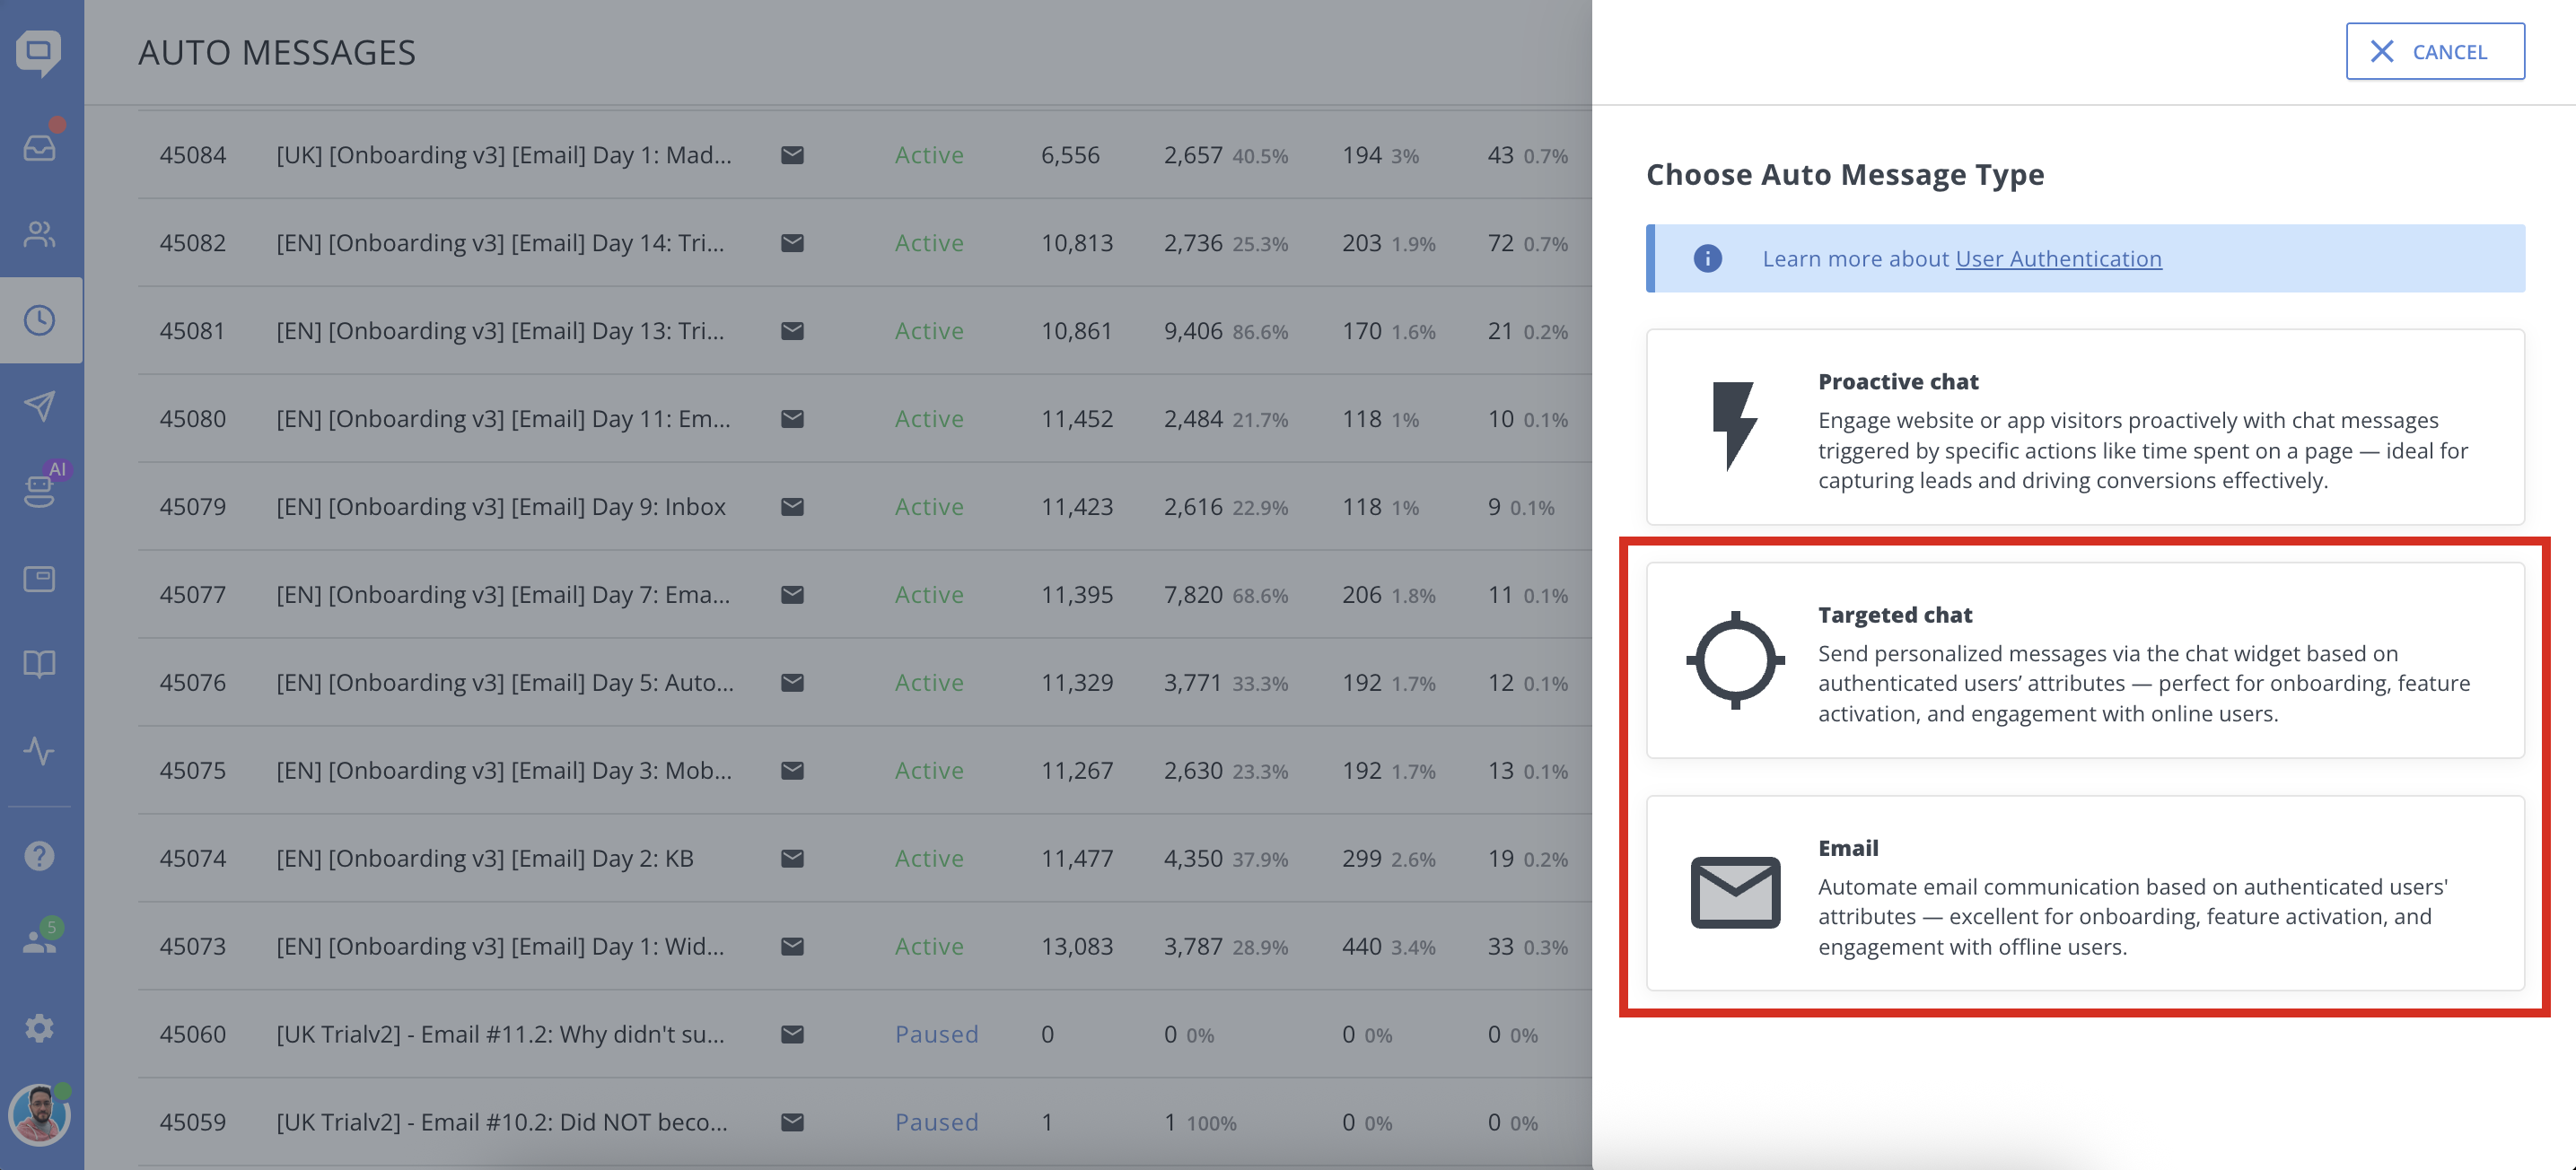
You’ll be prompted to choose one of three message types:
-
Proactive chat – Ideal for website visitors. Triggered by real-time user behavior (e.g., time on page). Great for lead capture and conversion boosts. Read more
-
Targeted chat messages are shown to authenticated users directly in the chat widget and mobile SDK, triggered by specific user data or behavior, such as plan type, browser language, UTM tags, activity history...
These are ideal for users who are actively using your product or visiting your site. Use targeted chat messages to:-
Welcome new trial users and offer onboarding help.
-
Highlight unused features to boost activation.
-
Prompt users to upgrade when they reach a usage limit.
-
Share contextual tips based on recent activity or plan.
-
Personalize user experience based on language or region.
-
-
Email - sent to authenticated users based on their profile data or behavior (like subscription status, last seen, or custom attributes). They’re perfect for reaching users who are not currently online. Use email auto messages to:
-
Send action-based onboarding emails during a free trial.
-
Follow up with users who haven’t activated key features.
-
Announce new features, updates, or product changes.
-
Build multi-step marketing sequences (e.g., trial day 1, day 3, day 7...).
-
Re-engage inactive users or win back expired trials.
-
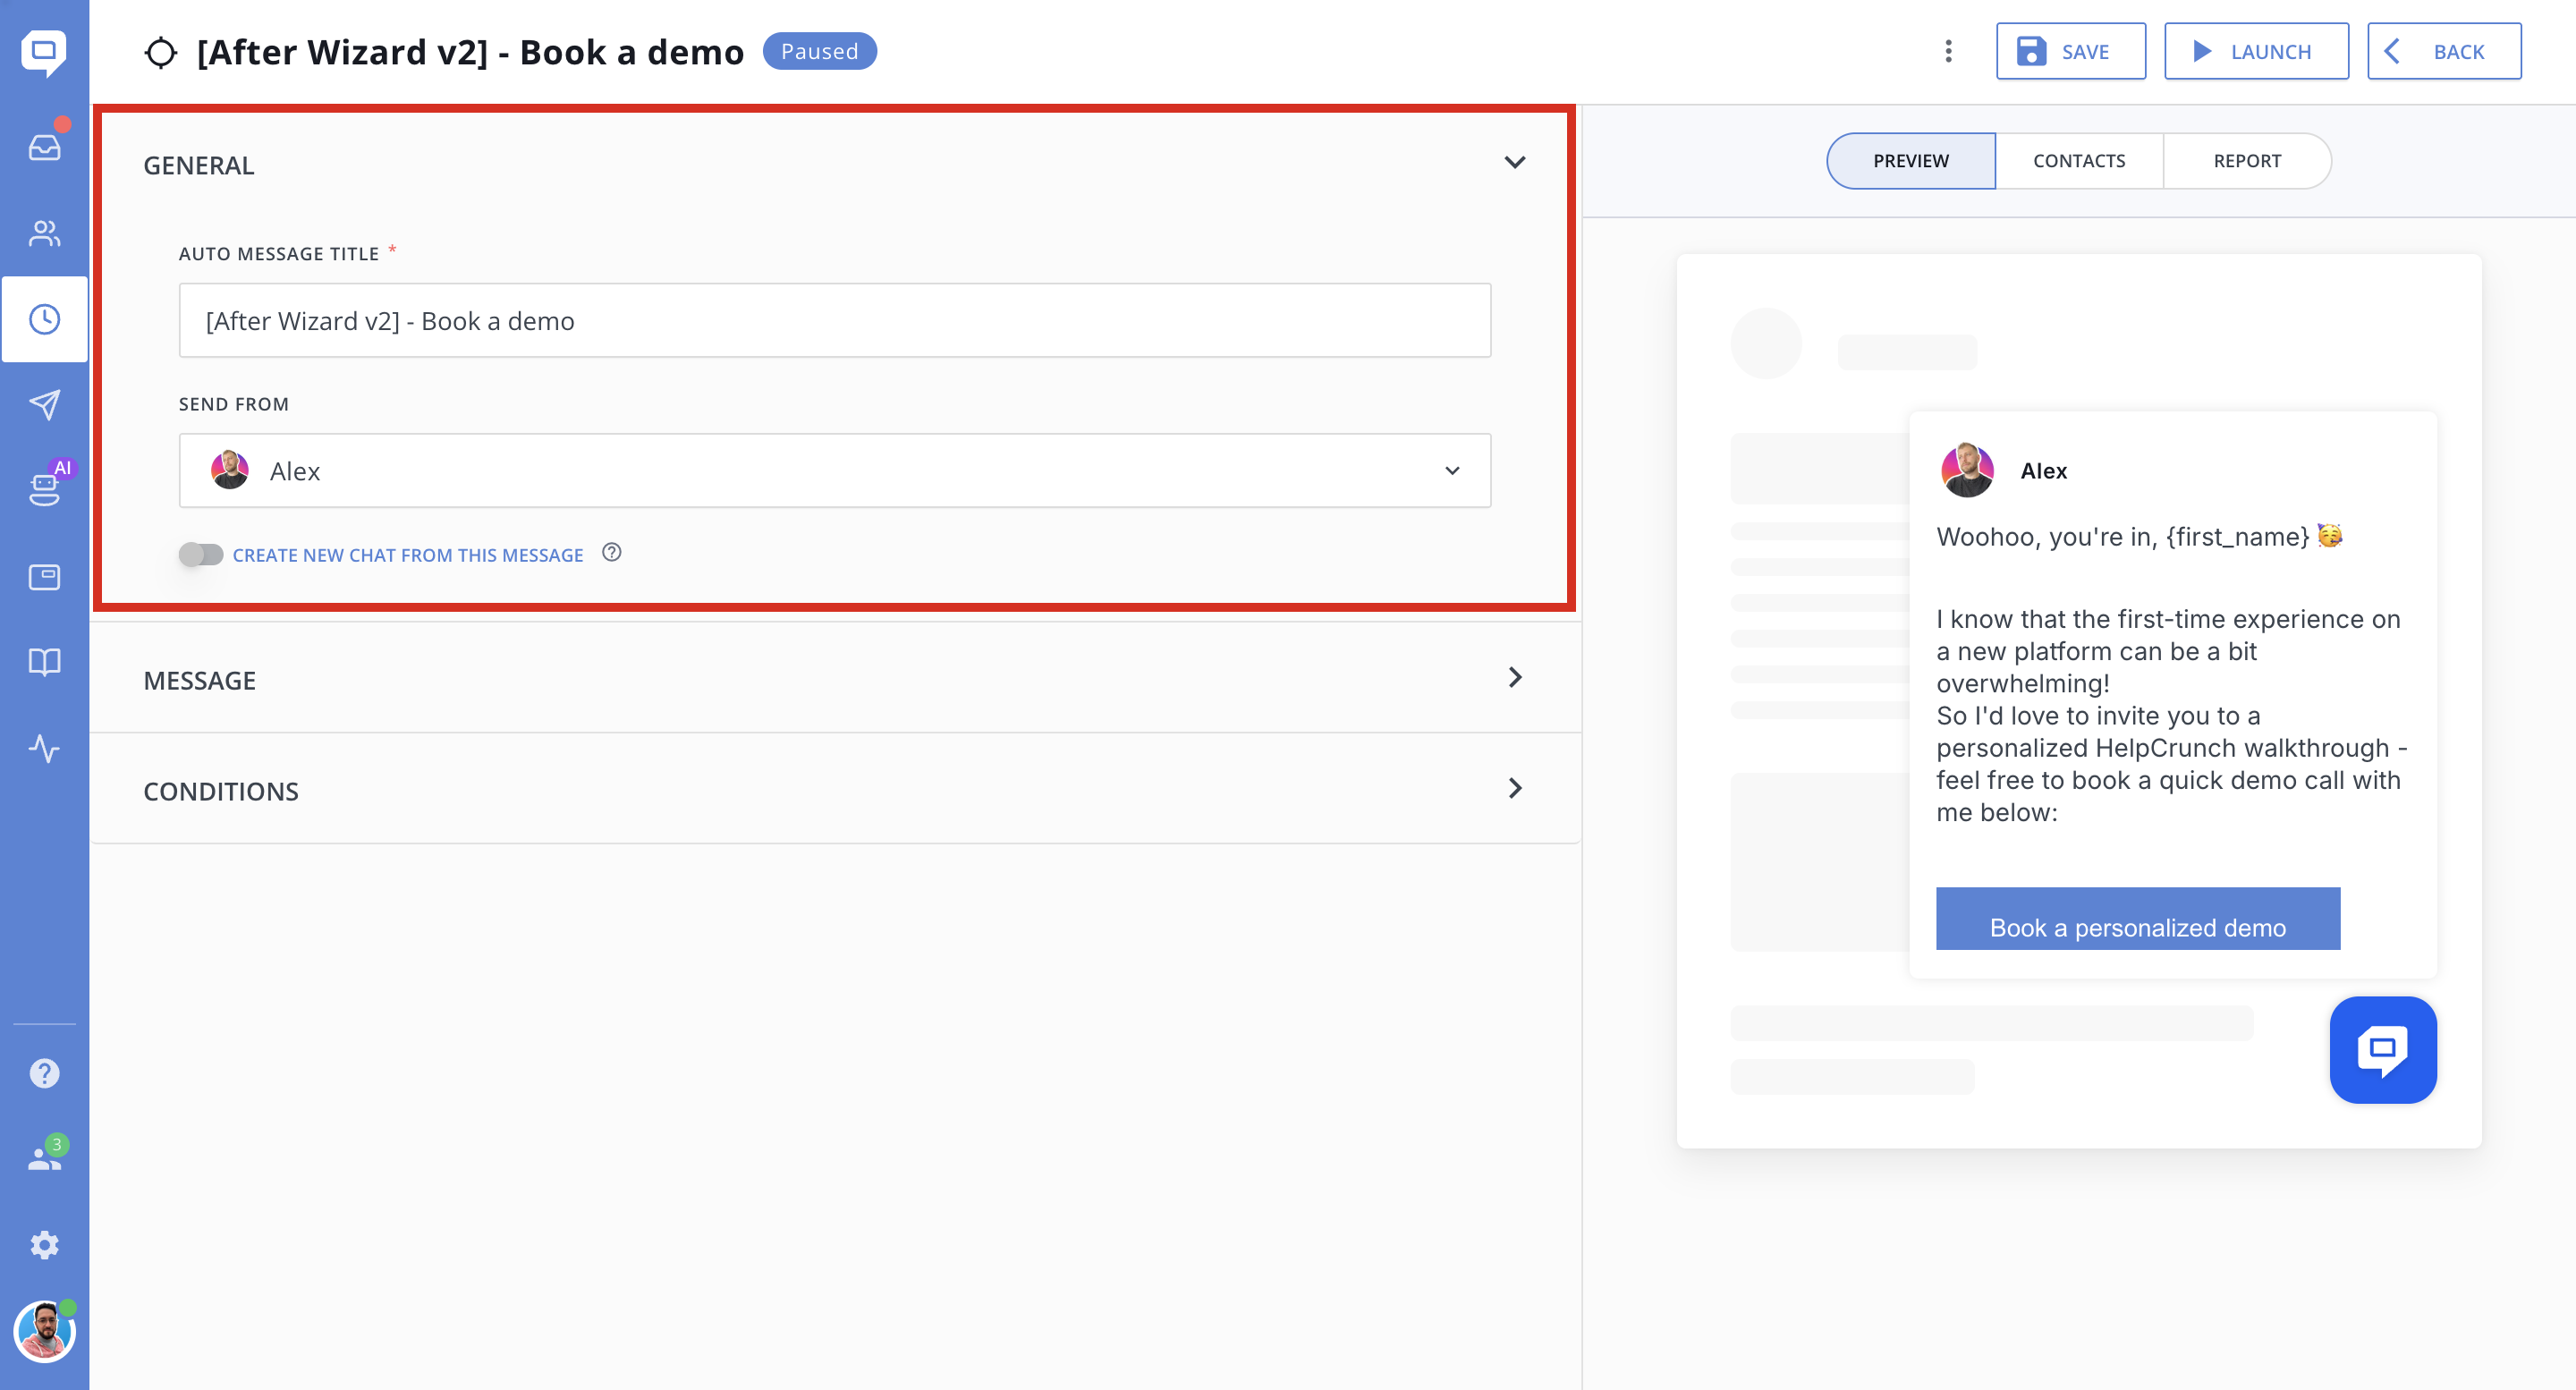
Step 2: General Settings
-
Auto message title – Give your campaign a descriptive name (visible to your team only).
-
Send from – Select the sender (select a team member from the list or create a generic user with the company name).
-
Optionally, toggle “Create new chat from this message” to automatically start a new conversation thread instead of delivering to the last active conversation.
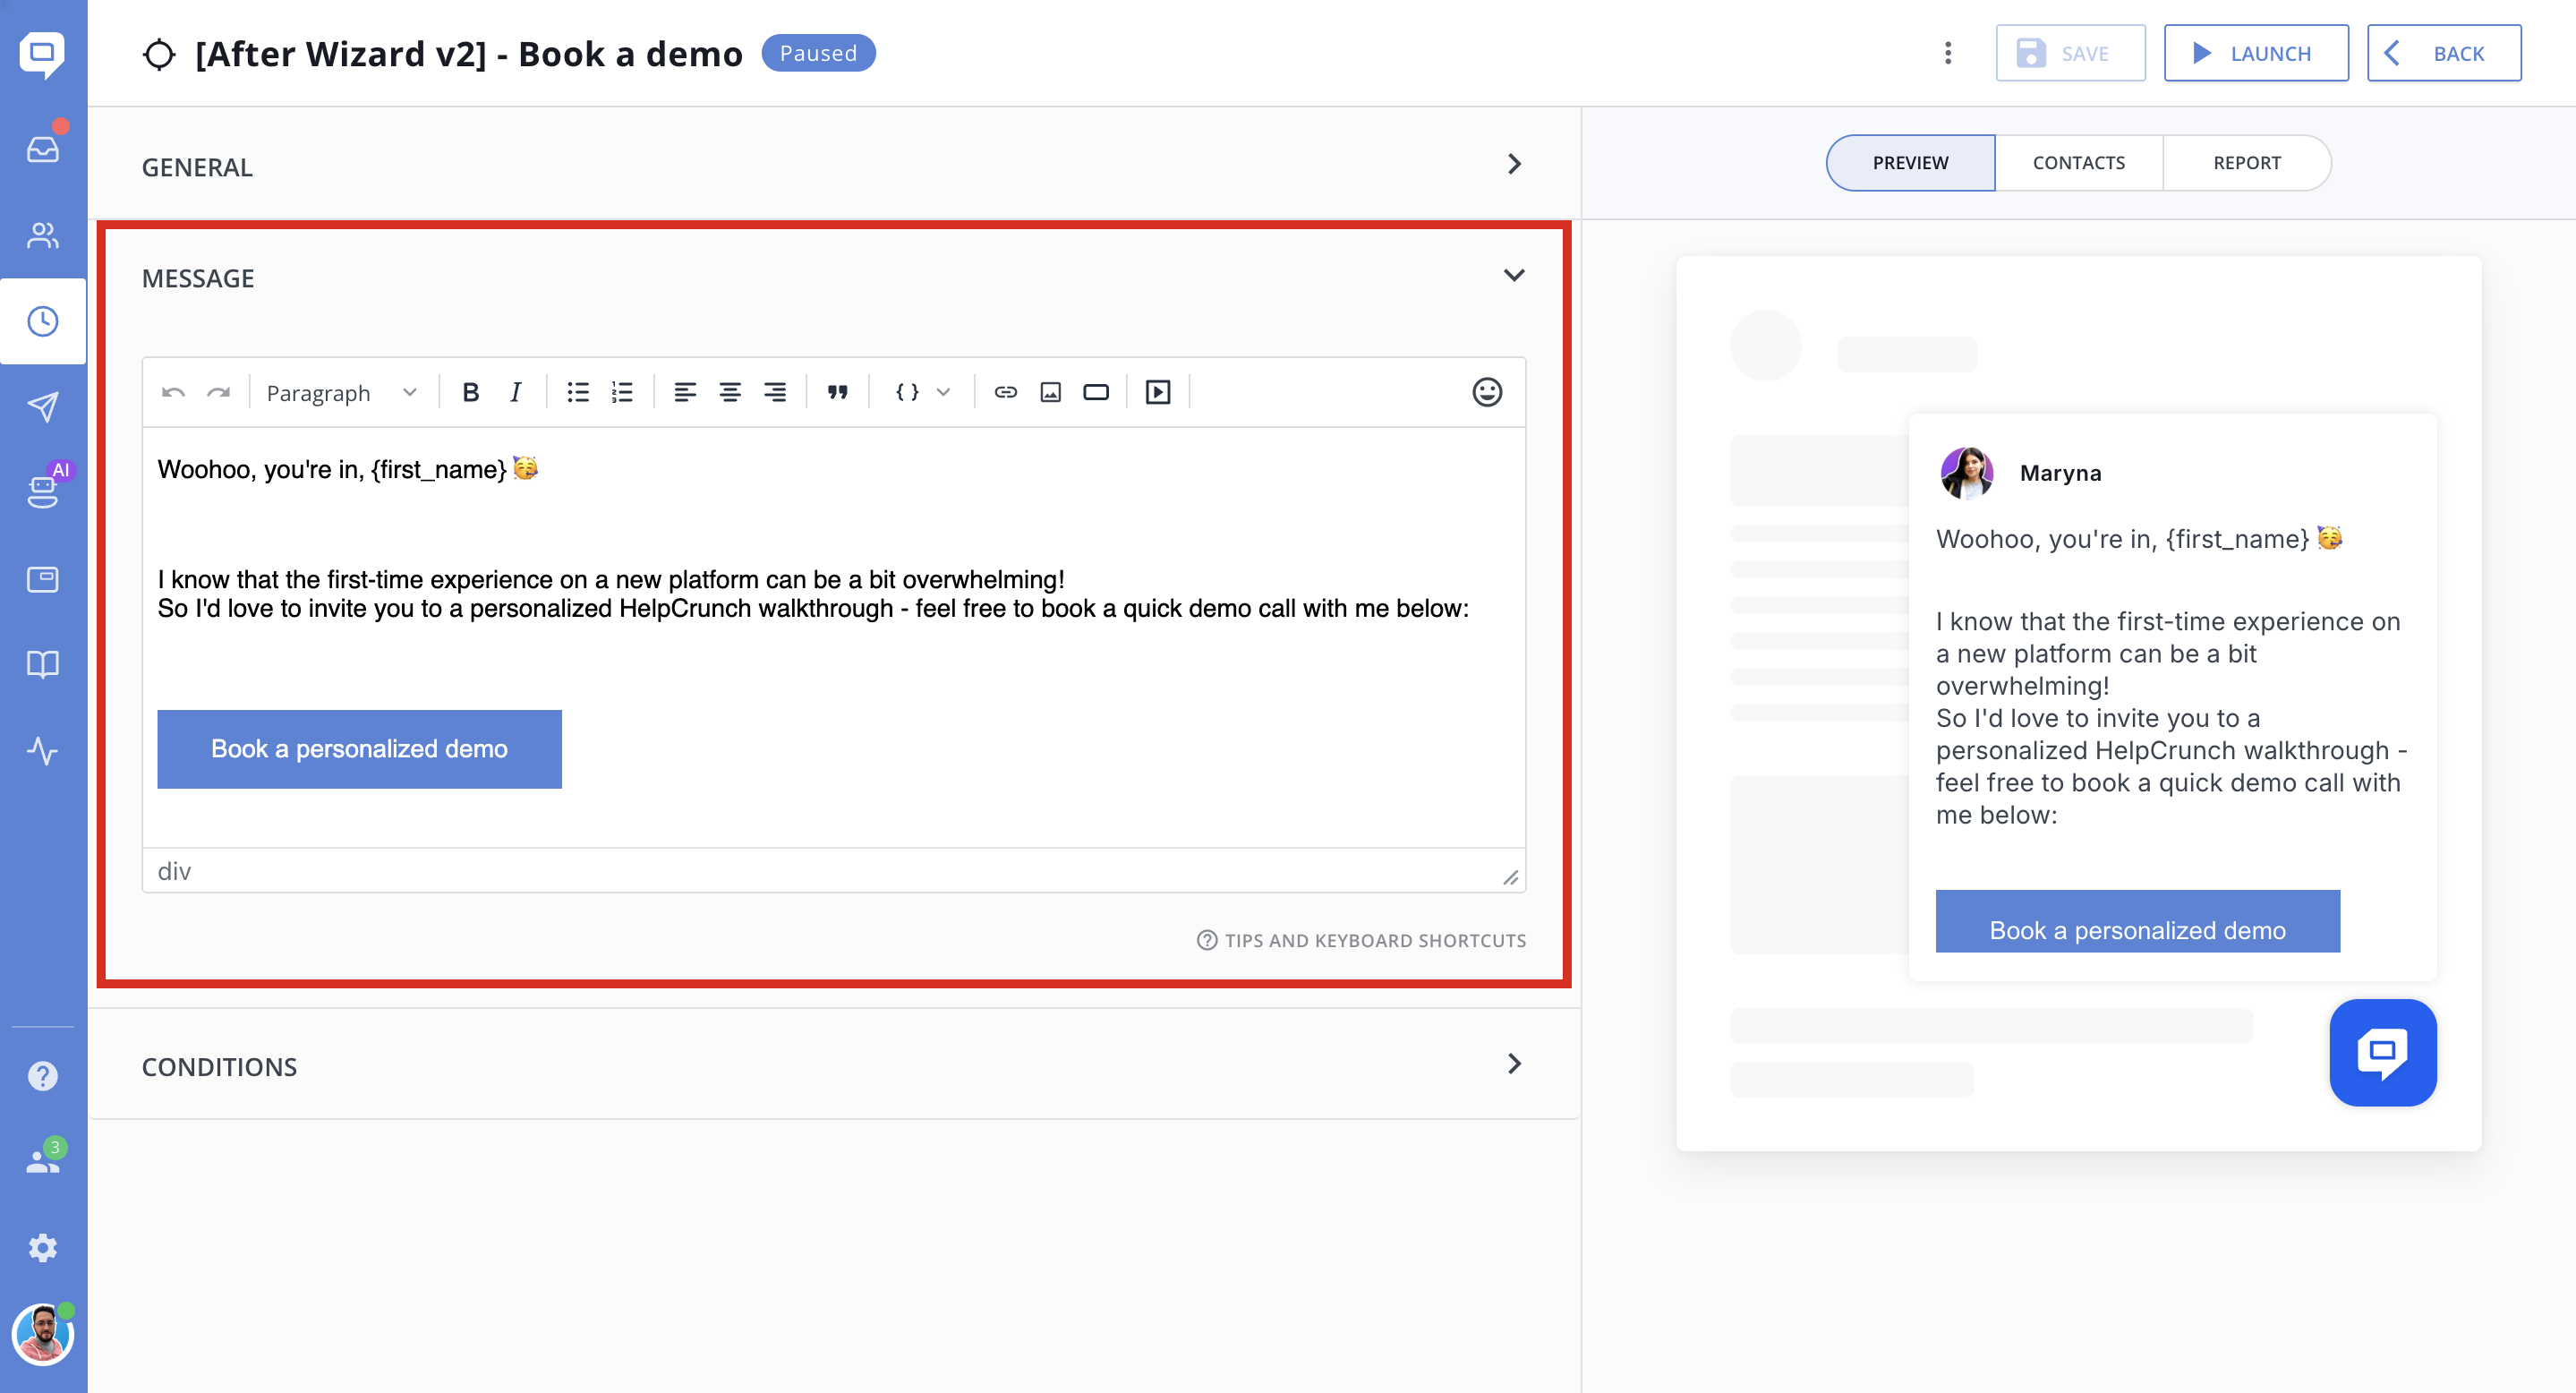
Step 3: Compose a Message
-
Use the visual editor to write your message. For email messages, you can also load previously created email templates.
-
Insert variables like {first_name, "there"}, {company}, or {email} to personalize content. For example:
Hey {first_name, "there"}, long time no speak -
Style text, add images or buttons, and link CTAs (e.g., “Book a call”).
-
The right-hand pane shows a live preview of a chat or email message.
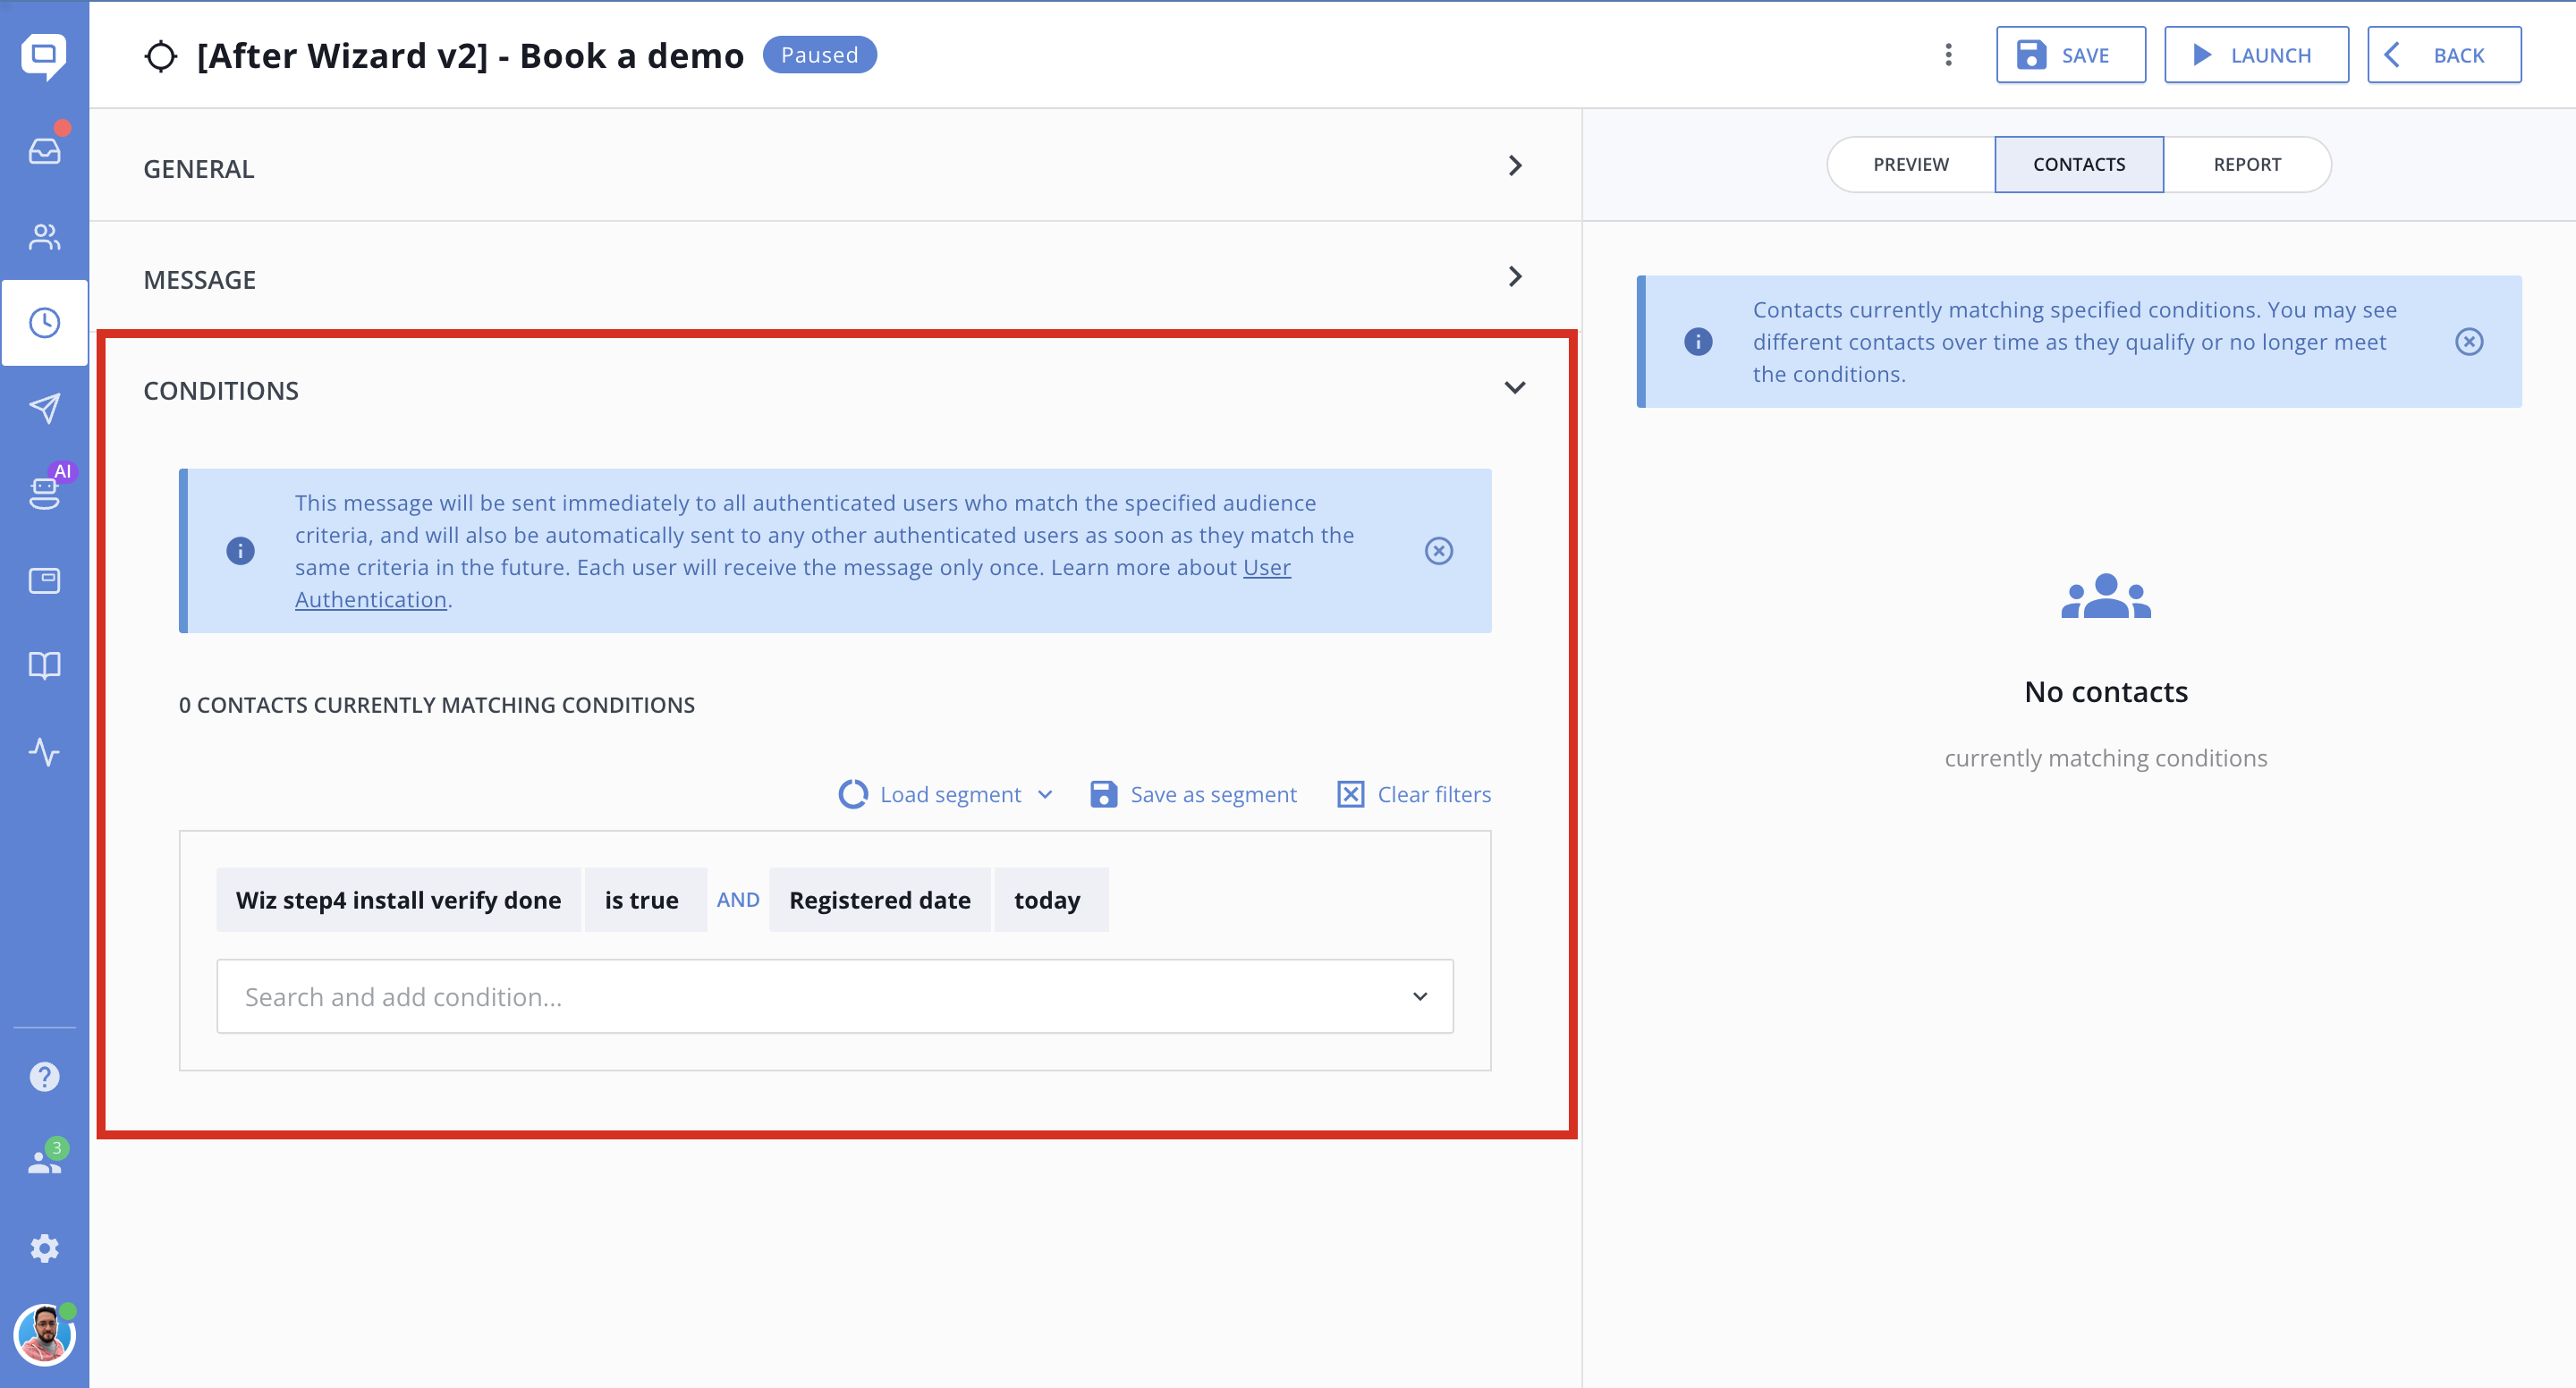
Step 4: Conditions (Audience Setup)
Use the Conditions panel to define who should receive your message. This step is required to ensure your campaign reaches only the right audience.
You can also save and reuse audience segments to streamline future automations:
-
Custom data (e.g., trial status, registration date)
-
Browser language (e.g., exclude Russian)
-
Page behavior, UTM tags, location, visits, etc.
The Contacts tab shows how many users currently match your selected conditions in real time.
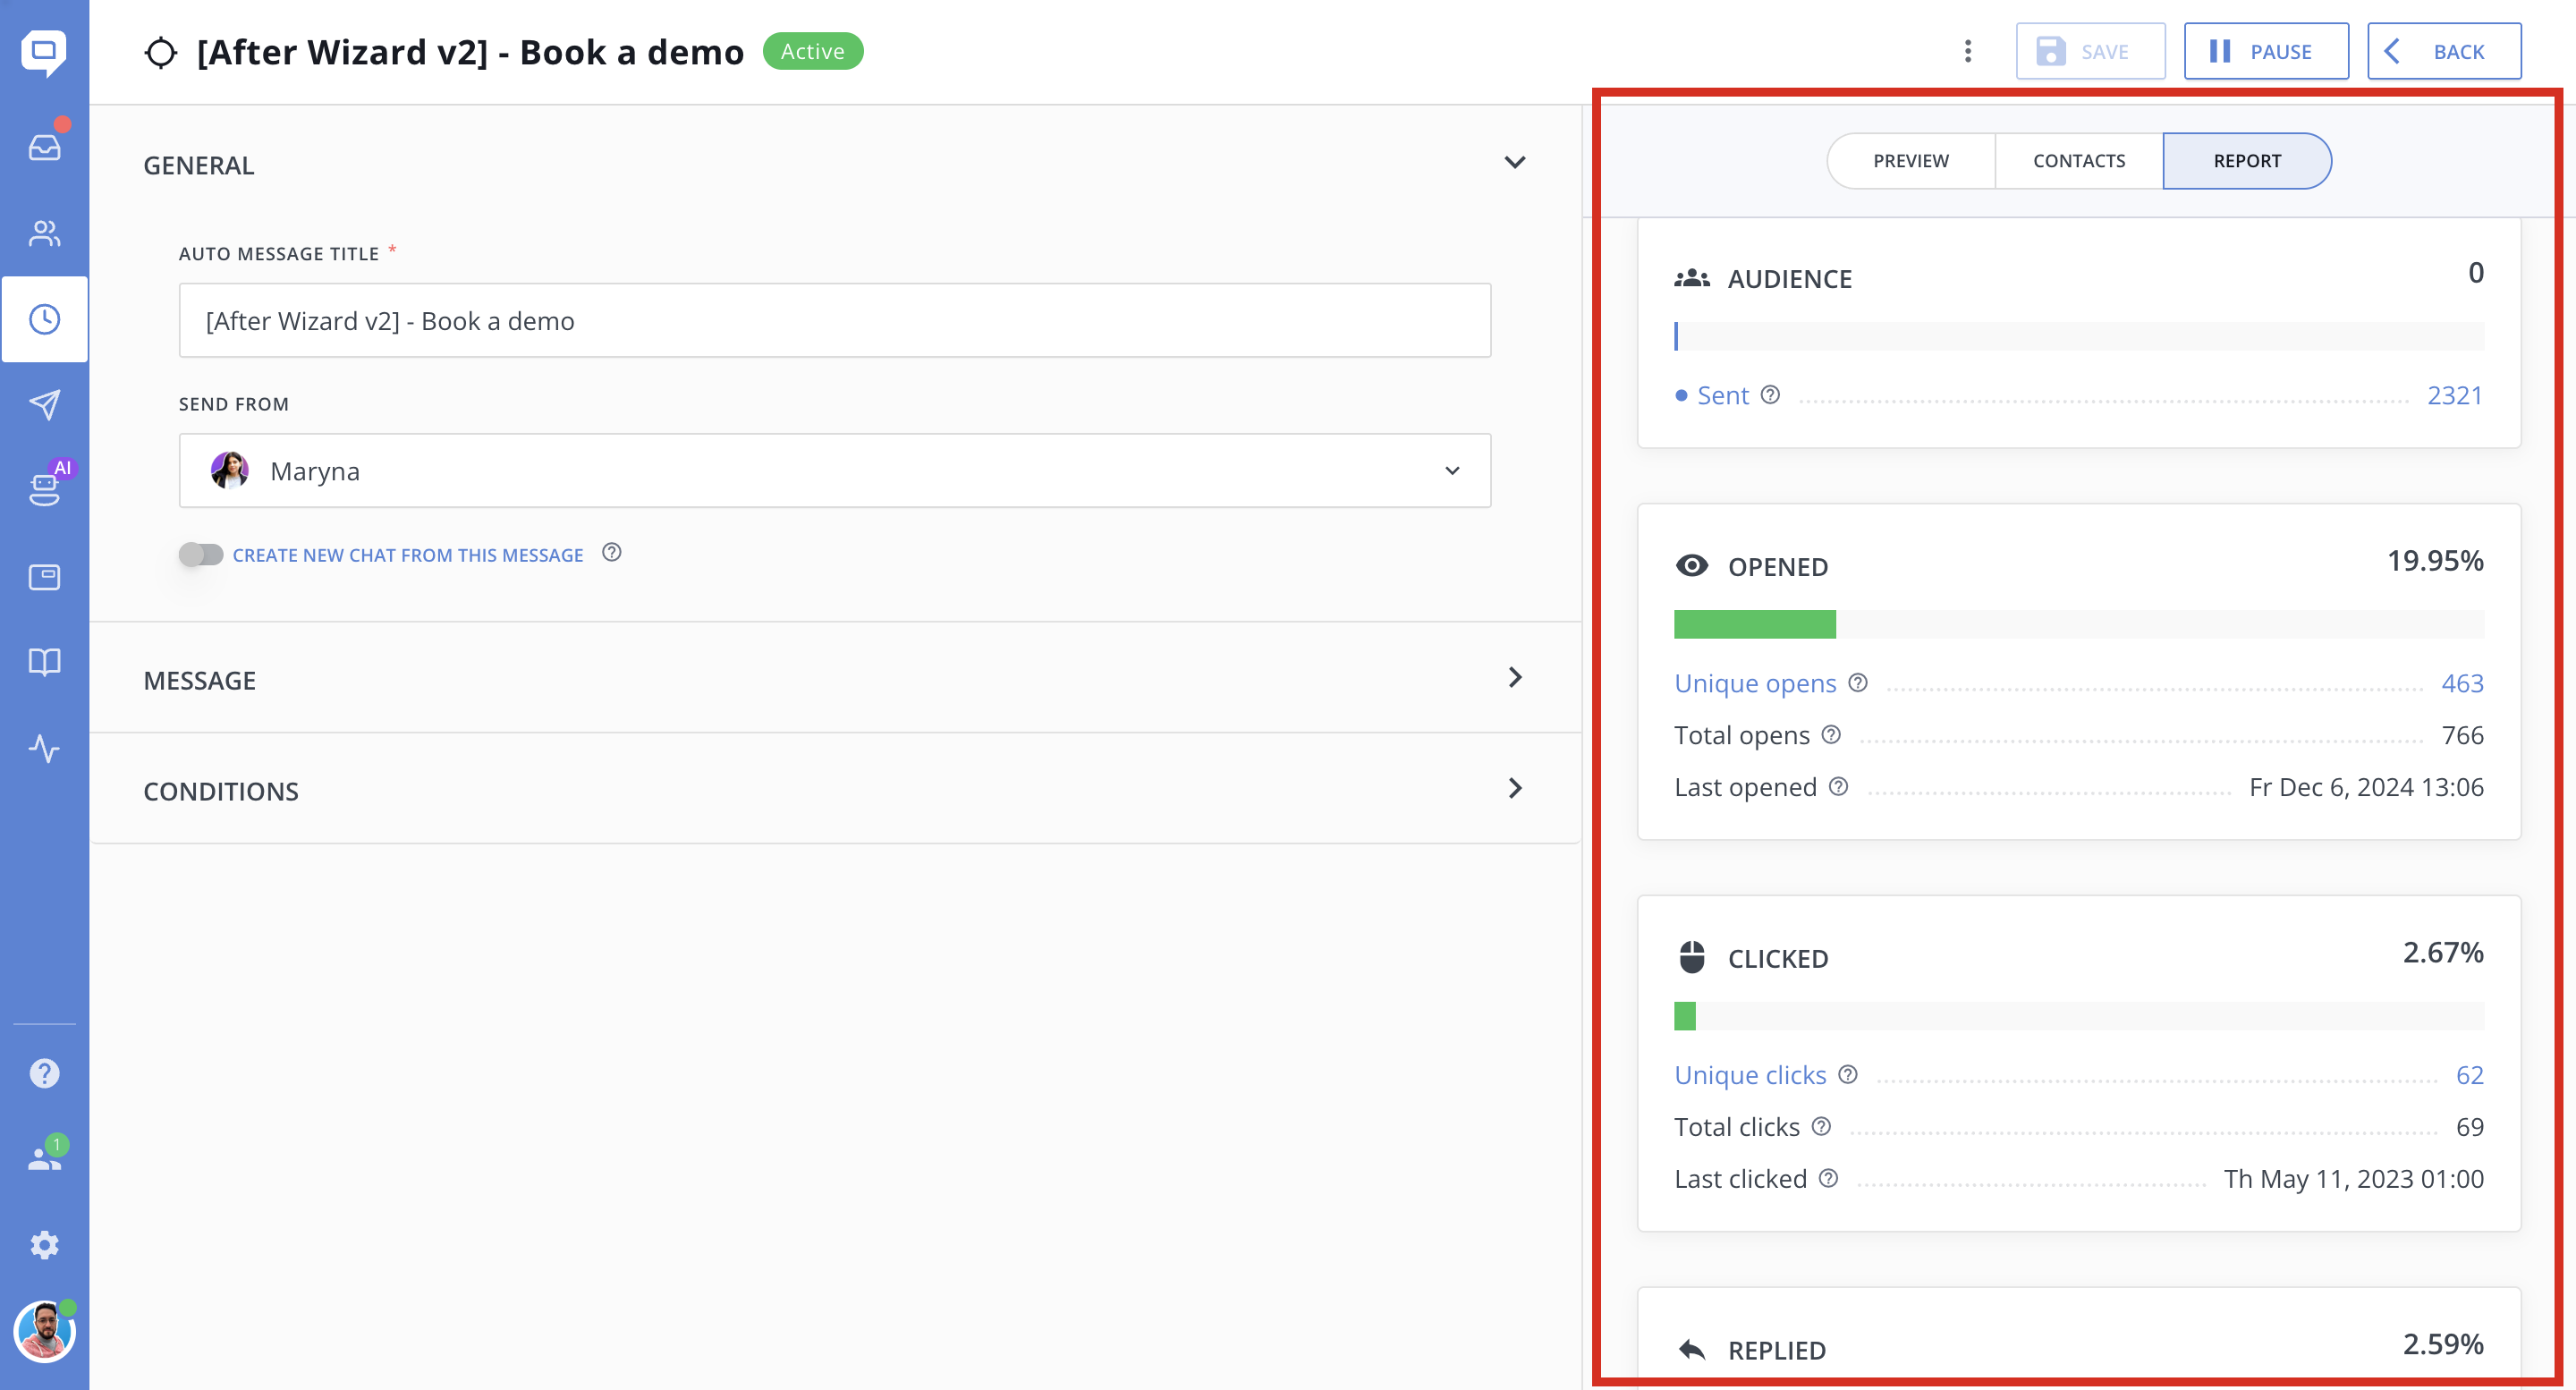
Step 5: Track Targeted Message Performance with Report Metrics
Once your targeted message is live, head to the Report tab to see how your audience is engaging. Here are the key metrics to monitor:
-
Audience (Sent): Total number of contacts who received the message based on your targeting conditions.
-
Opened: How many recipients opened the email or saw the chat - a good indicator of initial interest.
-
Clicked: Number of users who clicked a link or button within the message, showing active engagement.
-
Replied: How many responded, giving you insight into direct conversations sparked by the message.
-
Failed: Messages that weren’t delivered due to issues like invalid emails or bounces.
-
Unsubscribed: The count of users who unsubscribed after receiving the message - useful for monitoring list health and relevance.
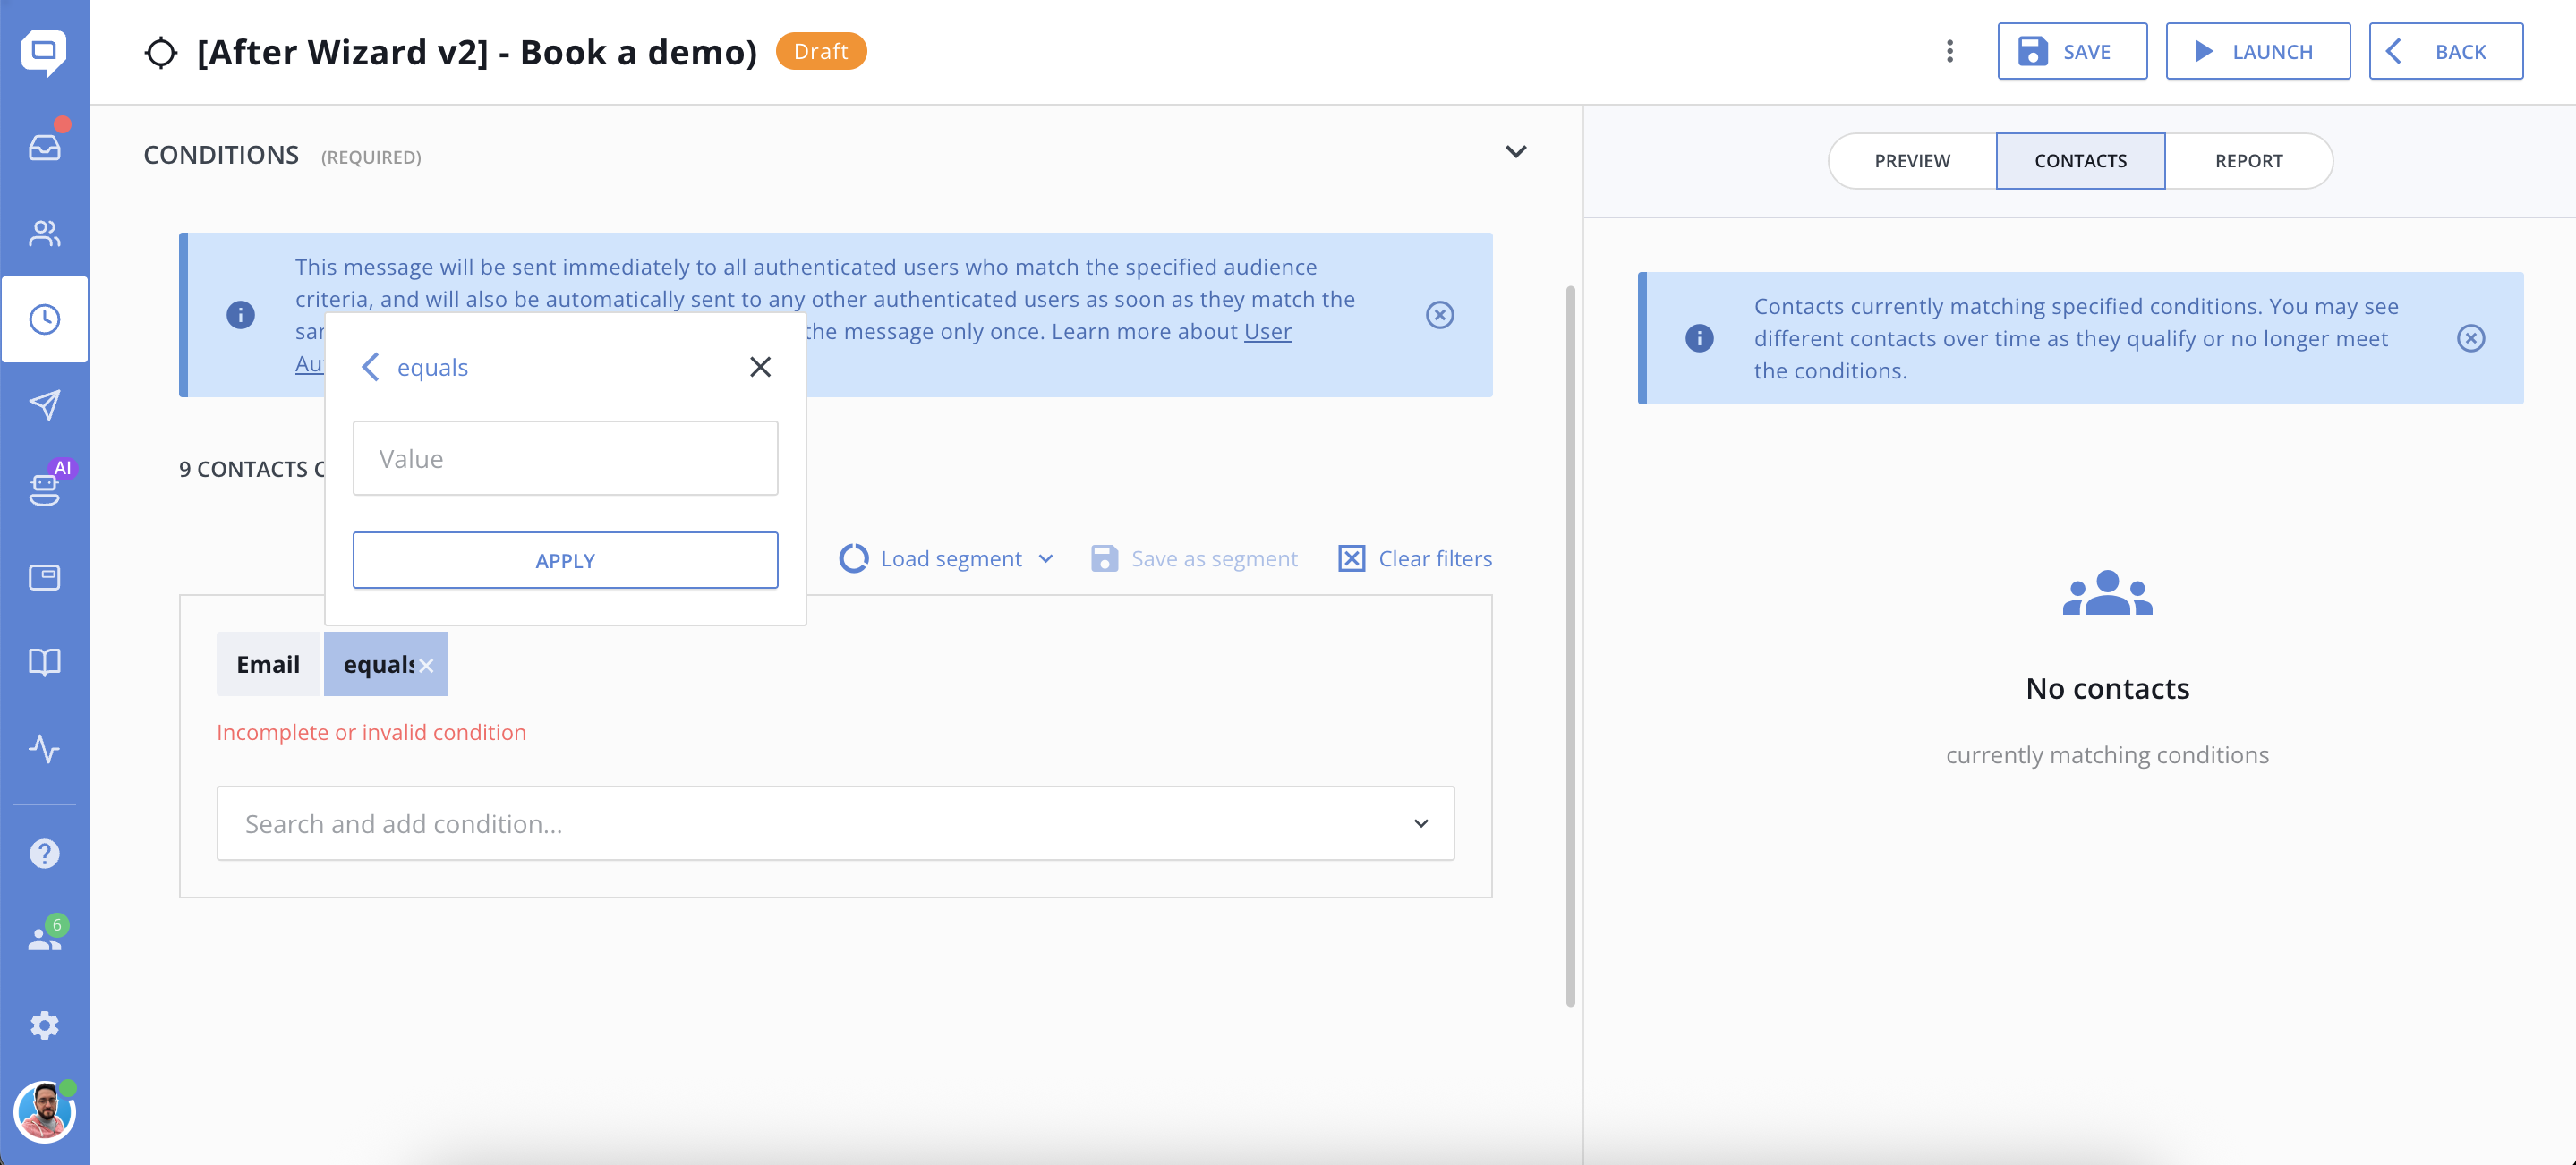
Save the Auto Message, Send Test, and Launch
Before launching to your full audience, it’s a good practice to send a test email to verify formatting, links, and personalization.
To send a test to yourself, go to the conditions tab and add the rule:
Email - Equals - Your_email_address
When testing a chat auto message, it's necessary to set up a chat conversation beforehand and provide your email to receive it. For an email auto message, simply creating a contact with a valid email address is sufficient.
See also: